How to Import Staff Record with Photo using Import Staff in xPortalNet Client Software
| Problem (Issue) Statement: | How to Import Staff Record with Photo using Import Staff in xPortalNet Client Software |
| Description: | A guide to add Staff Record with Photo using Import Staff Toll in xPortalNet Client Software. |
| System Application: |
|
| Symptom and Finding: | NA |
| Cause: | For first time to add Staff Record with Photo using Import Staff Toll in xPortalNet Client. |
| Solution: | Summary
Step- by- step Guide:
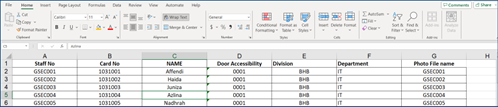
Step 1: Before importing staff record, system user required to prepare staff records list using Microsoft Excel or Text file.
Step 2: Follow the template. Figure 1: Example Staff Record Template
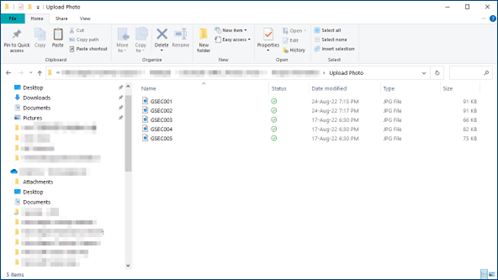
Step 3: Save the file at a designated location. Note Some compulsory fields for Staff Records file include Staff No Card No, Staff Name and Photo File Name. Step 4: Prepare all staff photo required to import and save at designated location.
Figure 2: Example Staff Photo Note Supports importing image or photo extension files as JPEG files, JPG files, and PNG files. The photo file name must be the same as the Excel file column photo file name.
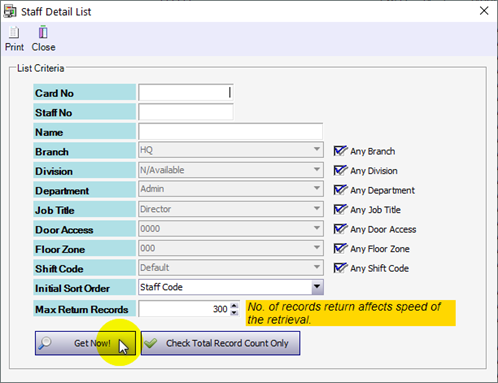
Step 5: Go to xPortalNet Client> Data Setup> Access Data Setting> Staff Record and click Get Now! To continue.
Figure 3: Staff Detail List Window
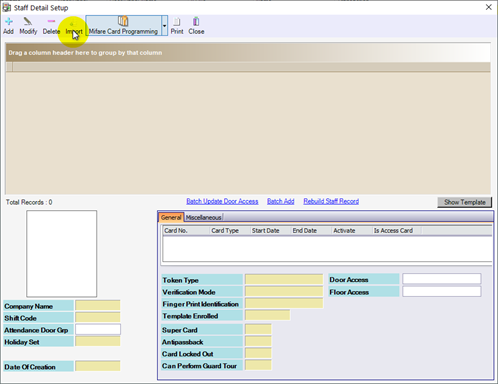
Step 6: The Staff Detail Setup Window will be shown. Click Import.
Figure 4: Staff Detail Setup Window Step 7: The Import Staff window will be shown. Click Next to continue.
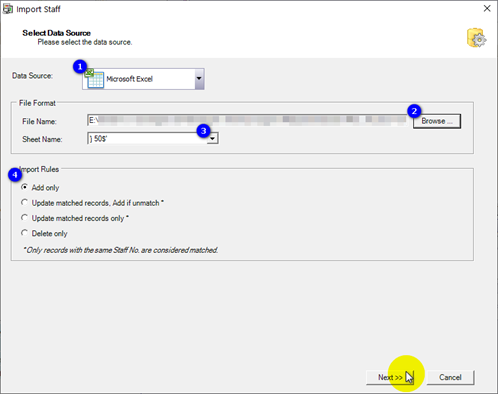
Figure 5: Import Staff Window
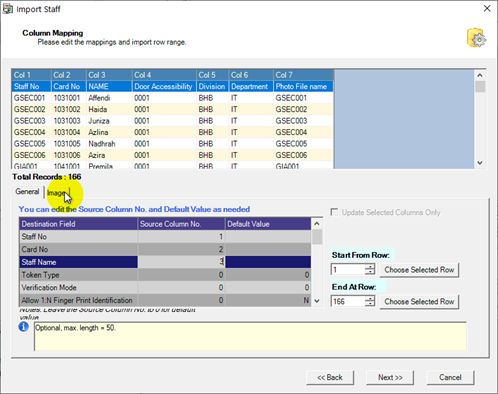
Step 8: The Column Mapping window will then be shown. Map the Source Column Number with the Destination Field to allow the software to make sense of the imported data.
Figure 6: Mapping the Source Column No. with the Destination Field
Note Ensure the import row range for Start From Row and End at Row is correct. Step 9: Next, click Image tab to upload photo.
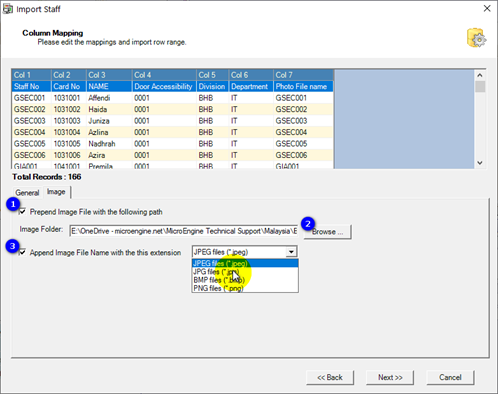
Figure 7: Mapping and Import Image
Step 10: The Image tab will be shown, tick check box and click Browse and locate the photo file. Select the Image extension file and click Next to continue.
Figure 8: Mapping and Import Image
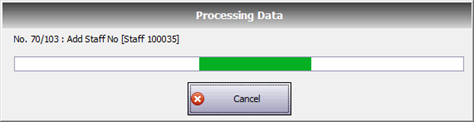
Step 11: The Progressing Data loading bar will be shown.
Figure 9: Progressing Data loading bar
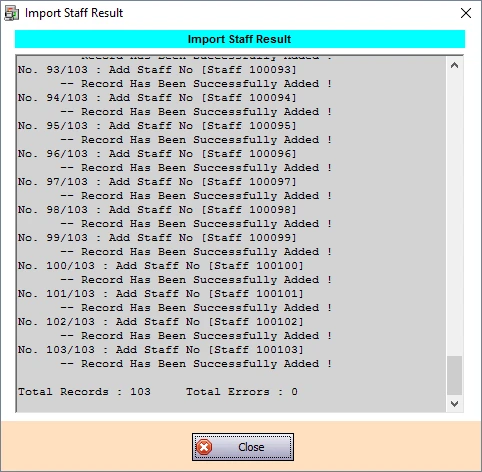
Step 12: The Import Staff Result window will be shown when the import to the software database is success.
Figure 10: Delivery Report Window.
Step 13: Check the staff record that is successfully imported to the software database from the Staff Records. |
| Common Issues: | NA |
| Porting Date: | 07/11/2023 (Rev1.0) |

© MicroEngine Technology Sdn Bhd (535550-U). All rights reserved.