How to Configure XP-M1000i or XP-M1300i Controller Using RS485 or RS232 Connection
| Problem (Issue) Statement: | How to configure XP-M1000i or XP-M1300i controller using RS485 or RS232 connection |
| Description: | This article will guide users on how to configure XP-M1000i or XP-M1300i controller using RS485 or RS232 connection. |
| Related Software: | NIL |
| Related Hardware: |
|
| System Application: | NIL |
| Symptom and Finding: | NIL |
| Cause: | For first time guide on how to configure XP-M1000i or XP-M1300i controller using RS485 or RS232 connection. |
| Solution: | Summary:. Step-by-step Guide:
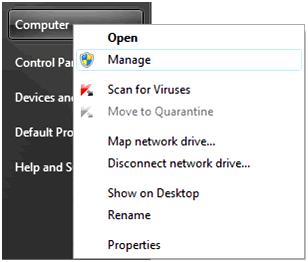
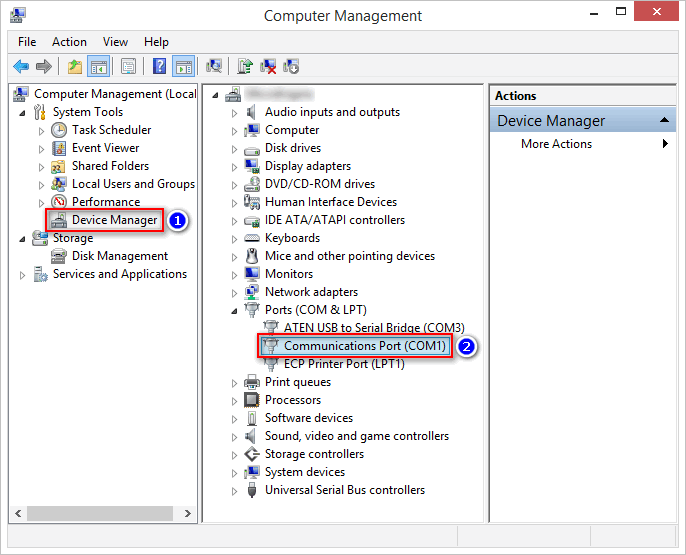
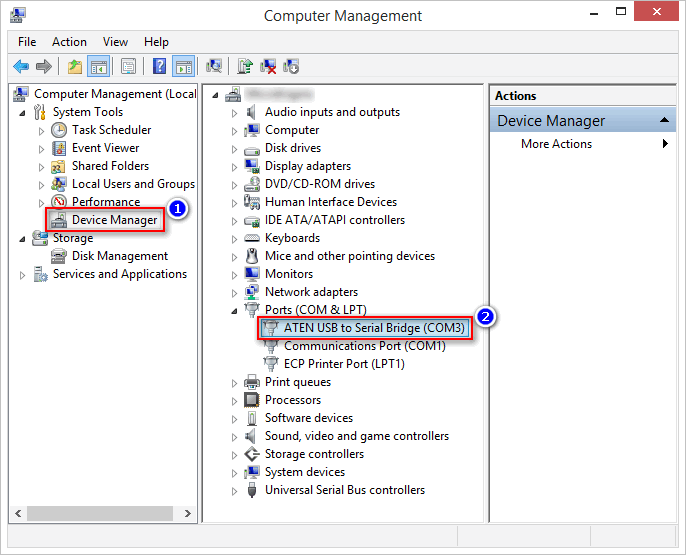
Step 1: Access the Windows Device Manager. Right-click at Computer > Manage. . Step 2: The Computer Management window will be shown. Select Device Manager and expand the Ports (COM & LPT) menu. If the MCI or Serial-to-USB converter is connected via RS232, the device will appear as a Communication Ports . If the MCI or Serial-to-USB converter is connected via RS485, the device will appear as a USB to Serial Bridge . .
Warning!
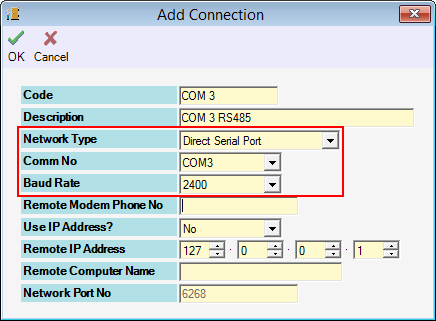
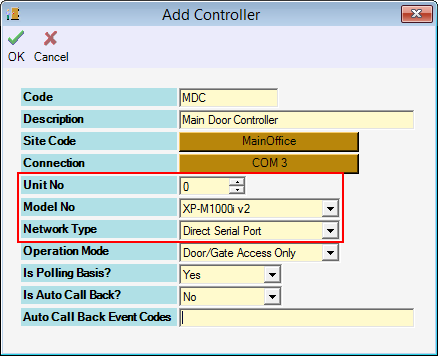
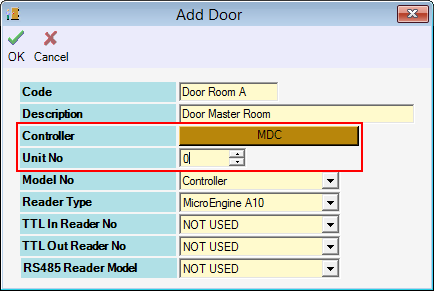
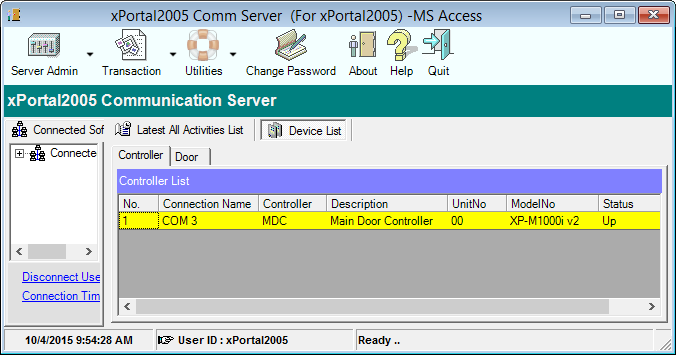
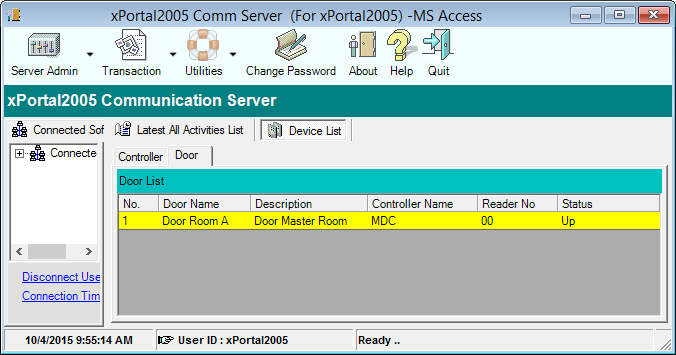
. . Step 1: Go to xPortalNet Server > Server Admin > Connection Setup > Add. The Add Connection window will be shown. Fill in the information following the screenshot below, with the Comm No following the Comm Port No obtained in step 2 of the previous section. . Step 2: Go to xPortalNet Server > Server Admin > System Device Setup > Controller > Add. The Add Controller window will be shown. Fill in the information following the screenshot below, with the Unit No setup according to the controller address number. . Step 3: Go to xPortalNet Server > Server Admin > System Device Setup > Door > Add. The Add Door window will be shown. Fill in the information following the screenshot below, ensuring that the Unit No field is configured to "0". . Note Under the Controller field, select the controller name added in Step 2. Note that in Step 2, the example controller is named MDC, hence the Controller field in Figure 6 is designated as MDC. . . Step 4: At the software home window, go to Device List > Controller. Ensure that the status of the newly added controller is shown as "Up". . Step 5: At the software home window, go to Device List > Door. Ensure that the status of the newly added door is shown as "Up". . Step 6: Go to xPortalNet Client > Device Comm > Send Door Setting > select the newly added controller > Send All Settings. The software will send the newly configured settings to the controller. |
| Common Issues: | NIL |
| Porting Date: | 17/4/2019 |
PROOF-READ
.
.
.
© MicroEngine Technology Sdn Bhd (535550-U). All rights reserved.
