How to Configure Door Settings for XP-SNET-E5D Extension Board with xPortalNet Software
Problem (Issue) Statement: | How to configure door settings for XP-SNET-E5D extension board with xPortalNet software |
Description: | A guide to configure door setting for XP-SNET-E5D extension board with xPortalNet software. |
Related Software: |
|
Related Hardware: |
|
System Application: |
|
Symptom and Finding: | NA |
Cause: | For first time guide to configure door settings for XP-SNET-E5D extension board with xPortalNet software. |
Solution: | Summary:
. Step-by-step Guide:
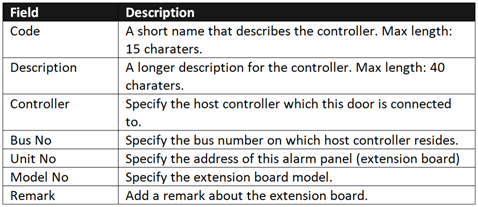
Step 1: Ensure that the Connection and Controller setup has been completed. Knowledge Base Link Users may refer to How to Configure Connection, Controller, and Door Settings for XP-SNET controller with xPortalNet Software to complete the configuration setting. . . Step 2: For Alarm Controller Setup, go to Server Admin > System Device Setup > Alarm Controller. The Alarm Controller Setup window shown as below: . Step 3: Click Add to add new Alarm Controller for XP-SNET-E5D extension board. . Step 4: The Add Alarm Controller window will be shown as below. Fill in the respective field and click OK to save changes. .
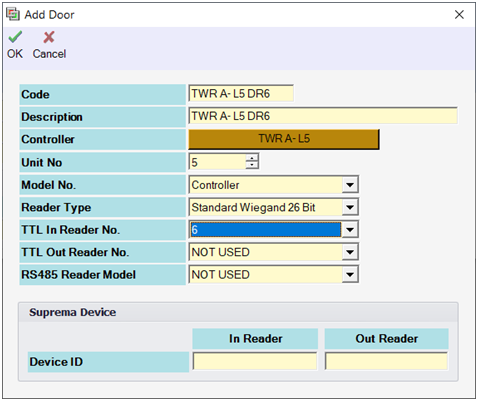
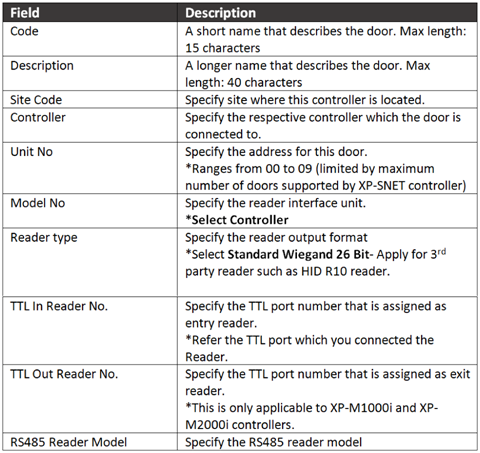
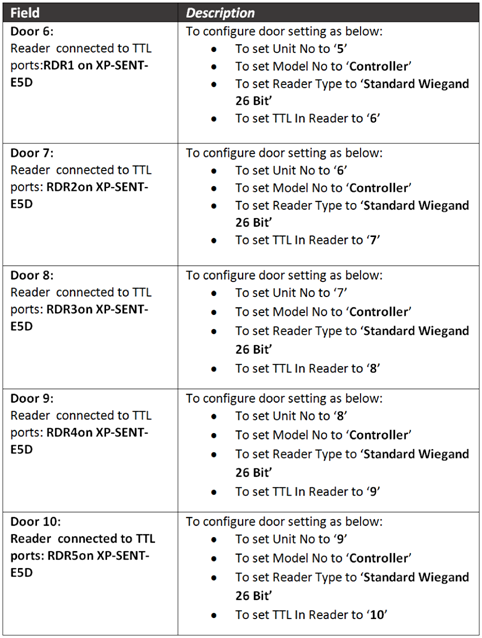
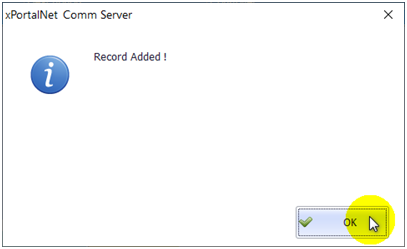
. Step 5: The following message window will be prompted to show that Record is Added. Click OK to continue. . Step 6: For Door Setup go to Server Admin > System Device Setup > Door. The Door Setup window shown as below: . Step 7: Click Add to add new Alarm Controller for XP-SNET-E5D extension board. . Step 8: The Add Door window will be shown as below. Fill in the respective field and click OK to save changes. .
. Example:
. Step 9: The following message window will be prompted to show that Record is Added. Click OK to continue. . Step 10: Go xPortalNet Client > Device Comm > Send Door Setting. Select specified controller and click Send all setting to download all door configuration. |
Common Issue: | NA |
Date Documentation: | 16/1/2019 |


PROOF-READ
.
Related Articles.
Containing the label "snet"
.
.
© MicroEngine Technology Sdn Bhd (535550-U). All rights reserved.