How to Configure Connection, Controller, and Door Settings for XP-SNET controller with xPortalNet Software

Problem (Issue) Statement:

How to configure Connection, Controller, and Door settings for XP-SNET controller with xPortalNet software

Description:

A guide to configure Connection, Controller, and Door settings for XP-SNET controller with xPortalNet software.

Related Software:

  • xPortalNet Lite
  • xPortalNet Standard
  • xPortalNet PS

Related Hardware:

  • XP-SNET

System Application:

  • Door Access System

Symptom and Finding:

NA

Cause:

For first time configuration on Connection, Controller, and Door settings for XP-SNET controller with xPortalNet software.

Solution:


Warning!

  • Users are not recommended to run any xPortal software in Windows XP operating system as the system is unstable

  • Users are also advised to stop the xPortal Services before shutting down the Server PC to prevent any missing transaction issues.

.

.

Summary


Step-by-step Guide:

  • Before configuring Connection, Controller, and Door settings for XP-SNET controller with xPortalNet, ensure that the pre-configure network connection has been complete:

Knowledge Base Link

Users may refer to How to Pre-configure Network Connection for IP Controllers for the complete pre-configuration steps.

.

.

  • To ensure that the xPortalNet Services is running and dongle license is detected:

Step 1: Open xPortalNet Comm Service.


Step 2: Ensure that the xPortalNet Comm Service Status is Running.
xPortalNet Comm Service Running Pop-up Message
Figure 1: xPortalNet Comm Service Running Pop-up message


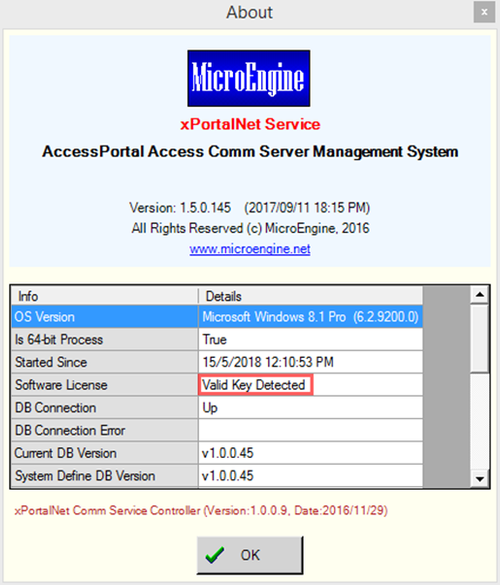
Step 3: Right-click the xPortalNet Comm Service icon at the notification bar, click Check Service Info and verify that the software detects the plugged in USB license key.
Valid Software License Key Detected Indication
Figure 2: Valid software license key detected indication

.

.

  • To configure settings for Connection, Controller, and Door:

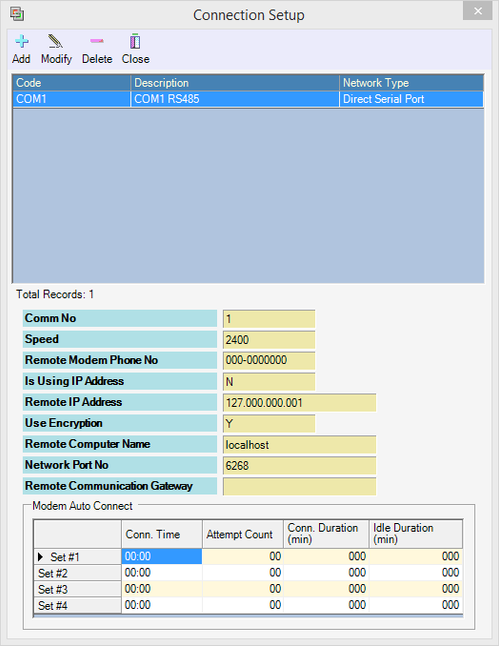
Step 1: For Connection Setup, open xPortalNet Server > Server Admin > Connection Setup. The Connection Setup window will be shown as below:
Connection Setup Window
Figure 3: Connection Setup window


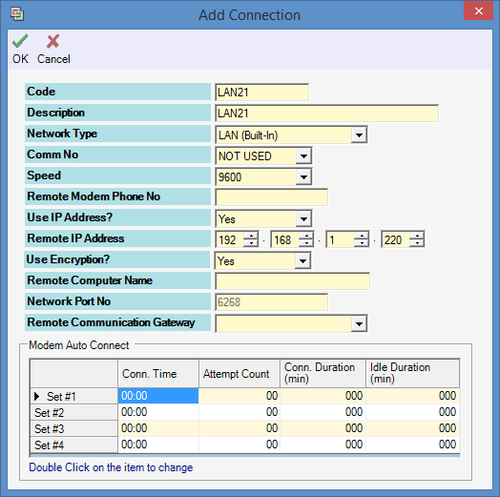
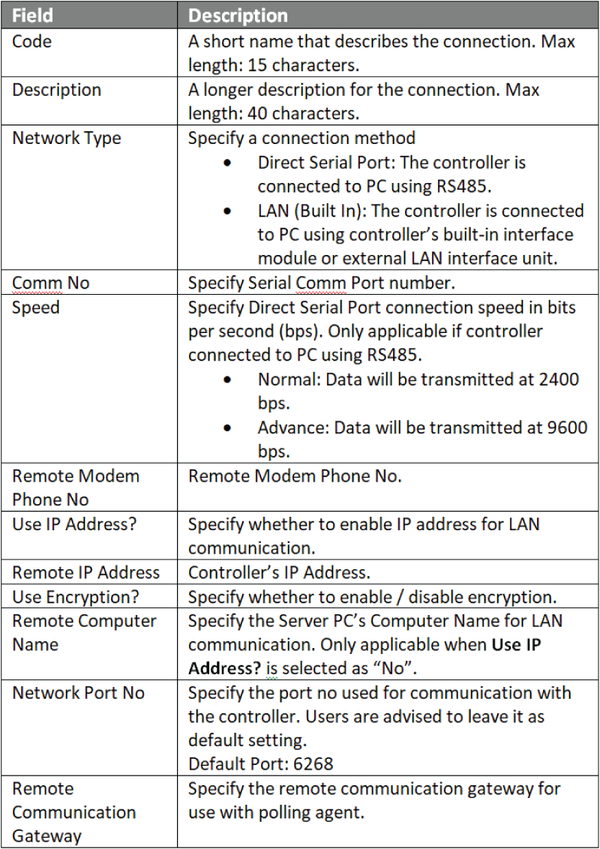
Step 2: Click Add to add a new connection. The Add Connection window will be shown as below. Click OK to save the changes.
Add Connection Window
Figure 4: Add Connection window


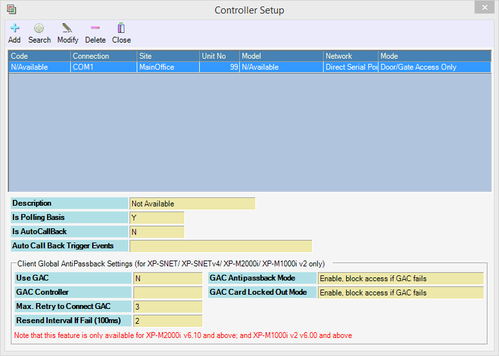
Step 3: For Controller Setup, go to Server Admin > System Device Setup > Controller. The Controller Setup window shown as below:
Controller Setup Window
Figure 5: Controller Setup window


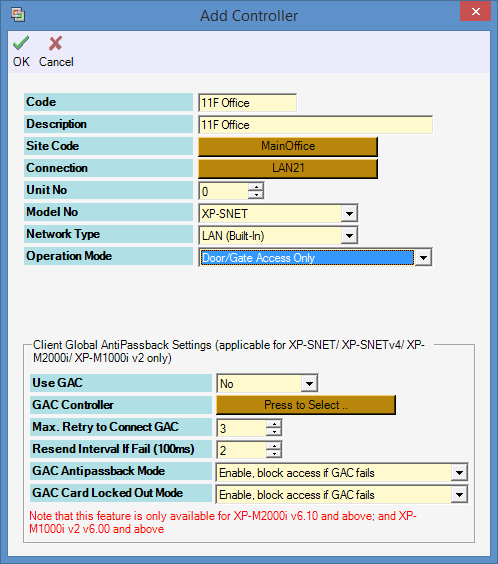
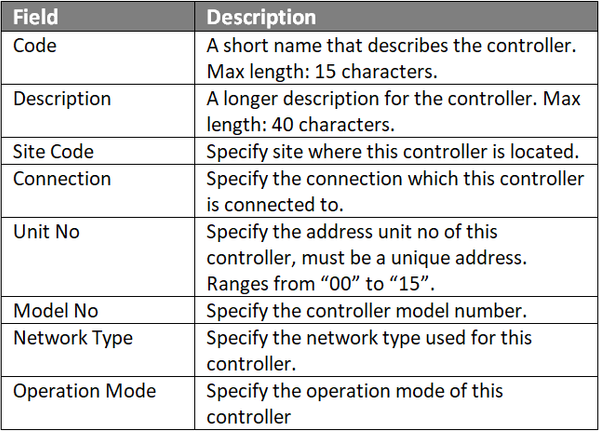
Step 4: Click Add to add a new controller. The Add Controller window will be shown as below. Click OK to save the changes.
Add Controller Window
Figure 6: Add Controller window


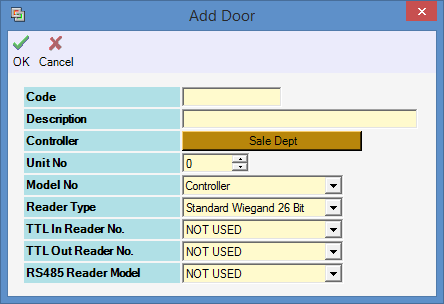
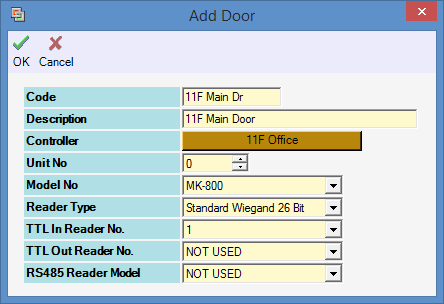
Step 5: For Door Setup, go to Server Admin > System Device Setup > Door. The Door Setup window shown as below:
Add Door Window
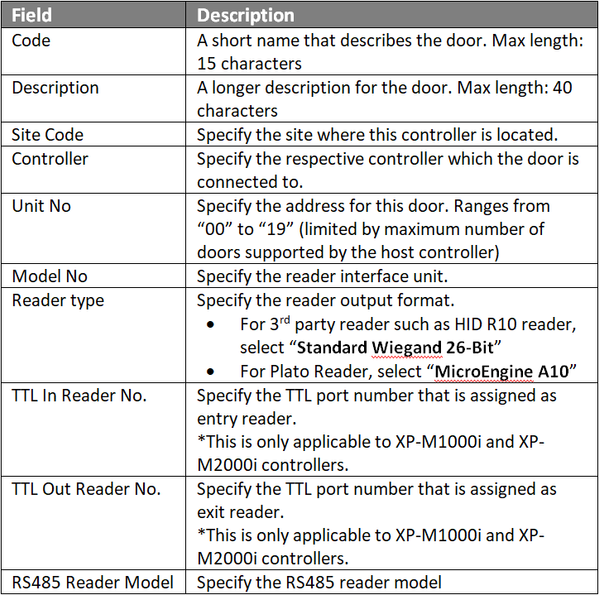
Figure 7: Add Door window


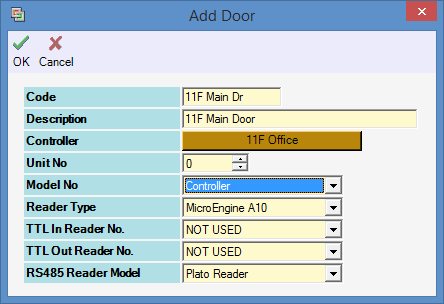
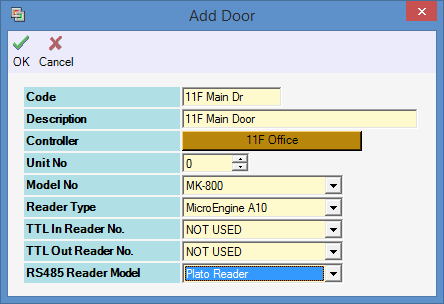
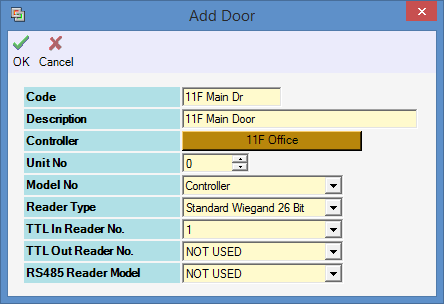
Step 6: The screenshots below indicate several examples of how to configure the door settings following different scenarios.
Add Door Setting Example with Plato Readers Connected Directly to Controllers (via Downlink Port)
Figure 8: Add Door setting example with Plato readers connected directly to controllers (via Downlink port)

.

.

.

Add Door Setting Example with Plato Readers Connected to MK800E
Figure 9: Add Door setting example with Plato readers connected to MK800E Reader Interface Module, which is then connected to the controllers

.

.

.

Add Door Setting Example with Third Party Reader Connected Directly to TTL Port
Figure 10: Add Door setting example with third party reader connected directly to the TTL port on the controllers

.

.

.

Note

  • TTL In / Out Reader No configuration settings are only applicable when the third party reader is connected directly to the TTL port.
  • XP-SNET controller supports up to a maximum of 5 TTL reader connections.

.

.
Add Door Setting Example with Third Party Reader Connected to MK800E
Figure 11: Add Door setting example with third party reader connected to MK800E Reader Interface Module, which is then connected to the controllers

.

.

.

Note

  • Users have to set a unique Door Unit Number for different doors for identification purposes (i.e.: no two doors in the same controller can have the same Door Unit Number).
  • For XP-SNET controller, the Door Unit Number ranges from "00" to "09" for a total of 10 connected doors.

.

.
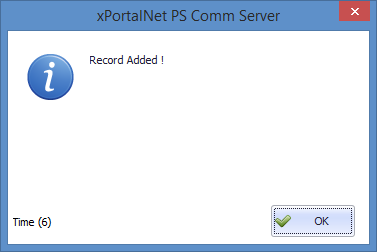
Step 7: The following message window will be shown to indicate that the Record is Added. Click OK to continue.
Record Added Window
Figure 12: Record Added window


Step 8: The Connection, Controller and Door settings are configured. Users can now observe the controller and door Status at Device List.

.

.

  • To observe the Controller and Door status at Device List.

Step 1: After completing the Connection, Controller and Door settings, users can now check the status of the controller and door.


Step 2: To check the status of the controller, go to xPortalNet Server>Device List>Controller List to verify that the controller Status is Up.
Controller List under Device List Tab
Figure 13: Controller List under Device List tab


Step 3: To check the status of the door,go to xPortalNet Server>Devices List>Door Listto verify that the door StatusisUp
Door List under Device List tab
Figure 14: Door List under Device List tab 

Date Documentation:

16/5/2018 (Rev 1.0)

PROOF-READ

.

.


.

© MicroEngine Technology Sdn Bhd (535550-U). All rights reserved.