How to Import Staff Record using Startup Wizard in xPortal3000 Software
| Problem (Issue) Statement: | How to Import Staff Record using Startup Wizard in xPortal3000 software |
| Description: | This article will guide users on how to import Staff Record using Startup Wizard in xPortal3000 software. |
| Related Software: |
|
| Related Hardware: | NIL |
| System Application: | NIL |
| Symptom and Finding: | NIL |
| Cause: | For first time guide on how to import Staff Records using Startup Wizard in xPortal3000 software. |
Warning!
. . Summary:. . Step-by-step Guide:
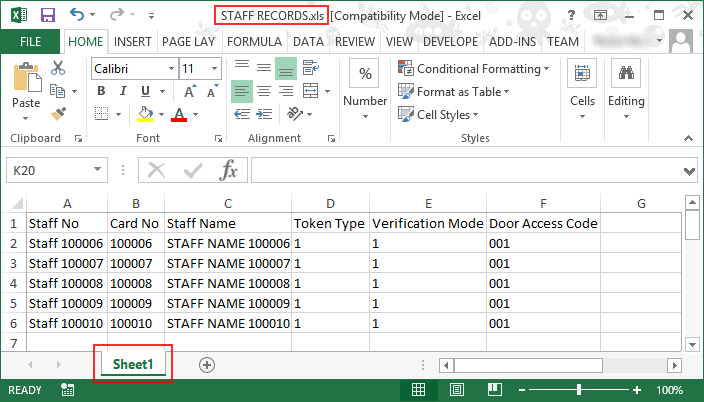
Step 1: Users can choose to create the Staff Record import file using Microsoft Excel. Ensure that the file is named as "Staff Records", and that the staff record data are contained in "Sheet 1" of the Excel spreadsheet. . Step 2: Alternatively, users can also choose to create the Staff Record import file using text file. Similarly, ensure that the file is named as "Staff Records", and that each column is separated by a comma (,). . Knowledge Base Link Users are advised to include the column of Door Access Code, and configure it to "001" to ensure that the added staff can gain access through the pre-configured doors. . .
Step 1: Ensure that xPortal3000 Services is running. . Step 2: Go to xPortal3000 Client > Startup Wizard Icon. The Startup Wizard will be shown as below. Click on the Card User icon. . Step 3: The following window will then be shown. Click Method 2: Importing card user record from Excel or CSV file to import staff record via the Startup Wizard. . Knowledge Base Link Users may refer to How to Add Staff Record using Startup Wizard in xPortal3000 Software for the complete steps of selecting Method 1: Creating card user record by normal mode. . . Step 4: If the following message is shown by the software, click OK to continue. . Note This message is prompted by the software to indicate that there are no Staff Records found in the database. Users can safely ignore this error message. . . Step 5: The Select Data Source window will then be shown. Select the correct Data Source type according to your import file type; i.e.: Microsoft Excel or Text File. Users must ensure that the Add only option is selected under the Import Rules section. Click Next to proceed to the next window. . For Microsoft Excel: Click Browse to select the staff record file that you have created. Ensure that you have selected the correct sheet where the data is located under the Sheet Name field. . For Text File: Click Browse to select the staff record file that you have created. Select the correct Column Delimiter character which separates different characters in the Text File.
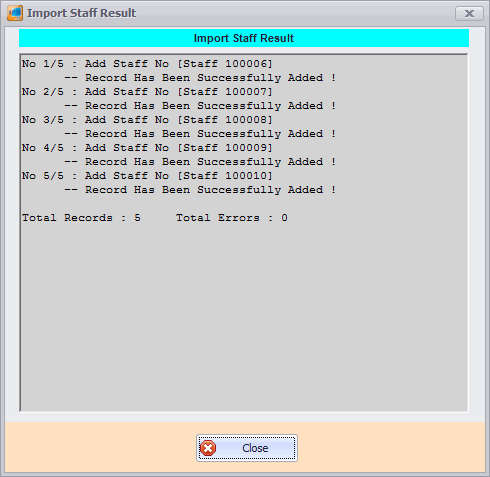
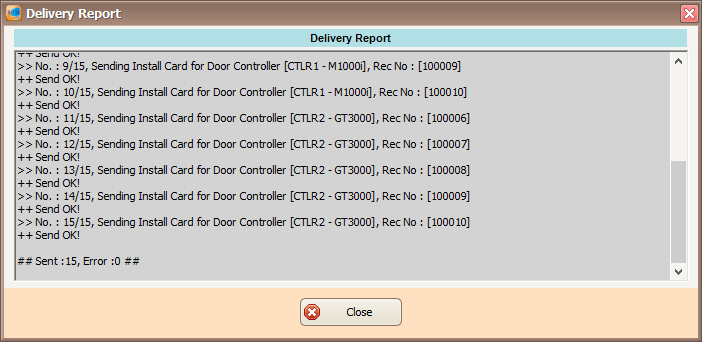
. Step 6: The Column Mapping window will be shown. Map the correct Source Column No. to the correct Destination Field according to the interface as shown below. Check and ensure that the Start From Row and End At Row settings are correct. Click Next to proceed to the next window. . Users can still edit the relevant fields as shown by the screenshot below: . Step 7: The Ready to Import window will then be shown. Ensure that there are no errors in the mapping and that the Status column for all staffs are shown as OK. . Step 8: The Import Staff Result window will be shown next. Click Close to continue. . Step 9: The Delivery Report window will then be shown. Ensure that all the data sending process return the status of OK! Click Close to continue. . Step 10: The newly added staff record will be listed in the Staff Detail Setup window. Click Close to exit from the window. . Step 11: The newly added staffs can now flash the valid access cards to the respective controllers to gain access. The software will record the "Valid Entry Access" transaction. | |
| Common Issues: | NIL |
| Porting Date: | 25/10/2019 |


PROOF-READ
.
.
.
© MicroEngine Technology Sdn Bhd (535550-U). All rights reserved.