How to Add Visitor Pre-Registration Record with QR Token Type in Cloud VMS website
| Problem (Issue) Statement: | How to add visitor pre-registration record with QR token type in Cloud VMS website |
| Description: | This article provides a step-by-step guide for system user or admin to add visitor pre-registration record with QR token type in Cloud VMS website. The pre-registered visitor will be signed in as visitor in xPortalNet software, either by using double verification mode which require visitor pre-registration matching process, or by using single verification mode which can be referred as auto-sign in visitor. |
| Related Software: | Cloud VMS, xPortalNet |
| Related Hardware: | NIL |
| System Application: | NIL |
| Symptom and Finding: | NIL |
| Cause: | For first time guide to add visitor pre-registration record with QR token type in Cloud VMS website. |
| Solution: | Pre-requisites / requirements
. . Summary:. Reminder Users need to ensure the Cloud VMS Sync service is running in order to allow the software database and Cloud VMS database is always synchronized from time to time. . . Step-by-step Guide:
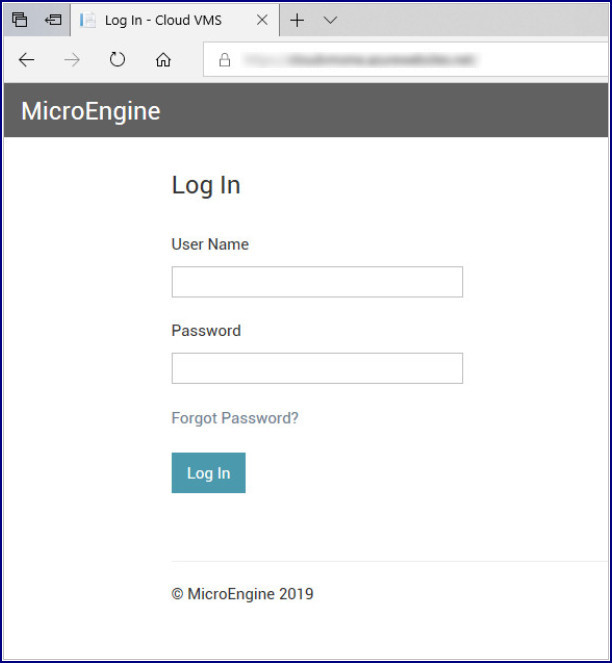
Step 1: Open Cloud VMS Website. General Information The Cloud VMS website link may vary for different software and site. Please contact your sales person for further info. . . Step 2: Enter the following default User Name and Password for admin to login: Login Credentials User Name : Manager Password : Manager 1 . . Click Log In. . .
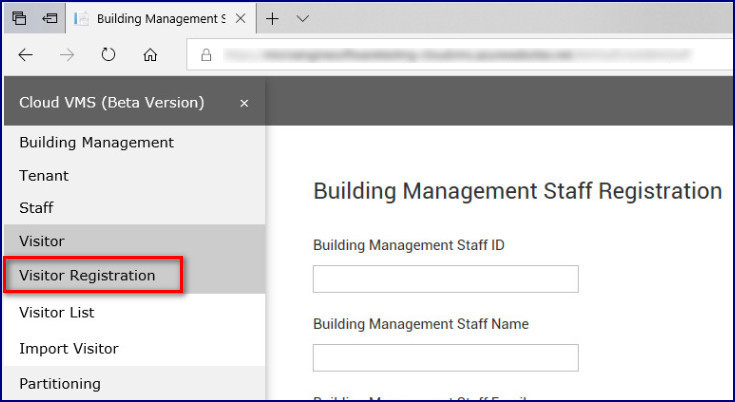
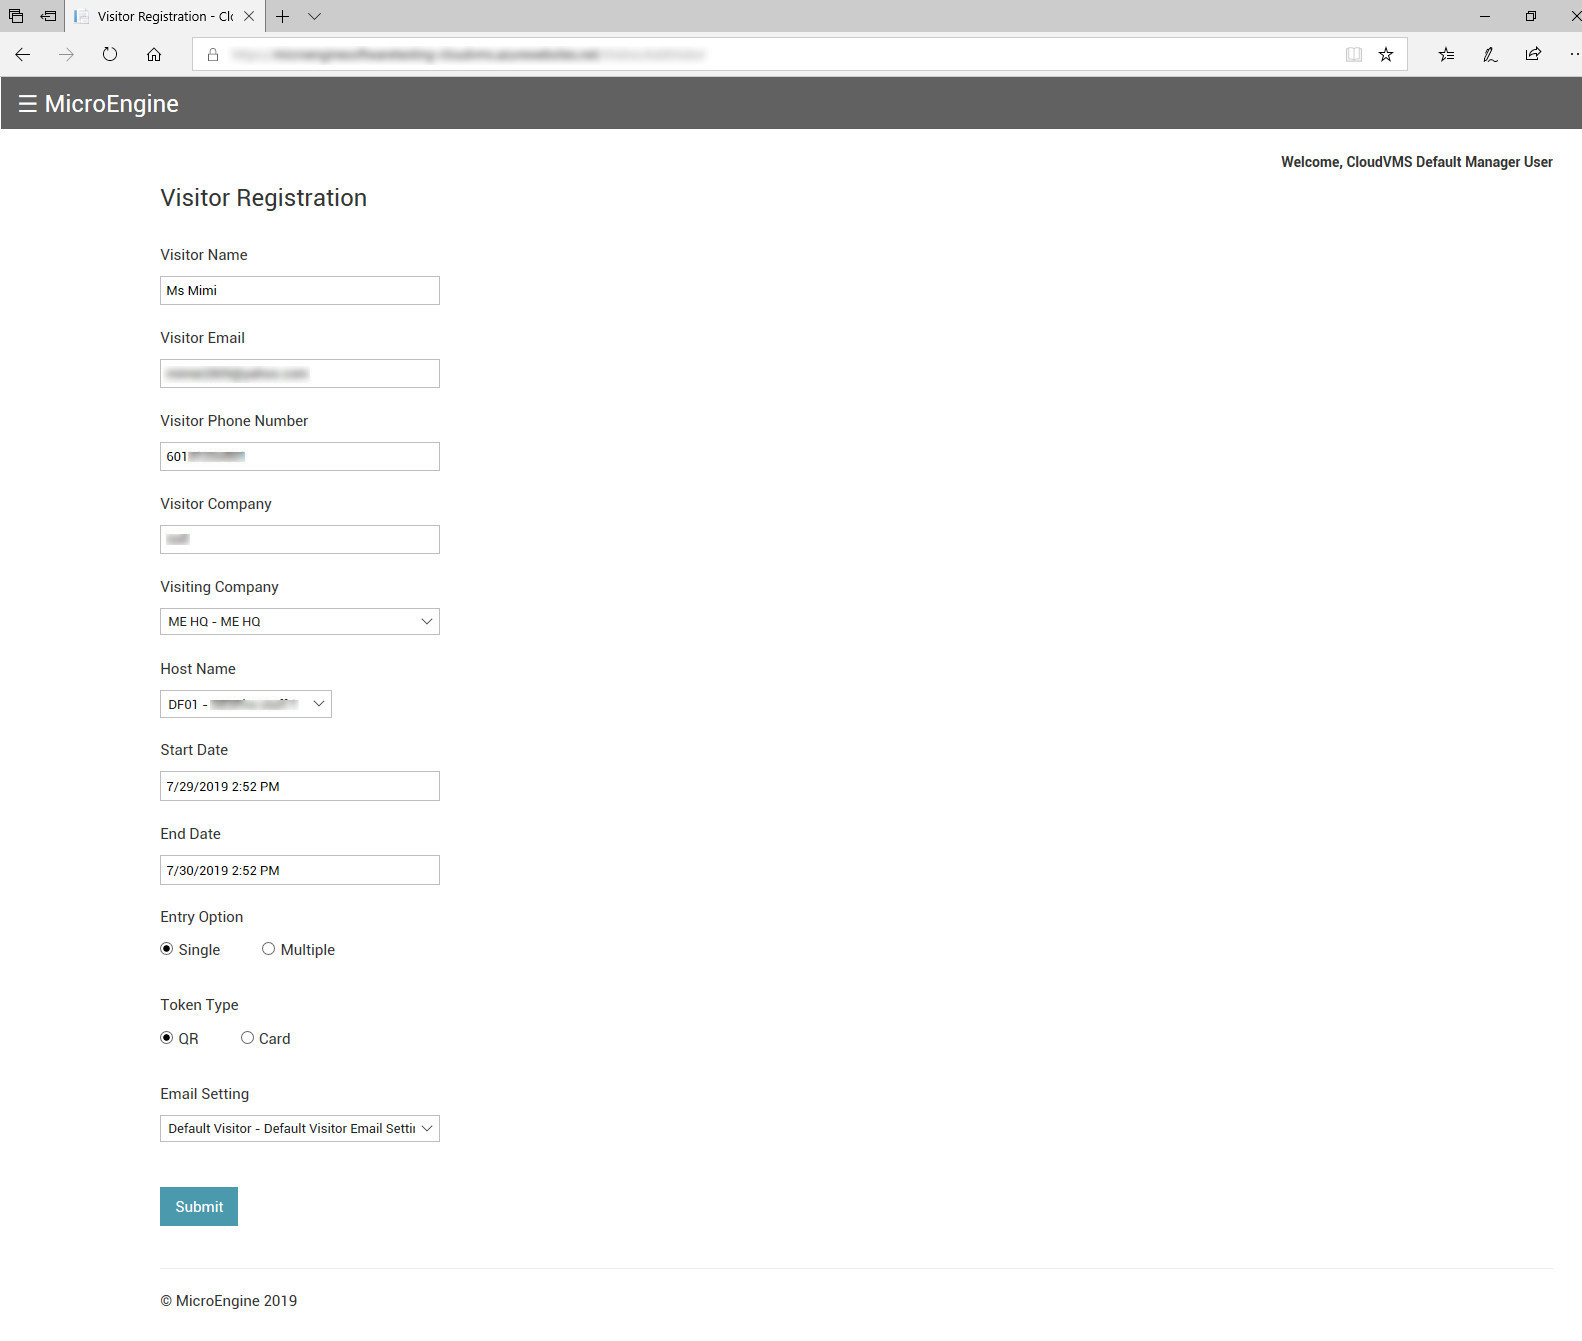
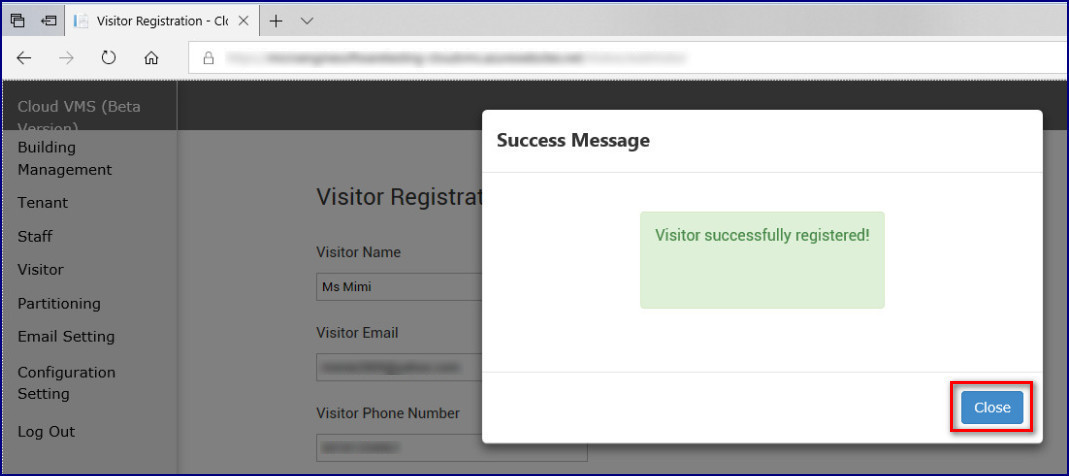
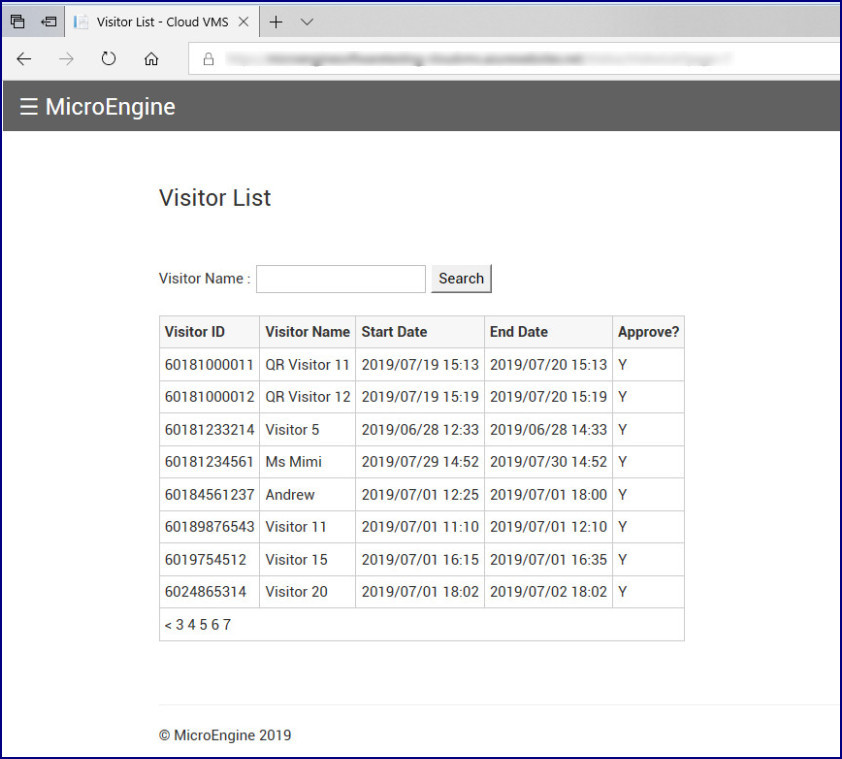
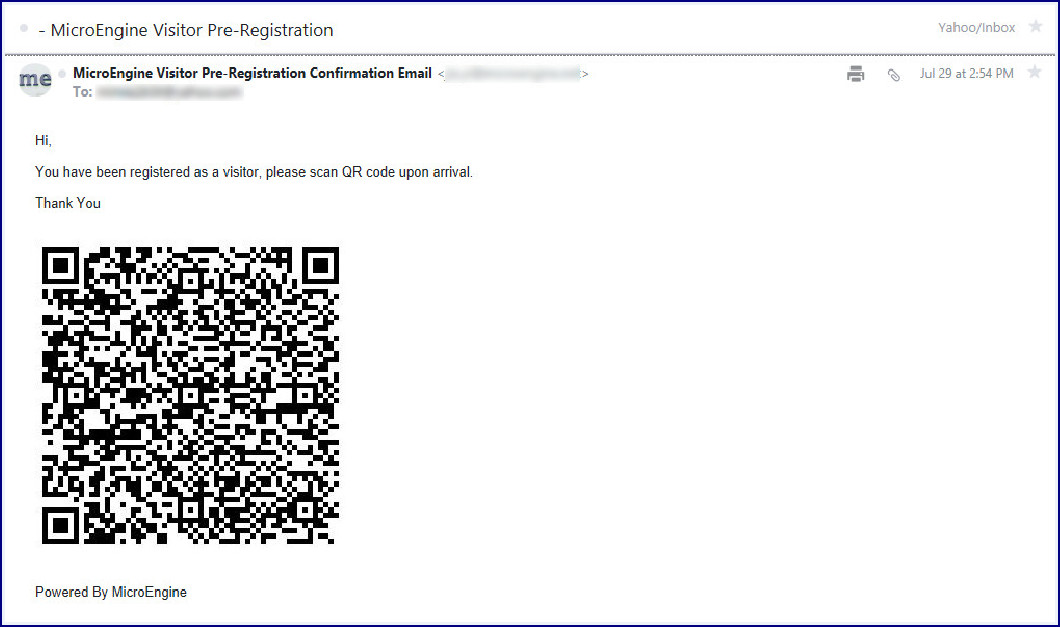
Step 1: Go to Visitor > Visitor Registration to add visitor pre-registration record. Step 2: Fill up the Visitor Pre-registration form. Below are the particular that users need to enter / select for the visitor pre-registration record: a. Visitor Name - Enter the visitor's name. b. Visitor Email - Enter a valid email address as 'MicroEngine Visitor Pre-registration Confirmation' email will be sent to visitor once visitor pre-registration record is submitted through Cloud VMS. c. Visitor Phone Number - Visitor phone number will be populated asVisitor ID in Visitor Still In List. d. Visitor Company - Enter the visitor's company name. e. Visiting Company - Select a visiting company's name from the list. You need to setup the Tenant record in xPortalNet software beforehand. Otherwise, you will not be able to see the visiting company list. f. Host Name - Select a host name or visiting staff name from the list. The host name(s) that appear in the drop-down list will be filtered by tenant / company that you have selected for Visiting Company field. In order to see the host name in the list, you need to add the staff records in xPortalNet software beforehand. g. Start Date - Select the start date of visiting period. h. End Date - Select the end date or expiry date of visiting period. i. Entry Option - Select 'Single' option (default setting). j. Token Type - Select 'QR' as token type since pre-registered visitor is currently using QR code to gain access. k. Email Setting - Select visitor email setting which is configurable in Cloud VMS website. Step 3: Click button Submit at the bottom of the page to add the visitor record. Step 4: You should get a Success Message once the visitor registration is successfully submitted. Click Close. Step 5: You will be directed to Visitor List page right after the visitor pre-registration record is added. . Note To open the Visitor List page from the Main Menu, go to Visitor > Visitor List to view the pre-registered visitor list. . . Meanwhile, Cloud VMS will automatically send a “MicroEngine Visitor Pre-registration Confirmation” email to visitor’s email address as entered in Visitor Registration form. Step 6: MicroEngine Cloud VMS Synchronization services will perform data synchronization for Cloud VMS website and xPortalNet software from time to time. Hence, you need to make sure that the machine that installed with xPortalNet Cloud VMS Sync software can access to the CloudVMS website. |
| Common Issues: | NIL |
| Documentation Date: | 18/04/2020 (Rev 1.0) |
PROOF-READ
.
Related Articles.
Containing the label "dynamic-qr-code"
.
.
© MicroEngine Technology Sdn Bhd (535550-U). All rights reserved.
.jpg?version=1&modificationDate=1588578722905&cacheVersion=1&api=v2&width=800&height=253)
