How to Configure XP-CPRO (Legacy Controller) at xPortalNet Software
| Problem (Issue) Statement: | How to configure XP-CPRO (legacy controller) at xPortalNet software |
| Description: | This article will guide users on how to configure XP-CPRO (legacy controller) at xPortalNet software. |
| Related Software: |
|
| Related Hardware: |
|
| System Application: | NIL |
| Symptom and Finding: | NIL |
| Cause: | For first time guide on how to configure XP-CPRO (legacy controller) at xPortalNet software. |
Summary:
. Step-by-step Guide:
Step 1: Users are advised to check and reconfirm the wiring termination before configuring the settings in xPortalNet software. Knowledge Base Link Users may refer to How to Connect XP-CPRO (Legacy Controller) to Door Accessories and MK800 Reader Interface Module for the complete instructions to terminate wiring for XP-CPRO controller. . .
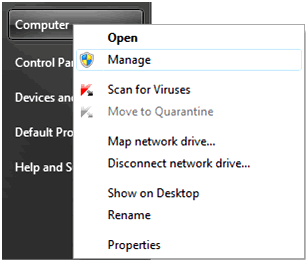
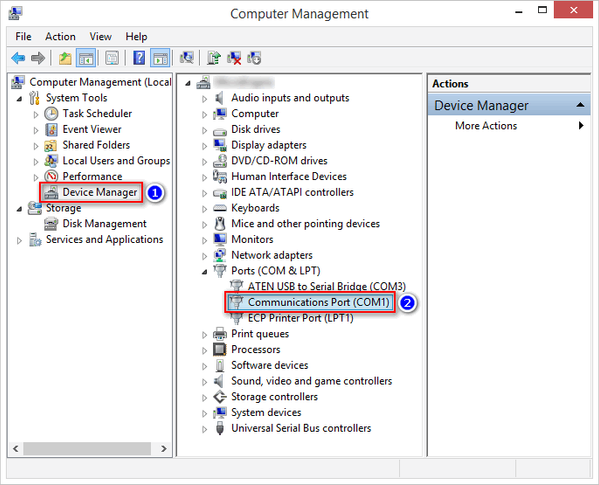
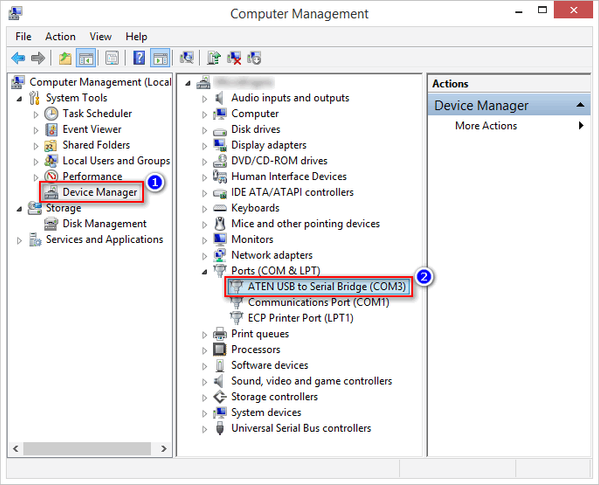
Step 1: Launch Device Manager. Right-click at Computer > Manage. . Step 2: The Computer Management window will be shown. Click Device Manager tab and expand Ports (COM & LPT) For MCI connected to Server PC via RS232 port: . For MCI connected to Server PC via USB-to-Serial converter: . .
Warning!
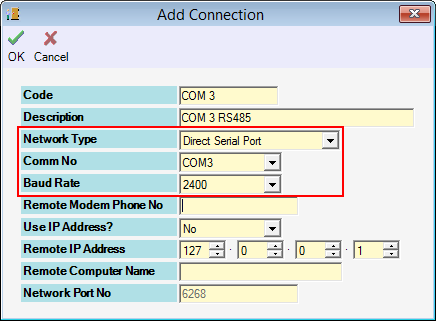
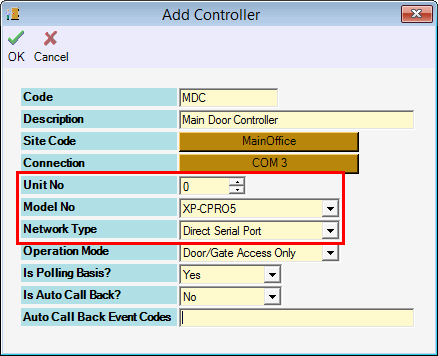
. . Step 1: Go to xPortalNet Server > Server Admin > Connection Setup > Add. The Add Connection window will be shown. Ensure that the Comm No field is selected as the same comm port connecting the MCI unit. Click OK to save the changes. . Step 2: Go to xPortalNet Server > Server Admin > System Device Setup > Controller > Add. The Add Controller window will be shown. Note of the settings explanation as follows. Click OK to save the changes. . Note
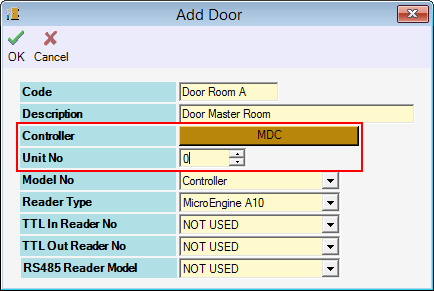
. . Step 3: Go to xPortalNet Server > Server Admin > System Device Setup > Door > Add. The Add Door window will be shown. Note of the settings explanation as follows. Click OK to save the changes. . Note
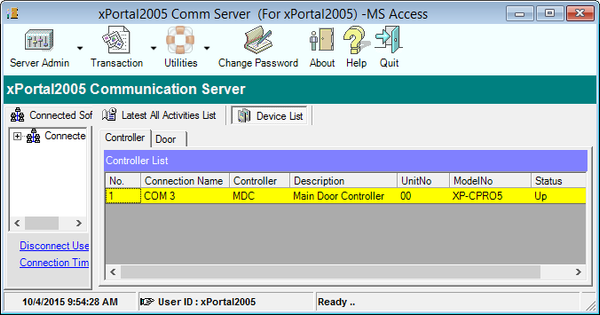
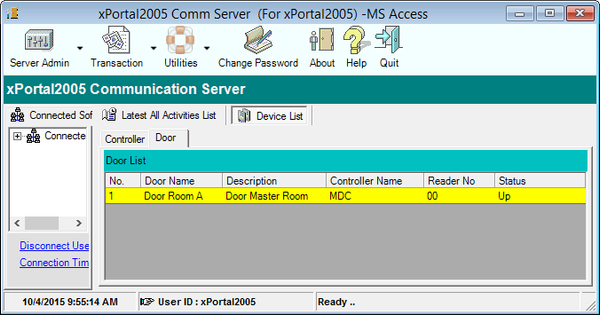
. . Step 4: The newly added XP-CPRO controller will be shown in Device List. Ensure that the status of the controller is "Up". . Step 5: Click Door tab, ensure that the door status is also shown as "Up". | |
| Common Issues: | NIL |
| Porting Date: | 19/4/2019 |
PROOF-READ
.
.
.
© MicroEngine Technology Sdn Bhd (535550-U). All rights reserved.
