How to Configure XP-SNET Controller Using RS485 Connection in xPortalNet Software
| Problem (Issue) Statement: | How to configure XP-SNET controller using RS485 connection in xPortalNet software |
| Description: | This article will guide users to configure XP-SNET controller using RS485 connection in xPortalNet software |
| Related Software: |
|
| Related Hardware: |
|
| System Application: | NIL |
| Symptom and Finding: | NIL |
| Cause: | For first time guide to configure XP-SNET controller using RS485 connection in xPortalNet software |
| Solution: | Summary:
. . Step-by-step Guide:
Step 1: Connect the XP-SNET controller to the Server PC properly via the MCI or RS485 converter. Knowledge Base Link Users may refer to How to Connect XP-SNET controller to Door Accessories and Extension Boards for the complete steps to connect XP-SNET controller to Server PC. . . Step 2: If the controller is connected to Server PC via MCI, ensure that the MCI is powered up and working properly. . .
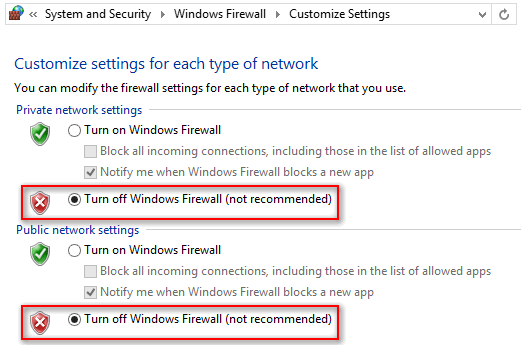
Step 1: At the Server PC, go to Control Panel > System and Security > Windows Firewall > Turn Windows Firewall on or off. The following window will be shown. Select Turn off Windows Firewall. . Note Windows Firewall turned on will affect communications between controller and Server PC. Therefore, it is advisable to turn off the Windows Firewall to ensure no interruptions to the communication. . .
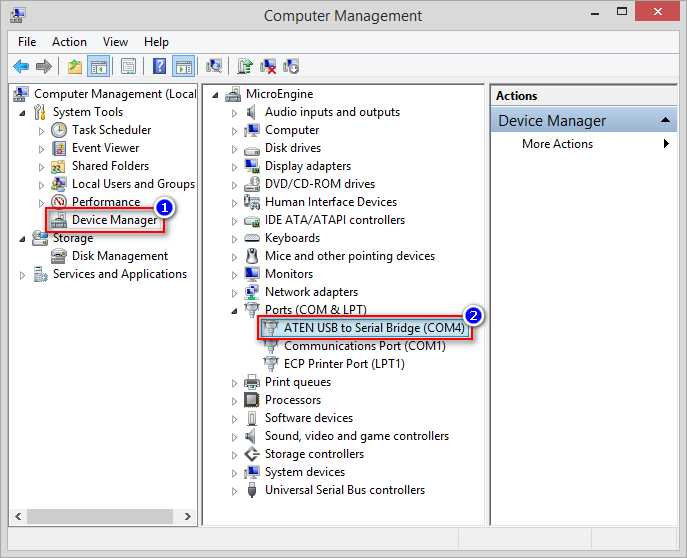
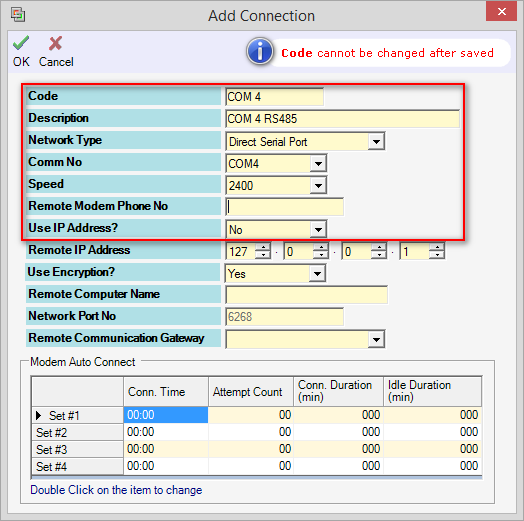
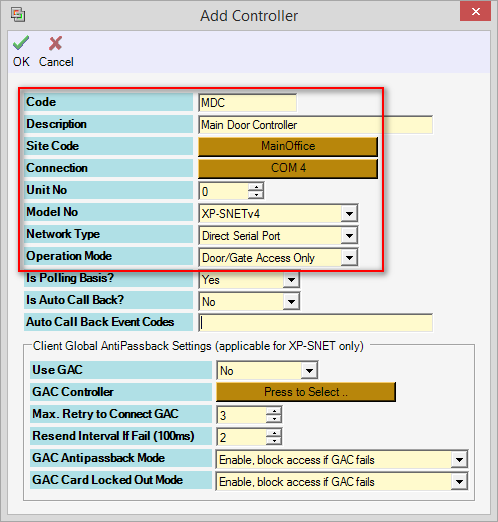
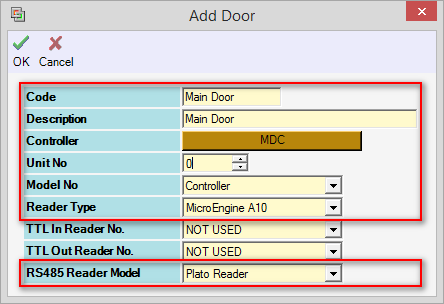
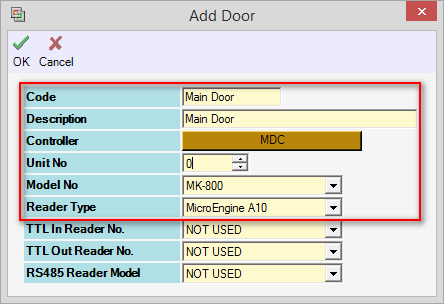
Step 1: Ensure that the MCI or RS485 to USB converter is detected by the Server PC. Check via the Device Manager window. Note that the MCI is connected to COM4. . Step 2: Go to xPortalNet Server > Server Admin > Connection Setup > Add. The Add Connection window will be shown. Configure the settings as shown in the screenshot below, and selecting the comm port number where the MCI or RS485-to-USB converted is detected. Click OK to save the changes. . Knowledge Base Link Users may refer to How to Configure Baud Rate Settings on MCI to configure the baudrate settings on MCI. . . Step 3: Go to xPortalNet Server > Server Admin > System Device Setup > Controller > Add. The Add Controller window will then be shown. Configure the settings as shown in the screenshot below. Click OK to save the changes. . Note For the Connection field, select the Connection code configured in Step 2. . . Step 4: Go to xPortalNet Server > Server Admin > System Device Setup > Door > Add. The Add Door window will be shown. Configure the settings as shown in the screenshot below. Click OK to save the changes. .
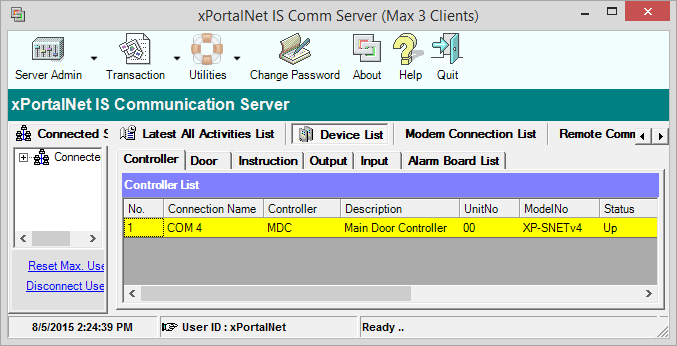
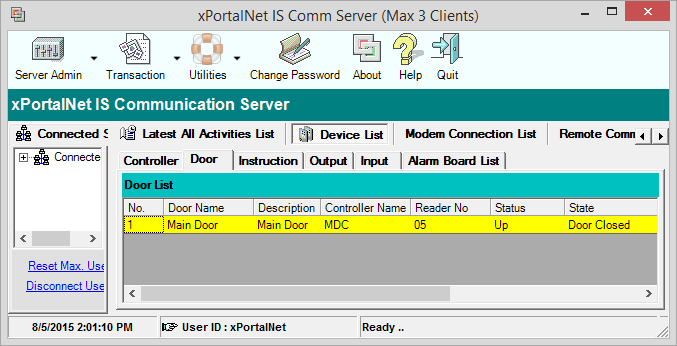
. Note For the Controller field, select the Controller code configured in Step 3. . . Step 5: Back at the home window of the software, go to Device List > Controller tab. Ensure that the newly added controller status is shown as "Up". . Step 6: Go to the Door tab and ensure that the newly added door status is also shown as "Up" and state is shown as "Door Closed". |
| Common Issues: | NIL |
| Porting Date: | 30/01/2020 |
PROOF-READ
.
Related Articles.
Containing the label "snet"
.
.
© MicroEngine Technology Sdn Bhd (535550-U). All rights reserved.
