How to Set Real Time Export Scheduled by Hour in xPortal3000 Software
Problem (Issue) Statement: | How to set real time export scheduled by hour in xPortal3000 software |
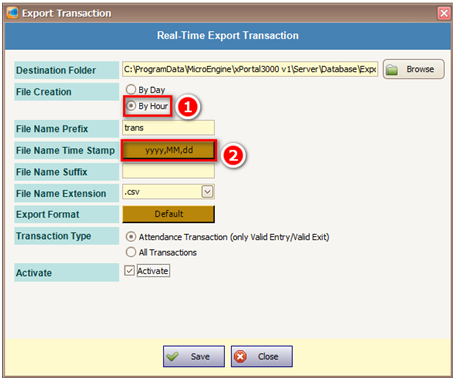
Description: | This article will guide readers to set real time export scheduled by hour in xPortal3000 software. |
Related Software: |
|
Related Hardware: | NIL |
System Application: | NIL |
Symptom and Finding: | NIL |
Cause: | For first time guide to set real time export scheduled by hour in xPortal3000 software. |
Solution: | Warning!
. . Summary:
|
Common Issue | NIL |
Date Documentation: | 30/3/2020 (Rev 1.0) |

PROOF-READ
.
Related Articles.
Containing the label "real-time-export-transaction"
.
.
© MicroEngine Technology Sdn Bhd (535550-U). All rights reserved.