How to Configure NVR & Camera Connection in xPortalNet HS PS Client v2.0 Software
Problem (Issue) Statement: | How to Configure NVR & Camera Connection in xPortalNet HS PS Client v2.0 Software? |
Description: | A guide to configure NVR & camera connection in xPortalNet HS PS Client v2.0 |
Related Software: |
|
Related Hardware: |
|
System Application: | Access Control System with CCTV integration |
Symptom and Finding: | NA |
Cause: | For first guide to configure NVR & camera connection in xPortalNet HS PS Client v2.0 |
Solution: | Summary:
. Note
. . Step-by-Step Guide:
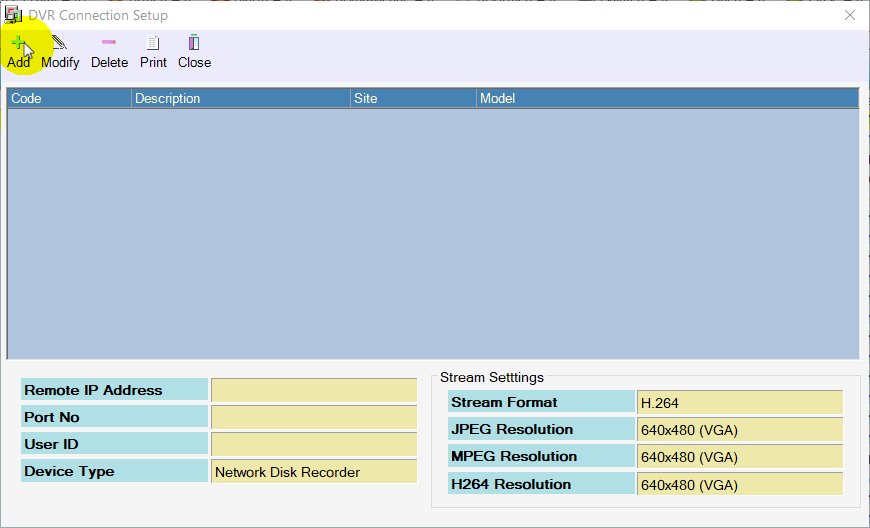
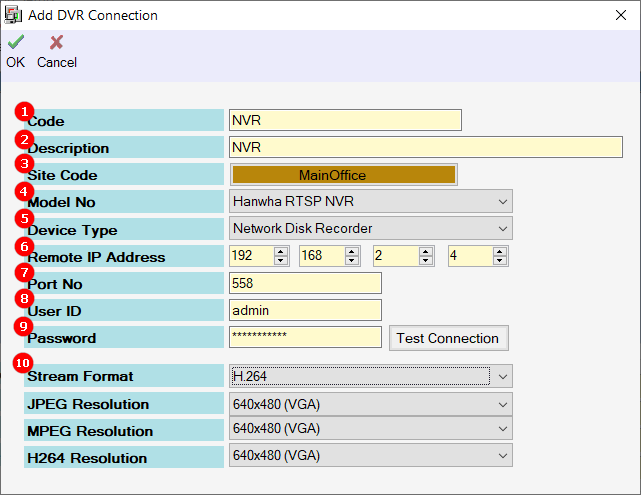
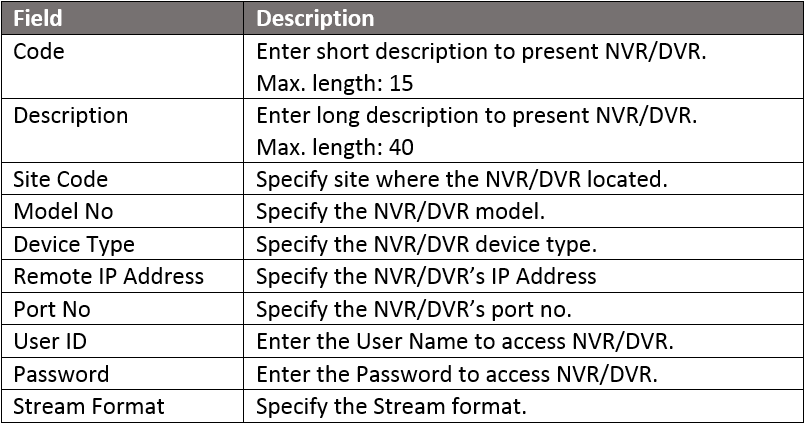
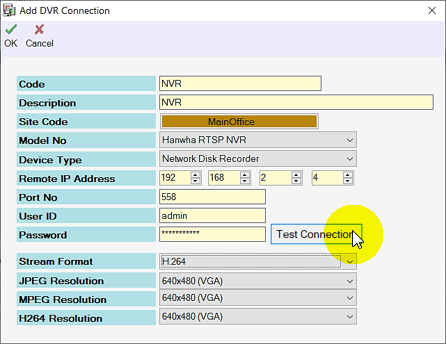
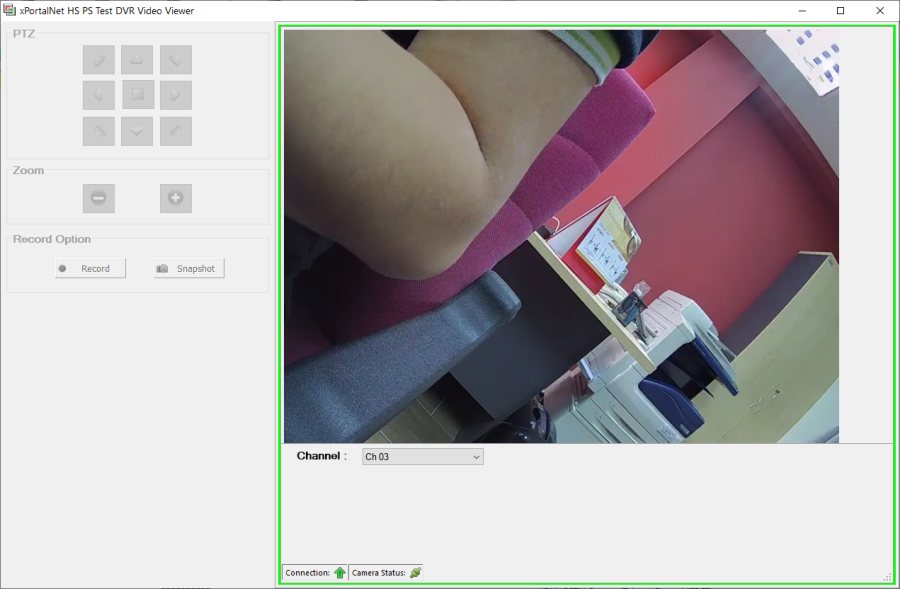
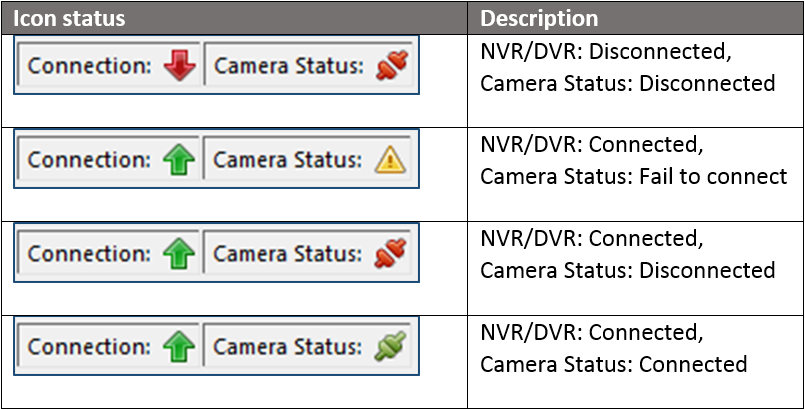
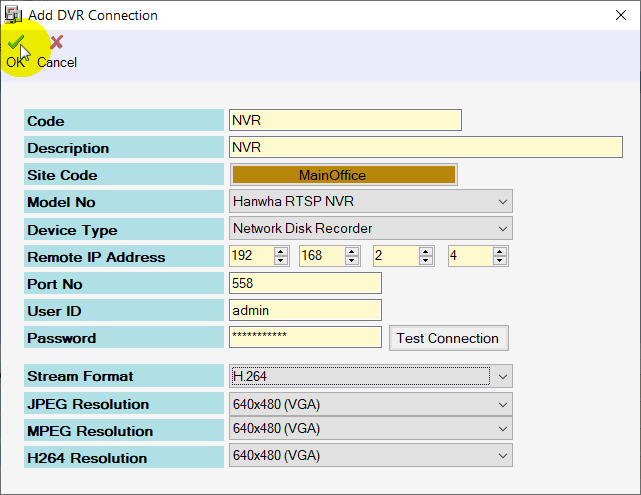
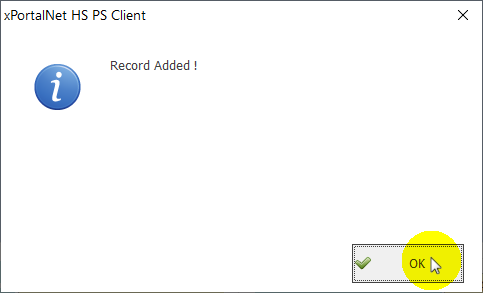
Step 1: Go to xPortalNet Client > Data Setup > System Setting > DVR. . Step 2: The DVR Connection Setup window will be shown. Click Add to add new DVR Connection. . Step 3: The Add DVR Connection window will be shown. Fill in all the relevant information accordingly. . . Tips For Hanwha NVR- PRN-40011: Default Port: TCP . . Step 4: After entering all the NVR/DVR information, click Test Connection to verify the NVR/DVR connection is correct. . Step 5: If the NVR/DVR and camera status are connected, the xPortalNet HS PS Test DVR Video Viewer will be shown to display the real-time video feed. . Note The table below showed the description of each icon statuses: . window. Step 6: Click Close to exit from the xPortalNet HS PS Test DVR Video Viewer window. . Step 7: Back at the Add DVR Connection window, click OK to confirm and save changes. . Knowledge Base Link User may refer TIKB-000680 How to check Device Port of Hanwha NVR for CCTV Integration with xPortalNet HS PS v2.0 software for complete the configure port. . . Step 8: Next, the xPortalNet HS PS Client message will show the following message to indicate that the Record Added. Click OK to continue. .
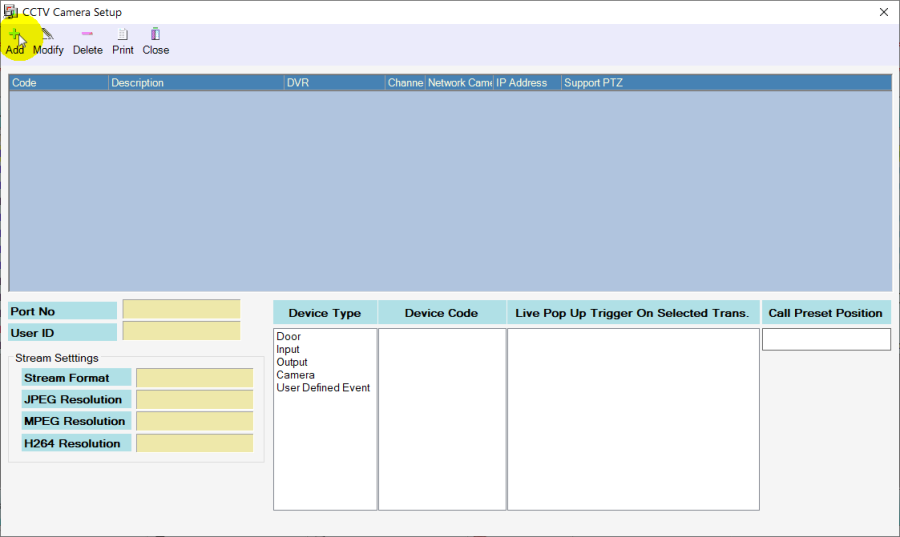
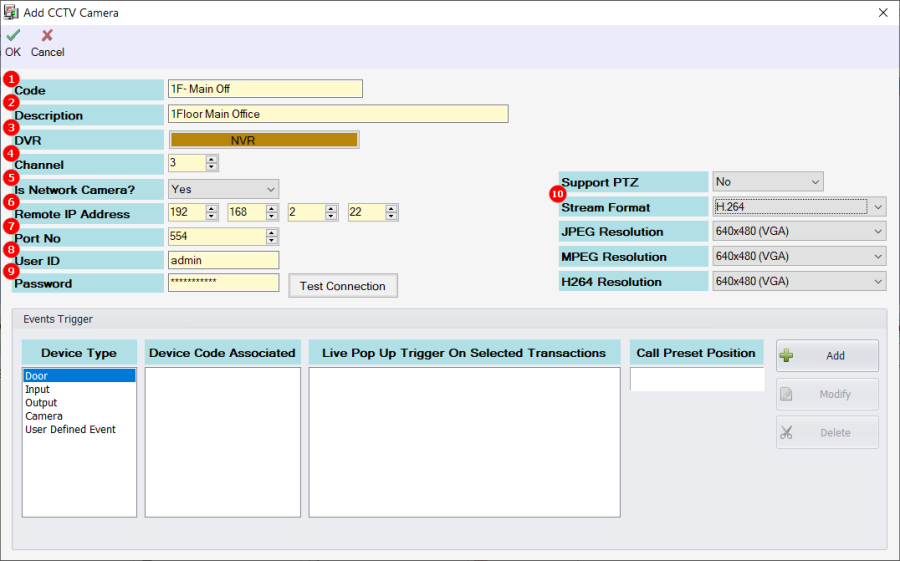
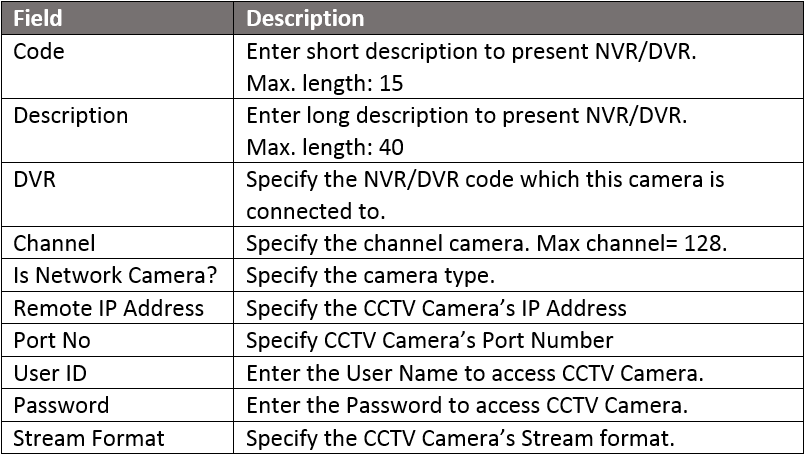
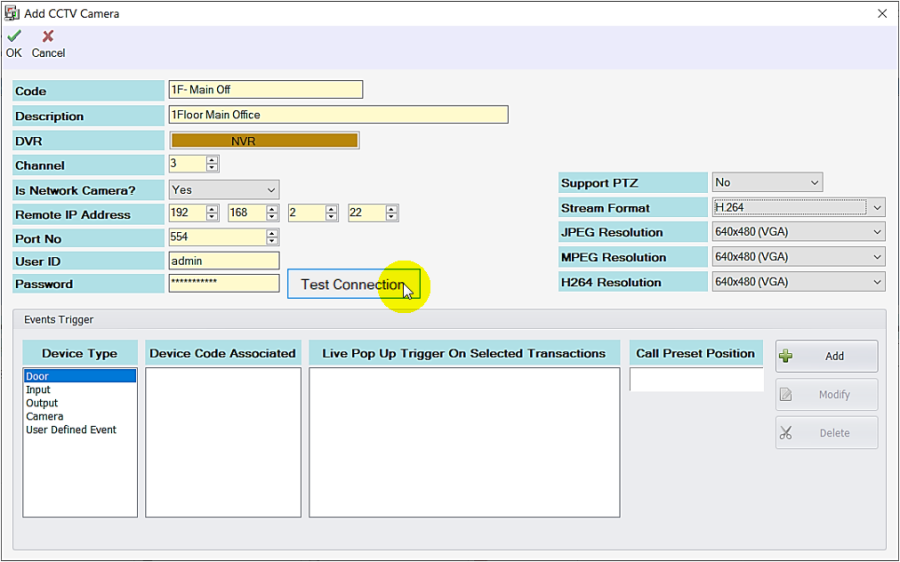
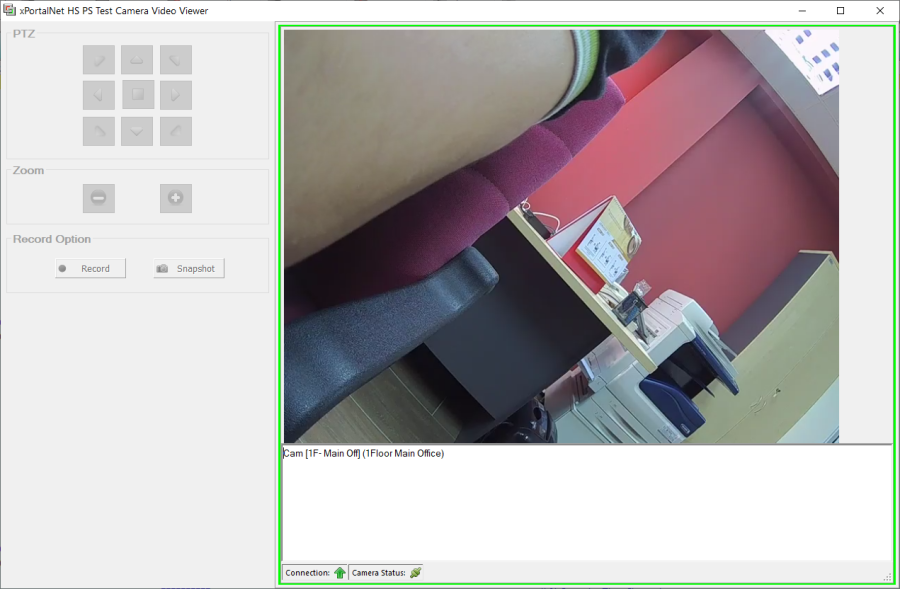
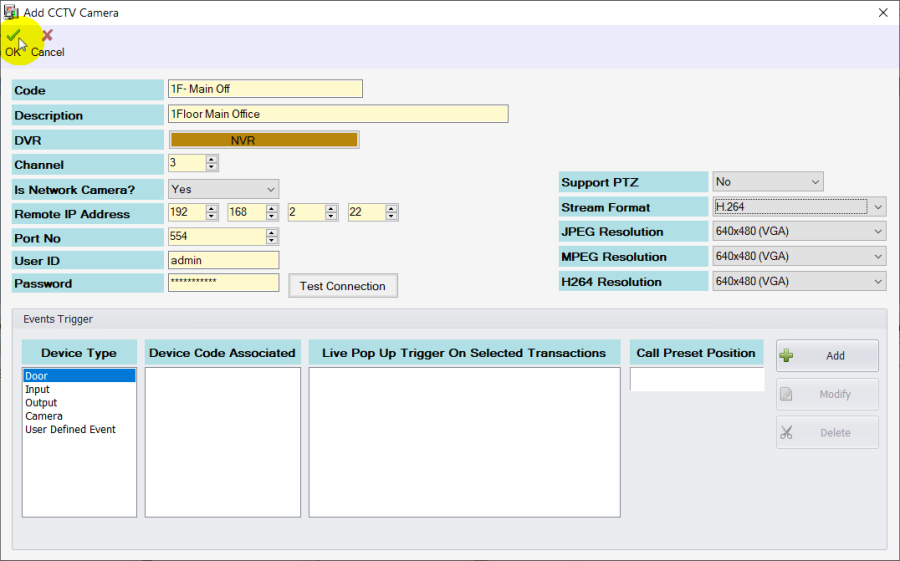
Step 1: Go to xPortalNet Client > Data Setup > System Setting > CCTV Camera Setup . Step 2: The CCTV Camera Setup window will be shown. Click Add to add new CCTV Camera. . Step 3: The Add CCTV Camera window will be shown. Fill in all information accordingly. . . Knowledge Base Link User may refer TIKB-000679 How to check device port of Wisenet IP Camera for CCTV Integration with xPortalNet HS PS v2.0 software for complete the configure port. . . Step 4: After filling up all the CCTV Camera information, click Test Connection to verify the CCTV camera connection is correct. . Step 5: If the camera is connected, the xPortalNet HS PS Test Camera Video Viewer will be shown to display the real-time video feed. . Step 6: Click Close to exit from the xPortalNet HS PS Test DVR Video Viewer. . Step 7: Back at the Add CCTV Camera window, click OK to confirm and save the changes. . Step 8: Next, the xPortalNet HS PS Client will show the following message to indicate that the Record Added. Click OK . |
Date Documentation: | 25/1/2018 (Rev 1.0) |
PROOF-READ
.
.
.
© MicroEngine Technology Sdn Bhd (535550-U). All rights reserved.
