Why are Users Unable to Delete Door Accessibility Group as the xPortalNet Software Showed "This Record Cannot be Deleted" Error Message
Problem (Issue) Statement: | Why are user unable to delete door accessibility group as xPortalNet software showed "This record cannot be deleted" error message |
Description: | When users attempt to delete door accessibility group in xPortalNet software, the software prompted an error message, and the door accessibility is not able to be deleted. |
Related Software: |
|
Related Hardware: | NIL |
System Application: |
|
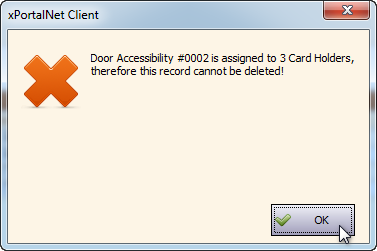
Symptom and Finding: | When user tried to delete Door Accessibility Access No 0002 at Door Accessibility Schedule, the following error message is shown to indicate that the Door Accessibility Group [002] cannot be deleted because there is Card Holder assigned to the Door Accessibility [002]. |
Cause: |
|
Solution: | Summary:
. Note Users can choose to EITHER Method 1 or Method 2 to complete the process. . Step-by-step Guide:
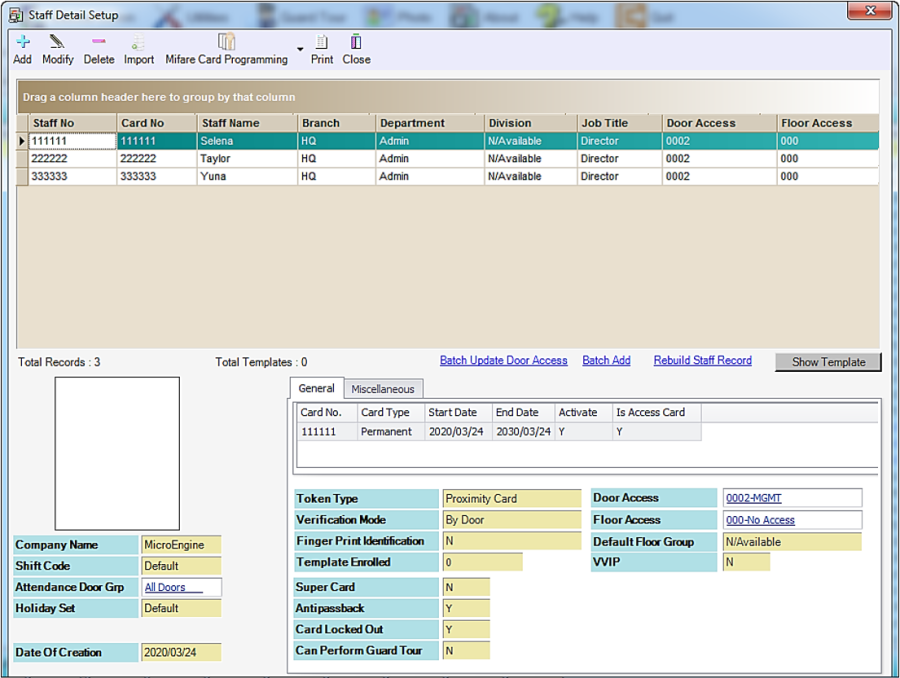
Step 1: Go to xPortalNet Client > Data Setup > Access Data Setting > Staff Records . Step 2: The Staff Detail List window will be shown, Un-tick Any Door Access > click the drop-down arrow for the Door Access field > select Door Accessibility to be deleted. . Step 3: Double confirm Door Access [002] selected is the door accessibility to be deleted. Click Get Now! . Step 4: The Staff Detail Setup window will then be shown and listed all staff records assigned with the Door Access #0002 . In this example, there are a total of 3 card users assigned with the door accessibility #0002. . .
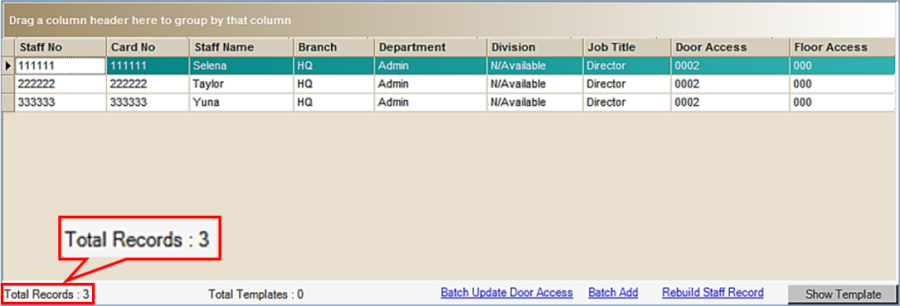
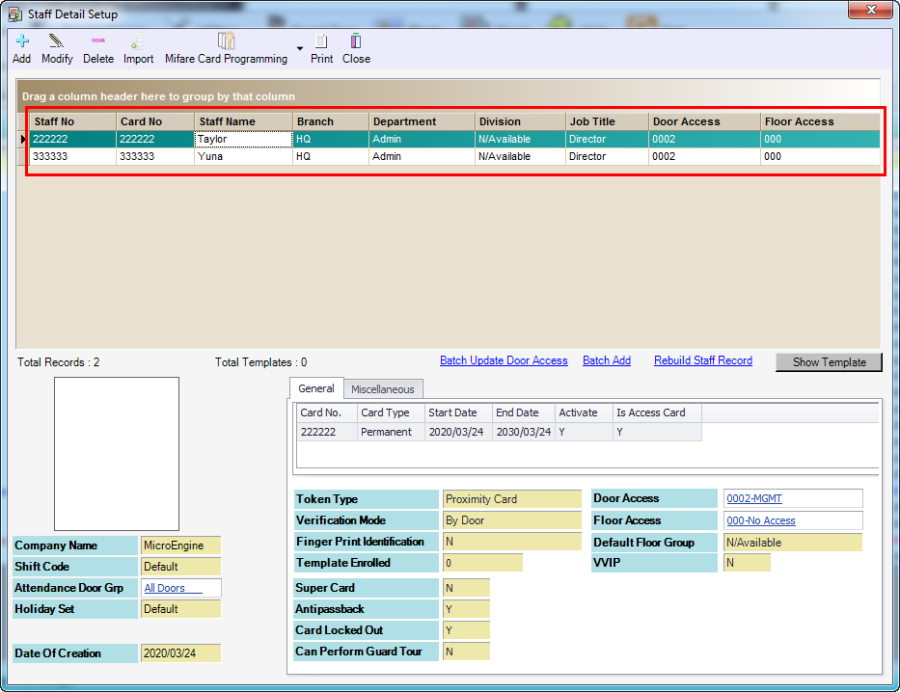
Step 1: Continue the filter staff record list and select each of the staff and click Modify. . Step 2: The Edit Staff Detail window for the selected card user will be shown as below. Click Door Accessibility Tab. . Step 3: Under Door Accessibility Tab, select Use Predefined Setting to choose another Door Accessibility Group . Step 4: Assign a new Door Accessibility for this card user and click OK to continue. . Step 6: Back at the Staff Detail Setup window, notice that the record has decreased to 2 users from 3 users earlier as shown in figure 6. The card user that we previously assigned to a different Door Access number has been removed from this list. . Step 7: Repeat the step 1 to step 5 to re-assign the remaining card users to a different Door Access number. . Step 8: When all related card users are re-assigned to a different Door Access number, user can now delete the Door Accessibility Group [002]. . .
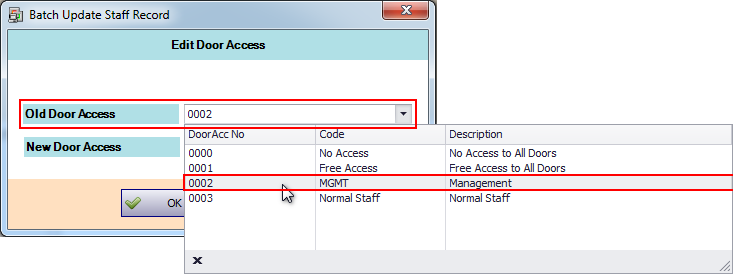
Step 1: At the Staff Detail Setup showing all card users assigned with Door Access #0002, click on Batch Update Door Access . Step 2: The Batch Update Staff Record window will then be shown. In the Old Door Access field, select "0002". . Step 3: In the New Door Access field, choose any new Door Accessibility Group to assign this new Door Accessibility for these card users. . Step 4: Ensure the Door Accessibility Group for Old Door Access and New Door Access is correct. Click OK to continue. . Step 5: The following message window will be shown to indicate Total Record Affected, click OK to continue. . Step 6: The following message window will be shown to indicate Record Updated, click OK to continue. . .
Step 1: Users can now delete the Door Accessibility Group. . Step 2: Go to Data Setup > Access Data Setting > Door Accessibility Schedule. . Step 3: The Door Accessibility Setup window will be shown. . Step 4: Select Door Accessibility [0002] to be deleted and click Delete. . Step 5: The following message window will be shown to prompt users to confirm to delete. Click Yes to continue. . Step 6: The following message window will be shown to indicate that the selected Door Accessibility Group [002] is deleted. Click OK to complete process. |
Common Issue | NIL |
Date Documentation: | 30/3/2020 (Rev 2.0) |


PROOF-READ
.
.
.
© MicroEngine Technology Sdn Bhd (535550-U). All rights reserved.