How to Configure Instruction Control for Alarm Monitoring System Application at xPortalNet HS Client
Problem (Issue) Statement: | How to configure Instruction Control for alarm monitoring system application at xPortalNet HS Client |
Description: | A guide to configure Instruction Control for alarm monitoring system application at xPortalNet HS Client |
Related Software: |
|
Related Hardware: |
|
System Application: | Alarm Monitoring System |
Symptom and Finding: | NA |
Cause: | For first time configuration on Instruction Control for alarm monitoring system application at xPortalNet HS Client |
Solution: | Warning!
. . Summary:
Step 1: Open xPortalNet Comm Service.
.
Knowledge Base Link Users may refer to How to Setup Alarm Monitoring System Application Using XP-GLS5000 Controller at xPortalNet HS Serverfor the complete procedures. . .
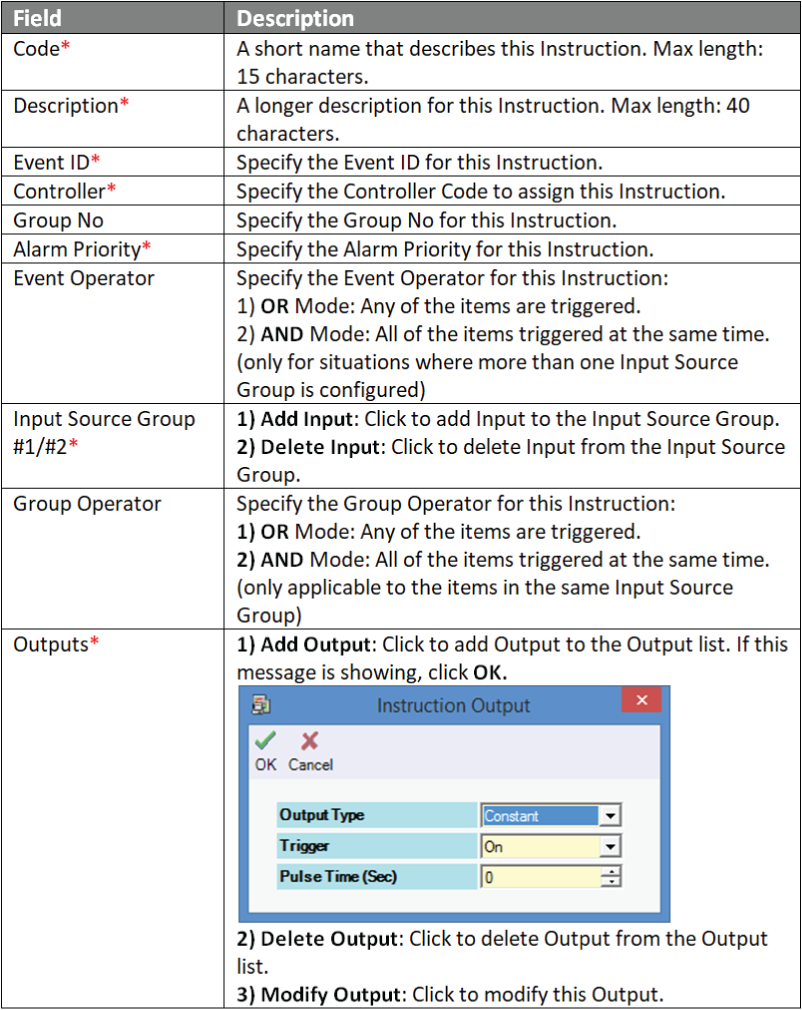
Step 1: Go to xPortalNet HS Client > System Setting > Instruction Control. The Instruction Setup window will be shown as below:
. Note
. . Step 3: Repeat steps 1 and 2 to add additional Instruction Setups as necessary.
.
Step 1: After completing the configuration settings, users MUST send all settings to the controller.
.
Step 1: To check the status of the controller, go to xPortalNet HSClient>Device List>Controller List to verify that the controller Status is Up.
|
Common Issue: | NA |
Date Documentation: | 28/5/2019 (Rev 1.1) |


PROOF-READ
.
.
.
© MicroEngine Technology Sdn Bhd (535550-U). All rights reserved.