How to Use Card Plus PIN Mode for XP-M1000i Controller
| Problem (Issue) Statement: | How to use Card + PIN mode for XP-M1000i controller |
| Description: | This article will guide users to configure XP-M1000i controller to be able to use Card + PIN mode in xPortalNet software. . Note To use Card + PIN mode for XP-M1000i, ensure that the Plato reader used is the Plato-P80KLS, which comes with the keypad for users to input the PIN number after flashing the access card. |
| Related Software: |
|
| Related Hardware: |
|
| System Application: | NIL |
| Symptom and Finding: | NIL |
| Cause: | For first time guide to configure XP-M1000i controller to be able to use Card + PIN mode in xPortalNet software. |
| Solution: | Summary:
. . Step-by-step Guide:
Step 1: Please follow the wiring diagram below for the connection between XP-M1000i controller to Plato-P80KLS reader. Note that the RC+ and RC- wires from the Plato-P80KLS reader is to be connected to the PC+ and PC- terminal on the XP-M1000i controller respectively. . Note To use Card + PIN mode in XP-M1000i controller, users will have to use the Plato-P80KLS reader as that reader is equipped with a keypad module, which will allow the card holder to flash the respective access card and input the PIN number for verification. . .
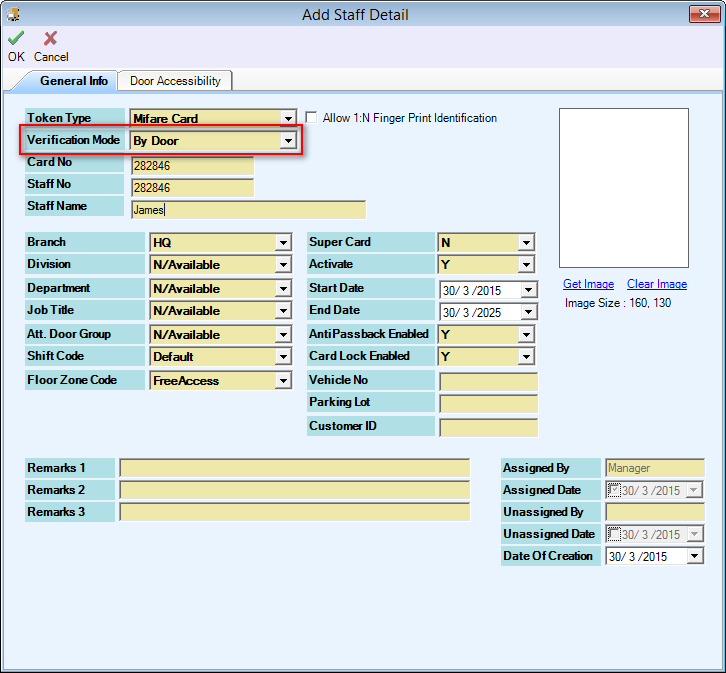
Step 1: Ensure that the prerequisites settings for the XP-M1000i controller has been configured in xPortalNet software. Knowledge Base Link Users may refer to How to Configure Connection, Controller, and Door Settings for XP-M1000i or XP-M1000i-SE21 Controller with xPortalNet Software to complete the prerequisite settings for the XP-M1000i controller in xPortalNet software. . . Step 2: Go to xPortalNet Client > Data Setup > Access Data Setting > Staff Records > Add. The Add Staff Detail window will be shown. Ensure that the Verification Mode field is selected to be "By Door". Click OK to save the changes and exit from the Add Staff Detail window. . Note Alternatively, users can also select the existing Staff Records > click Edit and edit existing Staff Records to ensure the Verification Mode field is selected as "By Door" . . Step 3: Go to xPortalNet Client > Data Setup > System Setting > Door > select the affected Door > Edit. The Edit Door window will then be shown. At the Higher Security Mode field, select the "Token Type + PIN", and select the Higher Security TZ as "001" to ensure that Higher Security Mode is always on. Click OK to save the changes. . Note Alternatively, users can also configure a different time zone setting and assign it to the Higher Security TZ field, so that the Card + PIN mode will only be activated on certain time of the day. Users may refer to How to Configure Time Zone Settings in xPortalNet Software for the complete steps to configure Time Zone settings in xPortalNet software; and then assign this same Time Zone number to the Higher Security TZ field. |
| Common Issues: | NIL |
| Porting Date: | 13/02/2020 |


PROOF-READ
.
Related Articles.
Containing the label "xp-m1000i"
.
.
© MicroEngine Technology Sdn Bhd (535550-U). All rights reserved.