How to Troubleshoot the xPortalNet Client Software Which Suddenly Showed the CliStaffAdmin.dll File is Missing Error Message
Problem (Issue) Statement: | How to troubleshoot the xPortalNet Client software which suddenly showed the CliStaffAdmin.dll File is Missing Error Message |
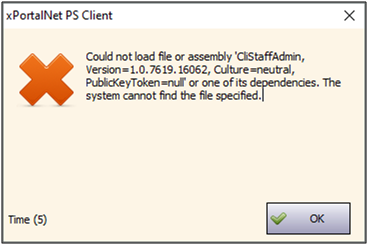
Description: | After installing or updating to xPortalNet v1.5.0.203 software on Windows 10 operating system and running for a period of time, some of the functions such as the Visitor Sign In / Out, Acknowledgement of Alarms in Alarm List or any Access Data Settings were unable to be used by the users. An error message will then be shown to indicate that the "CliStaffAdmin.dll" file is missing. |
Related Software: |
|
Related Hardware: | NIL |
System Application: | NIL |
Symptom and Finding: | When the system users are trying to access certain functions in xPortalNet Client, the software will prompt the following error message to indicate that the "CliStaffAdmin.dll" file is missing. |
Cause: | The "CliStaffAdmin.dll" file was quarantined and removed from "C:\Program Files (x86)\MICROENGINE\xPortalNet PS\Client" as the Windows Real Time Virus Protection detected the xPortalNet software as providing another remote access to the PC. |
Solution: | Summary:
. Step-by-step Guide:
Step 1: Click on the Search icon at the taskbar. . Step 2: Type in the following phrase "Virus & threat protection" in the search bar. Click on the search result to open the system settings window. . Step 3: The Virus & threat protection window will then be shown. Click Manage Settings to continue. . Step 4: The Tamper Protection window will then be shown. Users should scroll down to find the Exclusions section, and click on Add or remove exclusions to continue. . Step 5: The Exclusions window will then be shown. Click on the + Add an exclusion button to add a program to the exclusion list. . Step 6: The following drop-down menu will then be opened. Select Folder. . Step 7: The Select Folder window will then be shown. Locate the "C:\Program Files (x86)\MICROENGINE\xPortalNet PS" folder. Then, click Select Folder to continue. . Step 8: The User Account Control window will then be prompted. Click Yes to continue. . Step 9: Back at the Exclusions window, users will be able to see that the MicroEngine folder path has been added to the exclusions list. . .
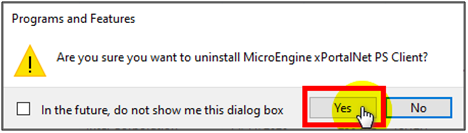
Step 1: Open the Programs and Features settings window. . Step 2: The Uninstall or change a program window will then be shown. Locate and select MicroEngine xPortalNet Client and click Uninstall. . Step 3: The Programs and Features Window will be shown to prompt users for confirmation to uninstall the software. Click Yes to continue and wait for the uninstall process to be completed. . Step 4: Then users can reinstall the xPortalNet software. Knowledge Base Link Users may refer to How to Install xPortalNet Software for the complete steps to install xPortalNet software. |
Common Issues: | NIL |
Date Documentation: | 9/9/2020 (Rev 1.0) |


PROOF-READ
.
.
.
© MicroEngine Technology Sdn Bhd (535550-U). All rights reserved.