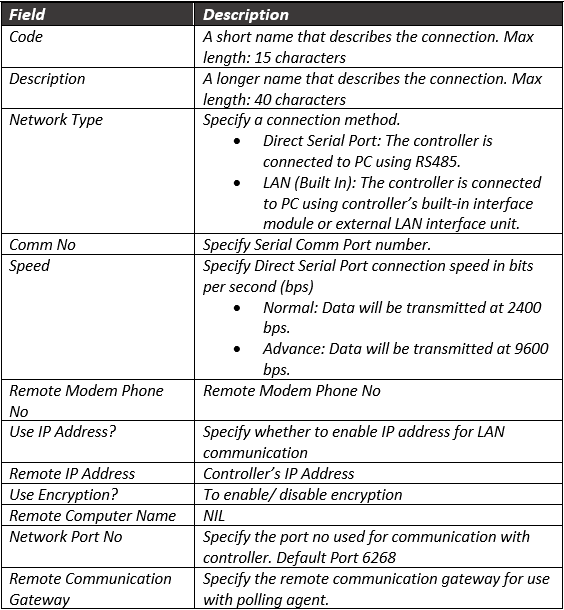
How to configure connection, controller, and door settings for XP-Q1200 / XP-Q1200/IP controller with xPortalNet HS v2.0 software
Problem (Issue) Statement: | How to configure connection, controller, and door settings for XP-Q1200 / XP-Q1200/IP controller with xPortalNet HS v2.0 software |
| Description: | A guide to configure connection, controller, and door settings for XP-Q1200 / XP-Q1200/IP controller with xPortalNet HS v2.0 software. |
| Related Software: |
|
| Related Hardware: |
|
| System Application: |
|
| Symptom and Finding: | NA |
| Cause: | For first time configuration on connection, controller, and door settings for XP-Q1200 / XP-Q1200/IP controller with xPortalNet HS v2.0 software. |
| Solution: | Warning!
Warning! We do not recommend controllers and PC communication to be connected via Wifi (using Wifi dongles) as Wifi connection is unstable and can make controller statuses be shown as "Down".Summary:
Step-by-step Guide:
Knowledge Base Link Users may refer to /wiki/spaces/MICS/pages/128843793 for the complete pre-configuration steps.
Step 1: Open xPortalNet HS v2.0 Comm Services.
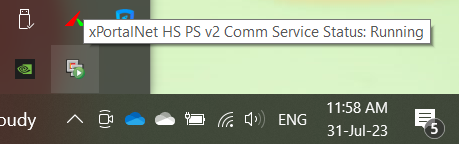
Step 2: Ensure that the xPortalNet HS v2.0 Comm Service Status is Running.
Figure 1: xPortalNet HS v2.0 Comm Service Runing pop up message Step 3: Right-click the xPortalNet HS v2.0 Comm Service icon at the notification bar, click Check Service Info and verify that the software detects the plugged in USB license key.
Figure 2: Valid software license key detected indication.
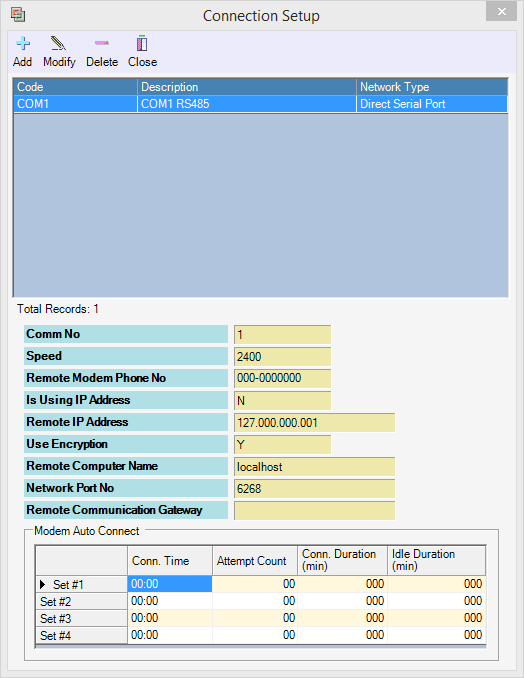
Step 1: Assign static IP address for XP-Q1200 / XP-Q1200/IP controller via web diagnostic. Knowledge Base Link Users may refer to /wiki/spaces/MICS/pages/129073156 for the complete configuration steps. Step 2: Step 2: For Connection setup, open xPortalNet HS v2.0 Server > Server Admin > Connection Setup. The Connection Setup window shown as below.
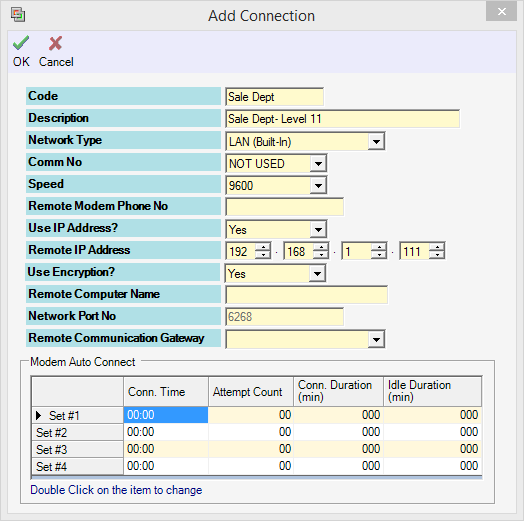
Figure 3: Connection Setup Window Step 3: Click Add to add a new connection. The Add Connection window will be shown as below. Click OK to save the changes.
Figure 4: Add Connection Window
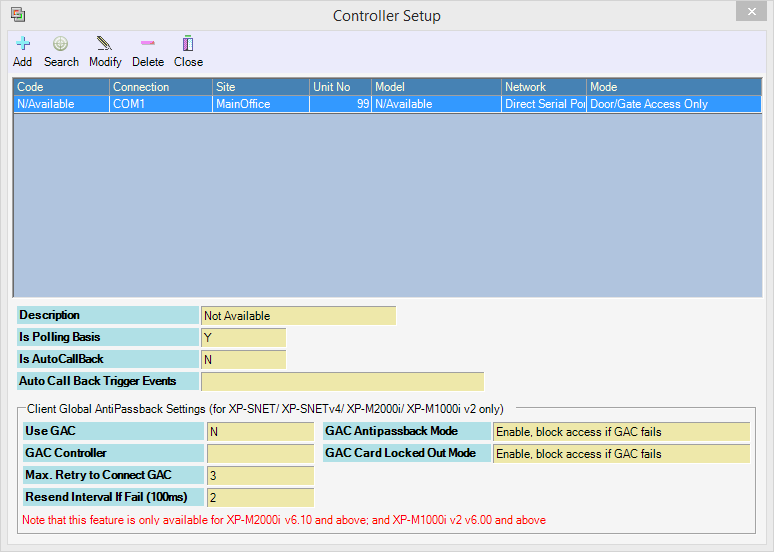
Step 4: For Controller Setup, go to Server Admin > System Device Setup > Controller. The Controller Setup window shown as below.
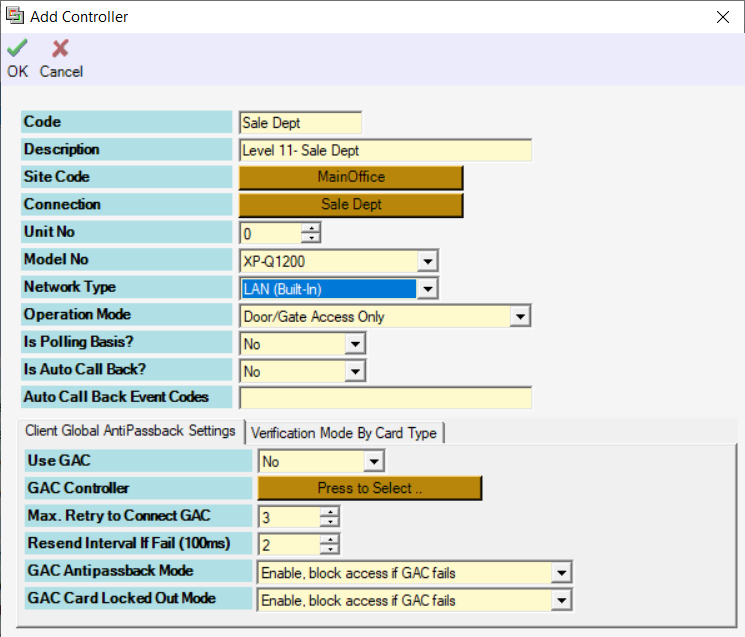
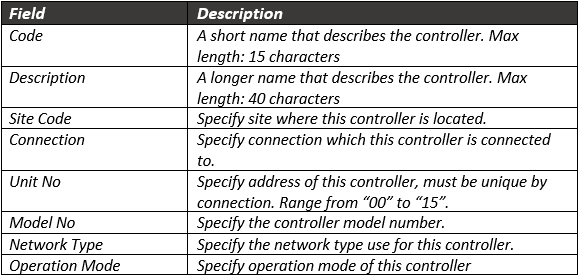
Figure 5: Controller Setup Window Step 5: Click Add to add a new controller. The Add Controller window will be shown as below. Click OK to save the changes.
Figure 6: Add Controller window.
Step 6: The following message window will be shown to indicate that the record is Added. Click Ok to continue.
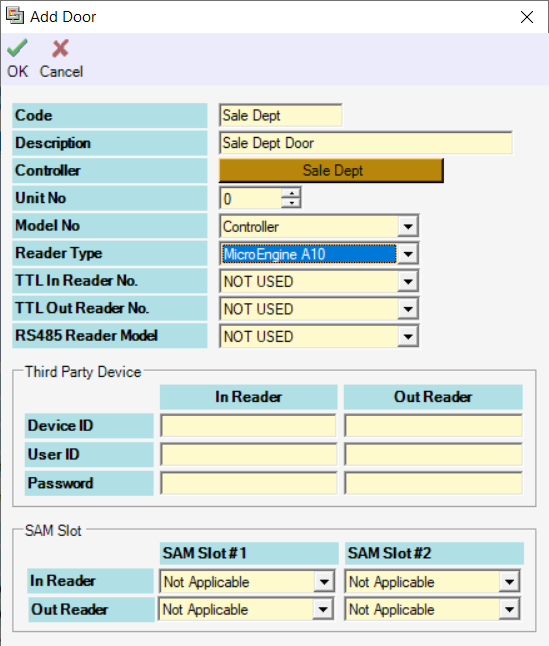
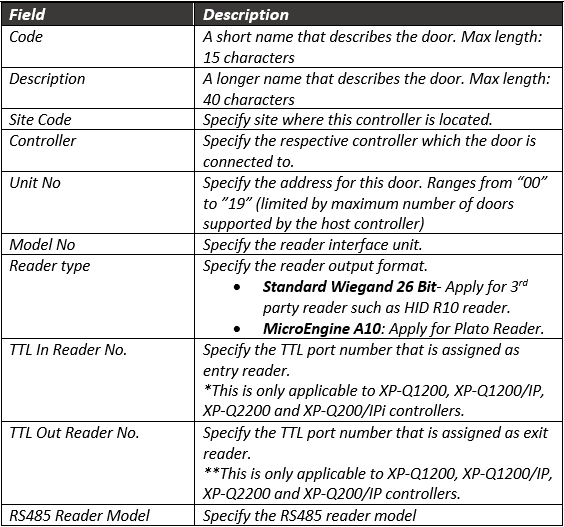
Figure 7: Record Added Window. Step 7: For Door Setup, the Add Door window will be prompted by xPortalNet HS v2.0 software as shown below. Fill in all information and click OK to save the changes.
Figure 8: Add Door Window
Note
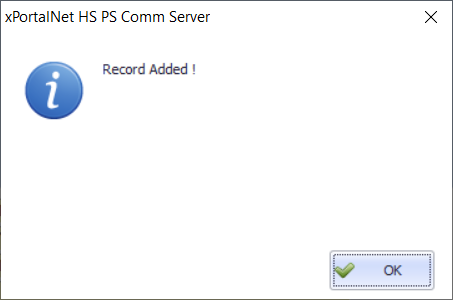
Step 8: The following message window will be shown Record Added and click OK button.
Figure 9: Record Added Window
Step 1: After completing the Connection, Controller and Door settings, users can now check the status of the controller and door. Step 2: To check the status of the controller, go to xPortalNet Server > Device List > Controller List to verify that the controller Status is Up.
Figure 10: Controller List under Device List tab |
| Common Issues: | NIL |
| Date Documentation | 31/7/2023 (Rev1.0) |


© MicroEngine Technology Sdn Bhd (535550-U). All rights reserved.