How to Defragment Hard Disk by Schedule in Windows for xPortalNet Server PC
Problem (Issue) Statement: | How to defragment hard disk by schedule in Windows for xPortalNet Server PC |
Description: | Every hard drive dies eventually, and when it's near death, user will see the signs: strange noises, corrupted files, crashing during boot and very slow transfer speeds all point to the inevitable end. |
Related Software: | NIL |
Related Hardware: |
|
System Application: | NIL |
Symptom and Finding: | NIL |
Cause: | For first time guide to defragment hard disk by schedule in Windows for xPortalNet Server PC. |
Solution: | Summary:
. Step-by-step Guide:
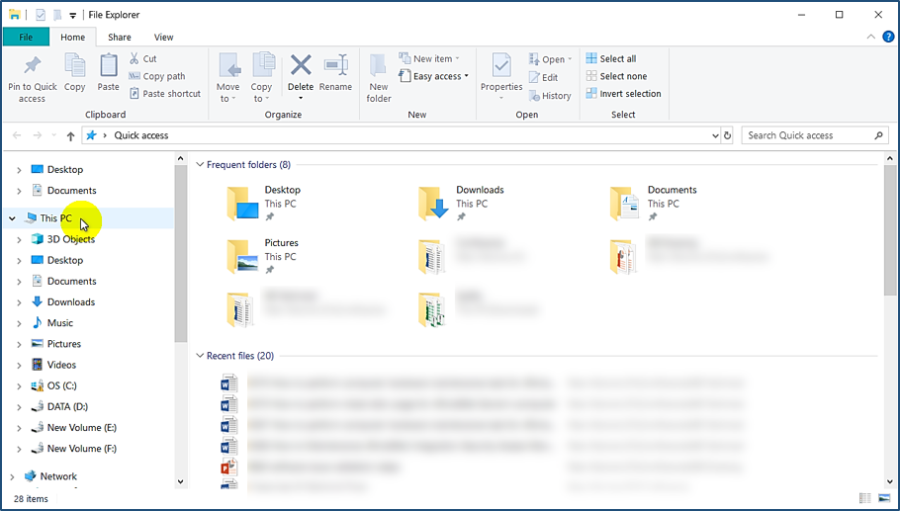
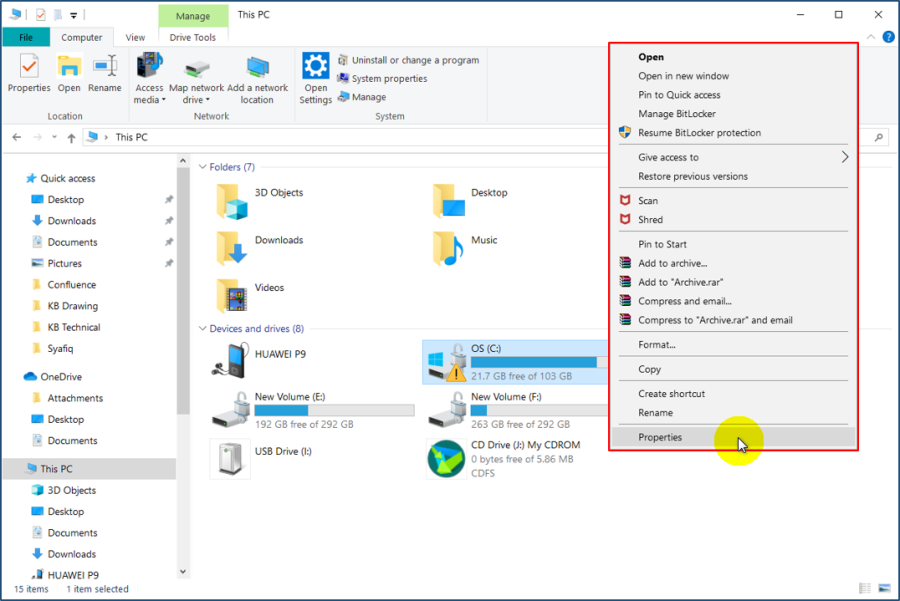
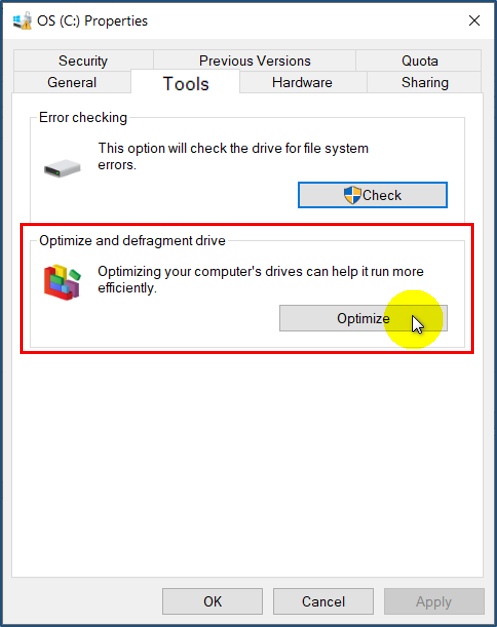
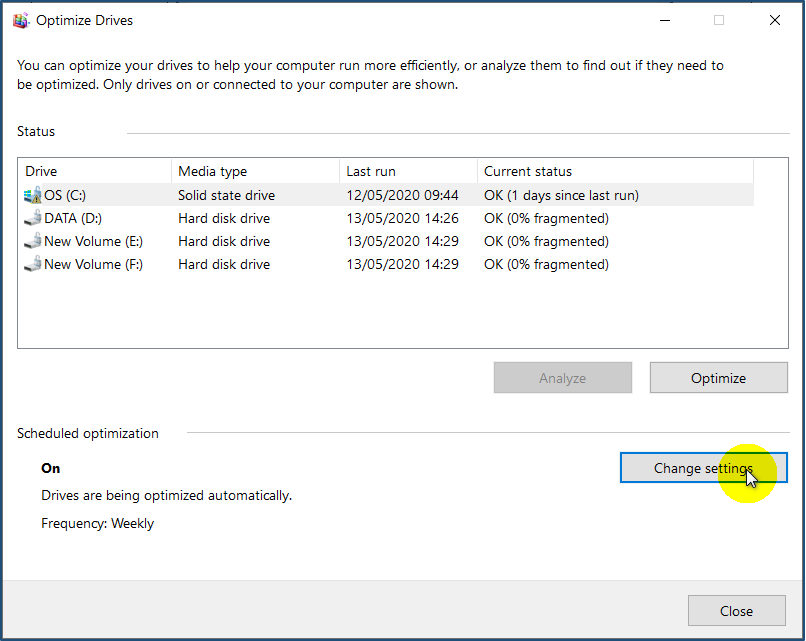
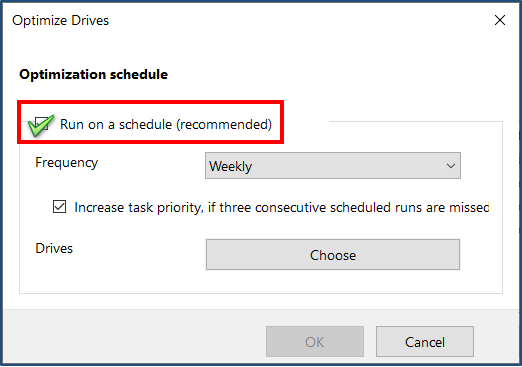
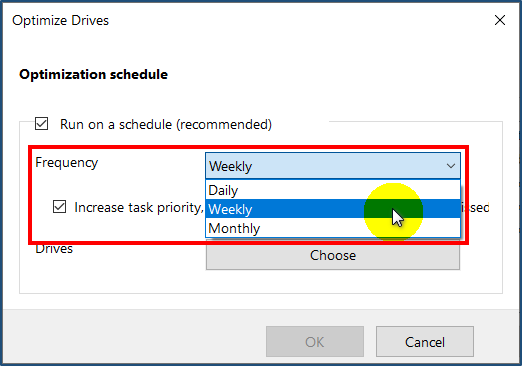
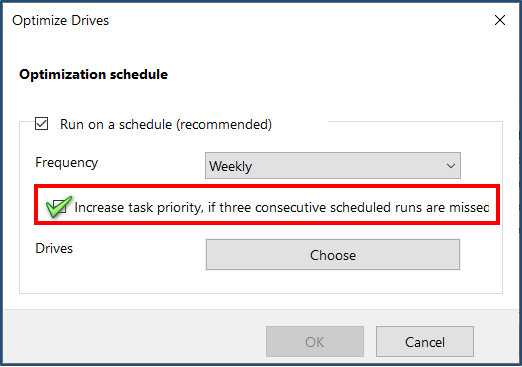
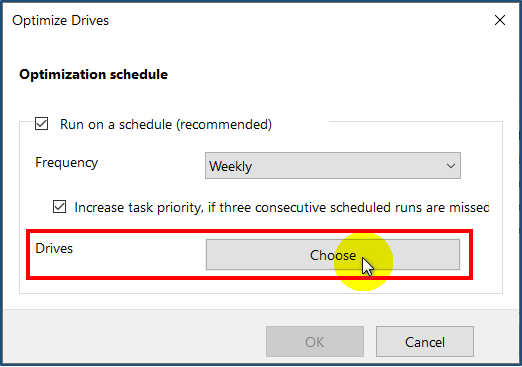
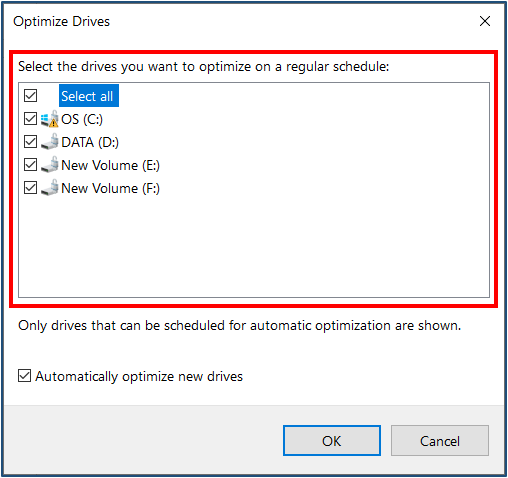
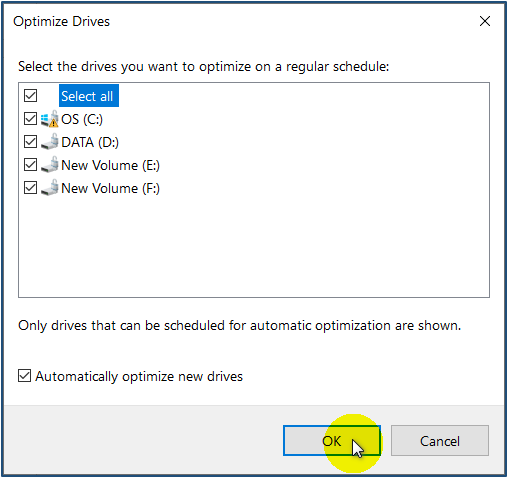
Step 1: Open new File Explorer window. Press Windows Key + E and click This PC. . Step 2: Next, the This PC window will be shown. Right-click on any drive and then click Properties. . Step 3: The Properties window for the selected drive will be shown. Here, click the Tools tabs and click Optimize under the Optimize and defragment drive section. . Step 4: The Optimize Drive window will then be shown. Click Change setting to continue. . Step 5: The following window will be shown. Tick the Run on a schedule (recommended) tickbox to enable the scheduled optimization. . Step 6: Select Daily, Weekly or Monthly frequency according to user needs. . Step 7: User also can tick the Increase task priority, if three consecutive scheduled runs are missed tickbox to stay notified about missed optimizations. . Step 8: Next, under the Drive field, click Choose to specify the drives to schedule the optimization task for. . . Step 9: Click OK to complete the process. |
Common Issue | NIL |
Date Documentation: | 13/5/2020 (Rev 1.0) |
PROOF-READ
.
Related Articles.
Containing the label "system-maintenance"
.
.
© MicroEngine Technology Sdn Bhd (535550-U). All rights reserved.
