How to Configure Door settings for Attendance Capturing in xPortalNet Software
| Problem (Issue) Statement: | How to configure Door settings for attendance capturing in xPortalNet software |
| Description: | In order for users to use the controller in attendance capturing mode, users will have to enable the Attendance Capturing Mode in the software to allow the controller to capture attendance every time users access the door. Users can then generate the Daily or Monthly Attendance report which can then be used for payroll activities. This article will guide users on how to configure the software for door attendance capturing. |
| Related Software: |
|
| Related Hardware: | NIL |
| System Application: | NIL |
| Symptom and Finding: | NIL |
| Cause: | For first time guide on how to configure door settings for attendance capturing in xPortalNeNett software. |
| Solution: | Summary: . . Step-by-step Guide:
Step 1: Check and ensure that there are no door event transactions with the door of "Door???" in the Latest Event List window. . Note Transaction with "Door???" means that the Door Unit No has been configured incorrectly at Door Setup window.
. .
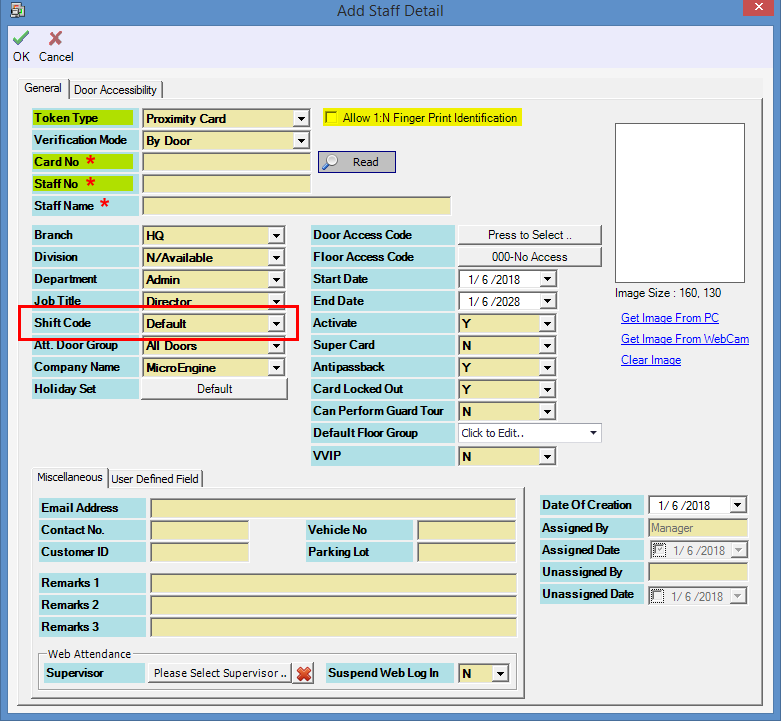
Step 1: Go to xPortalNet Client > Data Setup > Access Data Setting > Staff Records > select the staff to be modified > Modify. The Edit Staff Detail window will be shown. At the Shift Code field, select the correct Work Schedule for the staff. . Knowledge Base Link Users may refer to /wiki/spaces/MICS/pages/208601410 for the complete steps on how to pre-configure the work schedule to be assigned for this step. . . Step 2: Click OK to save the changes. . .
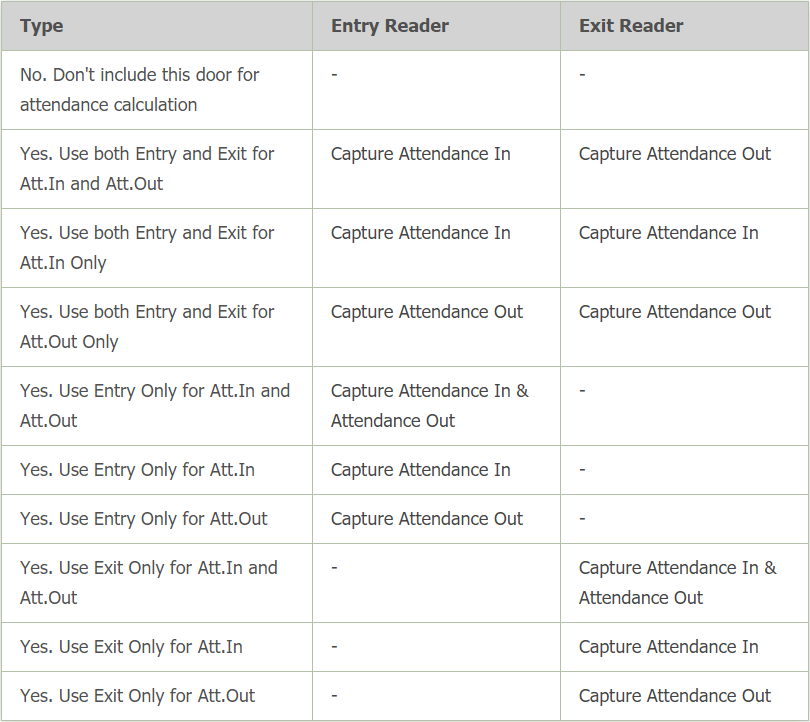
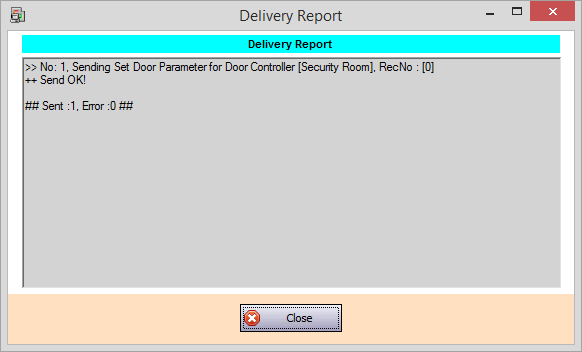
Step 1: Go to xPortalNet Client > Data Setup > System Device Setting > Door > select the door to be modified > Modify. At the Is Attendance Capturing Door field, select appropriately according to the application of the controller and reader. . Note There are 10 different options to choose from for the field of "Is Attendance Capturing Door". Refer to the following table for the descriptions of the complete options: . . Warning! If the following mode is selected, door attendance will not be captured at any time. . . Step 2: Click OK to save the changes. The Delivery Report window will then be shown. . Step 3: To generate the attendance report, please rebuild the respective attendance before hand. |
| Common Issues: | NIL |
| Porting Date: | 31/10/2019 |


PROOF-READ
.
.
.
© MicroEngine Technology Sdn Bhd (535550-U). All rights reserved.