How to Troubleshoot the System if the xPortalNet Server PC is Able to Ping All IP Controllers in Command Prompt, but All Controller Statuses are Shown as Down in xPortalNet Software
Problem (Issue) Statement: | How to troubleshoot if all IP controllers are able to ping in command prompt but unable to UP in xPortalNet software |
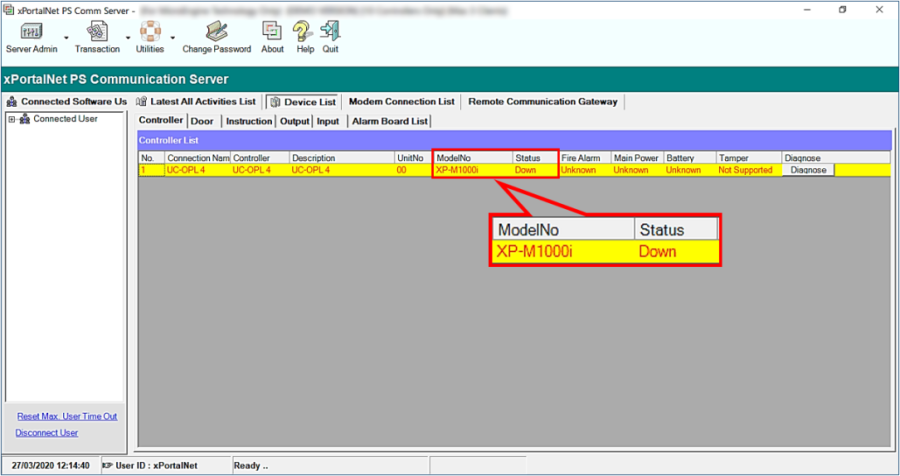
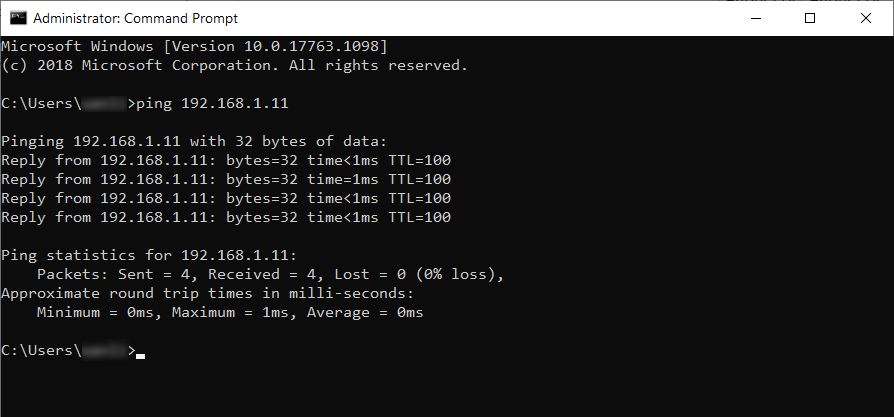
Description: | During the process of Servicing and Maintenance at site, or attending to ad-hoc troubleshooting for Card Access System breakdown calls, System Integrator will mostly face issues on how to troubleshoot the system when the controller statuses are shown as Down at xPortal software, but the controller IP address is able to be pinged from the xPortalNet Server PC. |
Related Software: |
|
Related Hardware: | All IP connection based controller models
|
System Application: |
|
Symptom and Finding: | After ensuring that the model for the controller was correctly selected, the controller status is still shown as Down in xPortalNet software. . User then used the Command Prompt to ping the controller, and the Command Prompt is able to receive response from the controller's iP address. |
Cause: |
|
Solution: | Warning!
. . Summary:
. Step-by-step Guide:
Step 1: Users have to check and ensure that Window Firewall has enable the software for communication. Knowledge Base Link Users may refer to How to Allow Software to Communicate Through Windows Firewall to complete the process. . . Step 2: Check that xPortalNet software has properly been added into the antivirus software's exception list. Knowledge Base Link Users may refer to How to Add a Software into Antivirus Exception List to complete the process. . . Step 3: If all configurations are all checked and set properly but controllers still unable to show UP status in xPortalNet software, user may to refer next section: To cross check the configuration settings between xPortalNet software and controller's Web Diagnostic. . .
Step 1: Cross check and ensure that the configuration settings between xPortalNet software and controller's Web Diagnostic is the same. Knowledge Base Link Users may refer to How to Troubleshoot the Issue where the Controller Status is Shown as Down in xPortalNet Software due to Incorrect Software Configuration for the complete steps. . Step 2: If the settings are the same between xPortalNet software and controller's Web Diagnostic, users should proceed to the next section: To check the xPortalNet Server PC IP Address. .. .
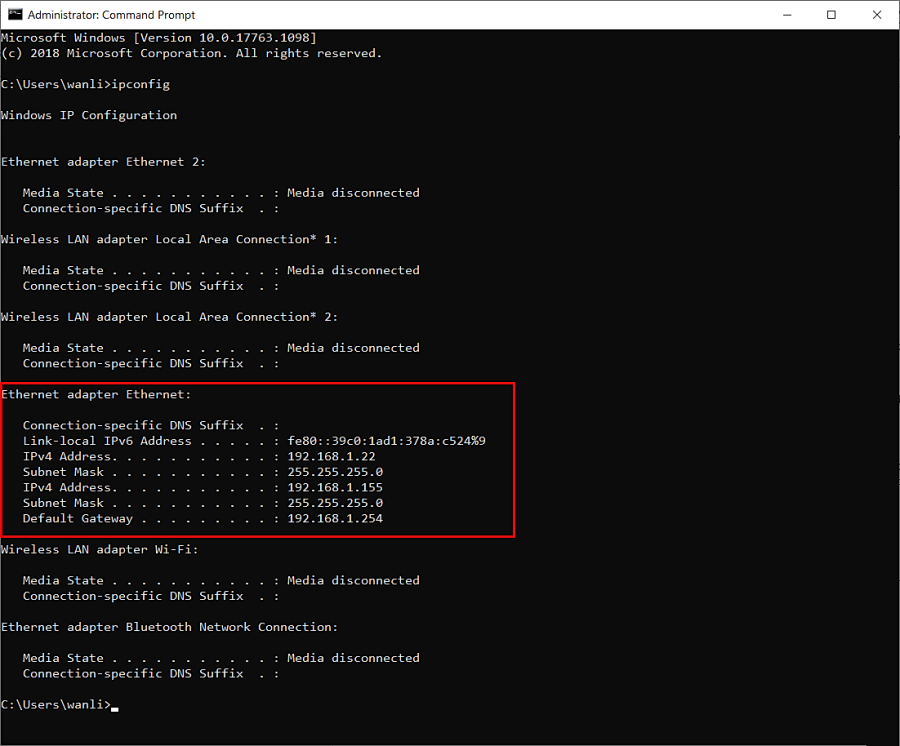
Step 1: Launch the Command Prompt using search bar on the xPortalNet Server PC. Knowledge Base Link Users may refer to How to Launch the Command Prompt in Windows Operating System to launch the Command Prompt. . . Step 2: Type ipconfig and press Enter to display the networking information on the xPortalNet Server PC. . Step 2: Under the Ethernet Adapter Ethernet section, the IP address, subnet mask and default gateway for the network adaptor is shown. Users can also check the static IP address assigned to xPortalNet Server's PC. . Step 3: If the static IP Address configured in the software is incorrect, users will have to correct the configuration settings. Knowledge Base Link Users may refer to How to Pre-configure Network Connection for IP Controllers to complete the process. . Step 4: If the controller's status still remained as Down, proceed to the next section: To check the Device Communication IP Address configured on xPortalNet Services. . .
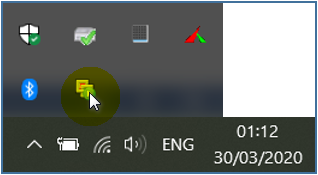
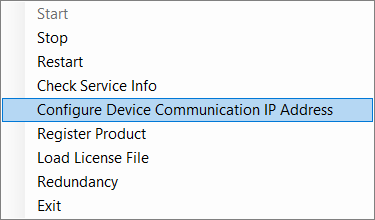
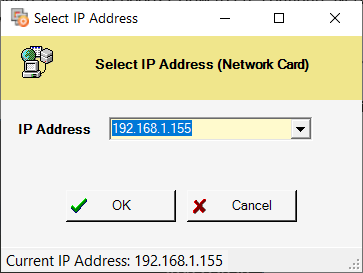
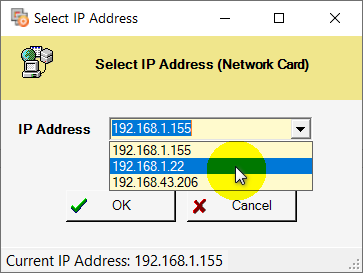
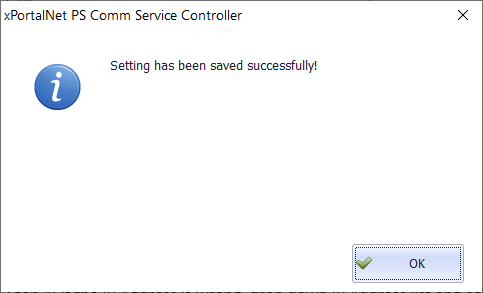
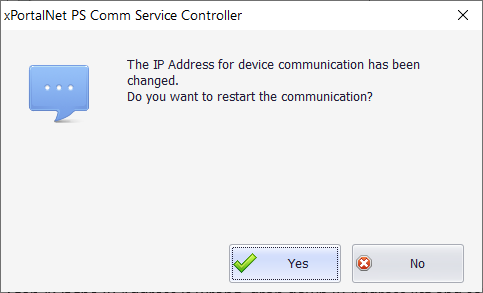
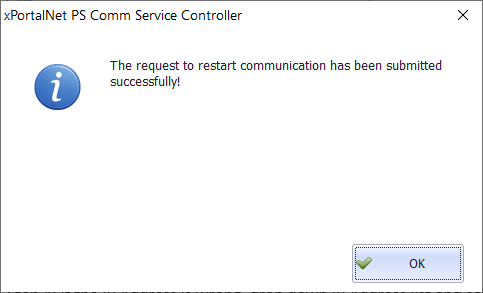
Step 1: Go to Taskbar on desktop > select xPortalNet Services. . Step 2: Right click the xPortalNet Service and select Configure Device Communication IP Address. . Step 3: The Set IP Address window will be shown as below and will indicate the current IP Address (xPortalNet Server PC current IP Address). . Step 4: If the IP Address is wrong, click on the drop-down arrow and select the correct IP address. Click OK to save the changes. . Step 5: The following message will be shown to indicate that the Setting has been saved successfully. Click OK to continue. . Step 6: Next, the software will prompt the message to indicate that The IP Address for device communication has been changed. Click Yes to restart the communication. . Step 7: Last message will be shown and indicate that the request to restart communication has been submitted successfully. Click OK to complete the process. |
Common Issue | NIL |
Date Documentation: | 27/3/2020 (Rev 1.0) |
PROOF-READ
.
Related Articles.
Containing the label "controller-down"
.
.
© MicroEngine Technology Sdn Bhd (535550-U). All rights reserved.
