How to Continue to Backup xPortalNet Software Database if SQL Management Studio Show Error Message of Sector Size
| Problem (Issue) Statement: | How to continue to backup xPortalNet software database if SQL Management Studio show error message of sector size |
| Description: | When customers attempted to create a new backup file for the XPNDB folder in SQL Server Management Studio, the following error message is prompted by the SQL Server Management Studio software: |
| Related Software: |
|
| Related Hardware: | NIL |
| System Application: | NIL |
| Symptom and Finding: | Previously, the customer created a backup file from his personal computer so that he can backup the software settings to the end-user's Server PC. Then, the customer makes additional changes in the end-user's Server PC, and after that, the customer wants to create another backup file to save all the new changes, and is then showed the error message as shown above. The error message did not allow for the additional backup process to be completed in the end-user's Server PC. |
| Cause: | The initial backup file was created using a different sector size, and the end-user's Server PC is using a different sector size for the SQL database. Therefore, it is now not possible to use the same backup file. |
Summary:
. . Step-by-step Guide:
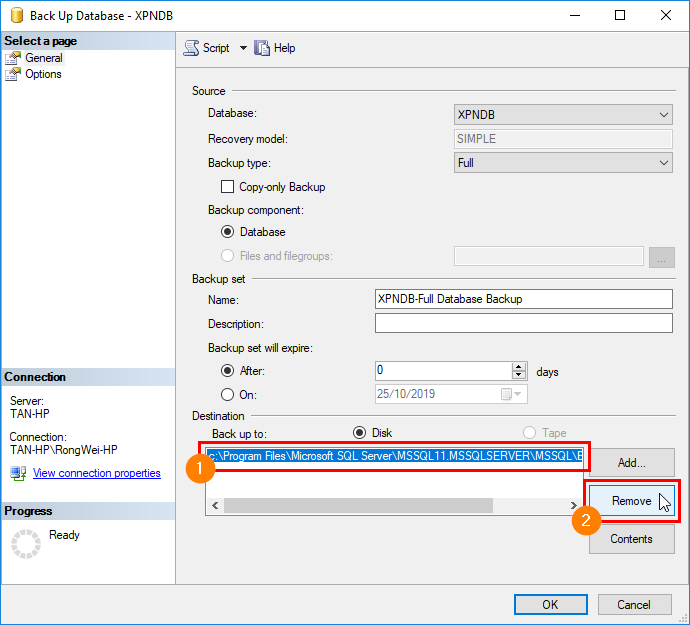
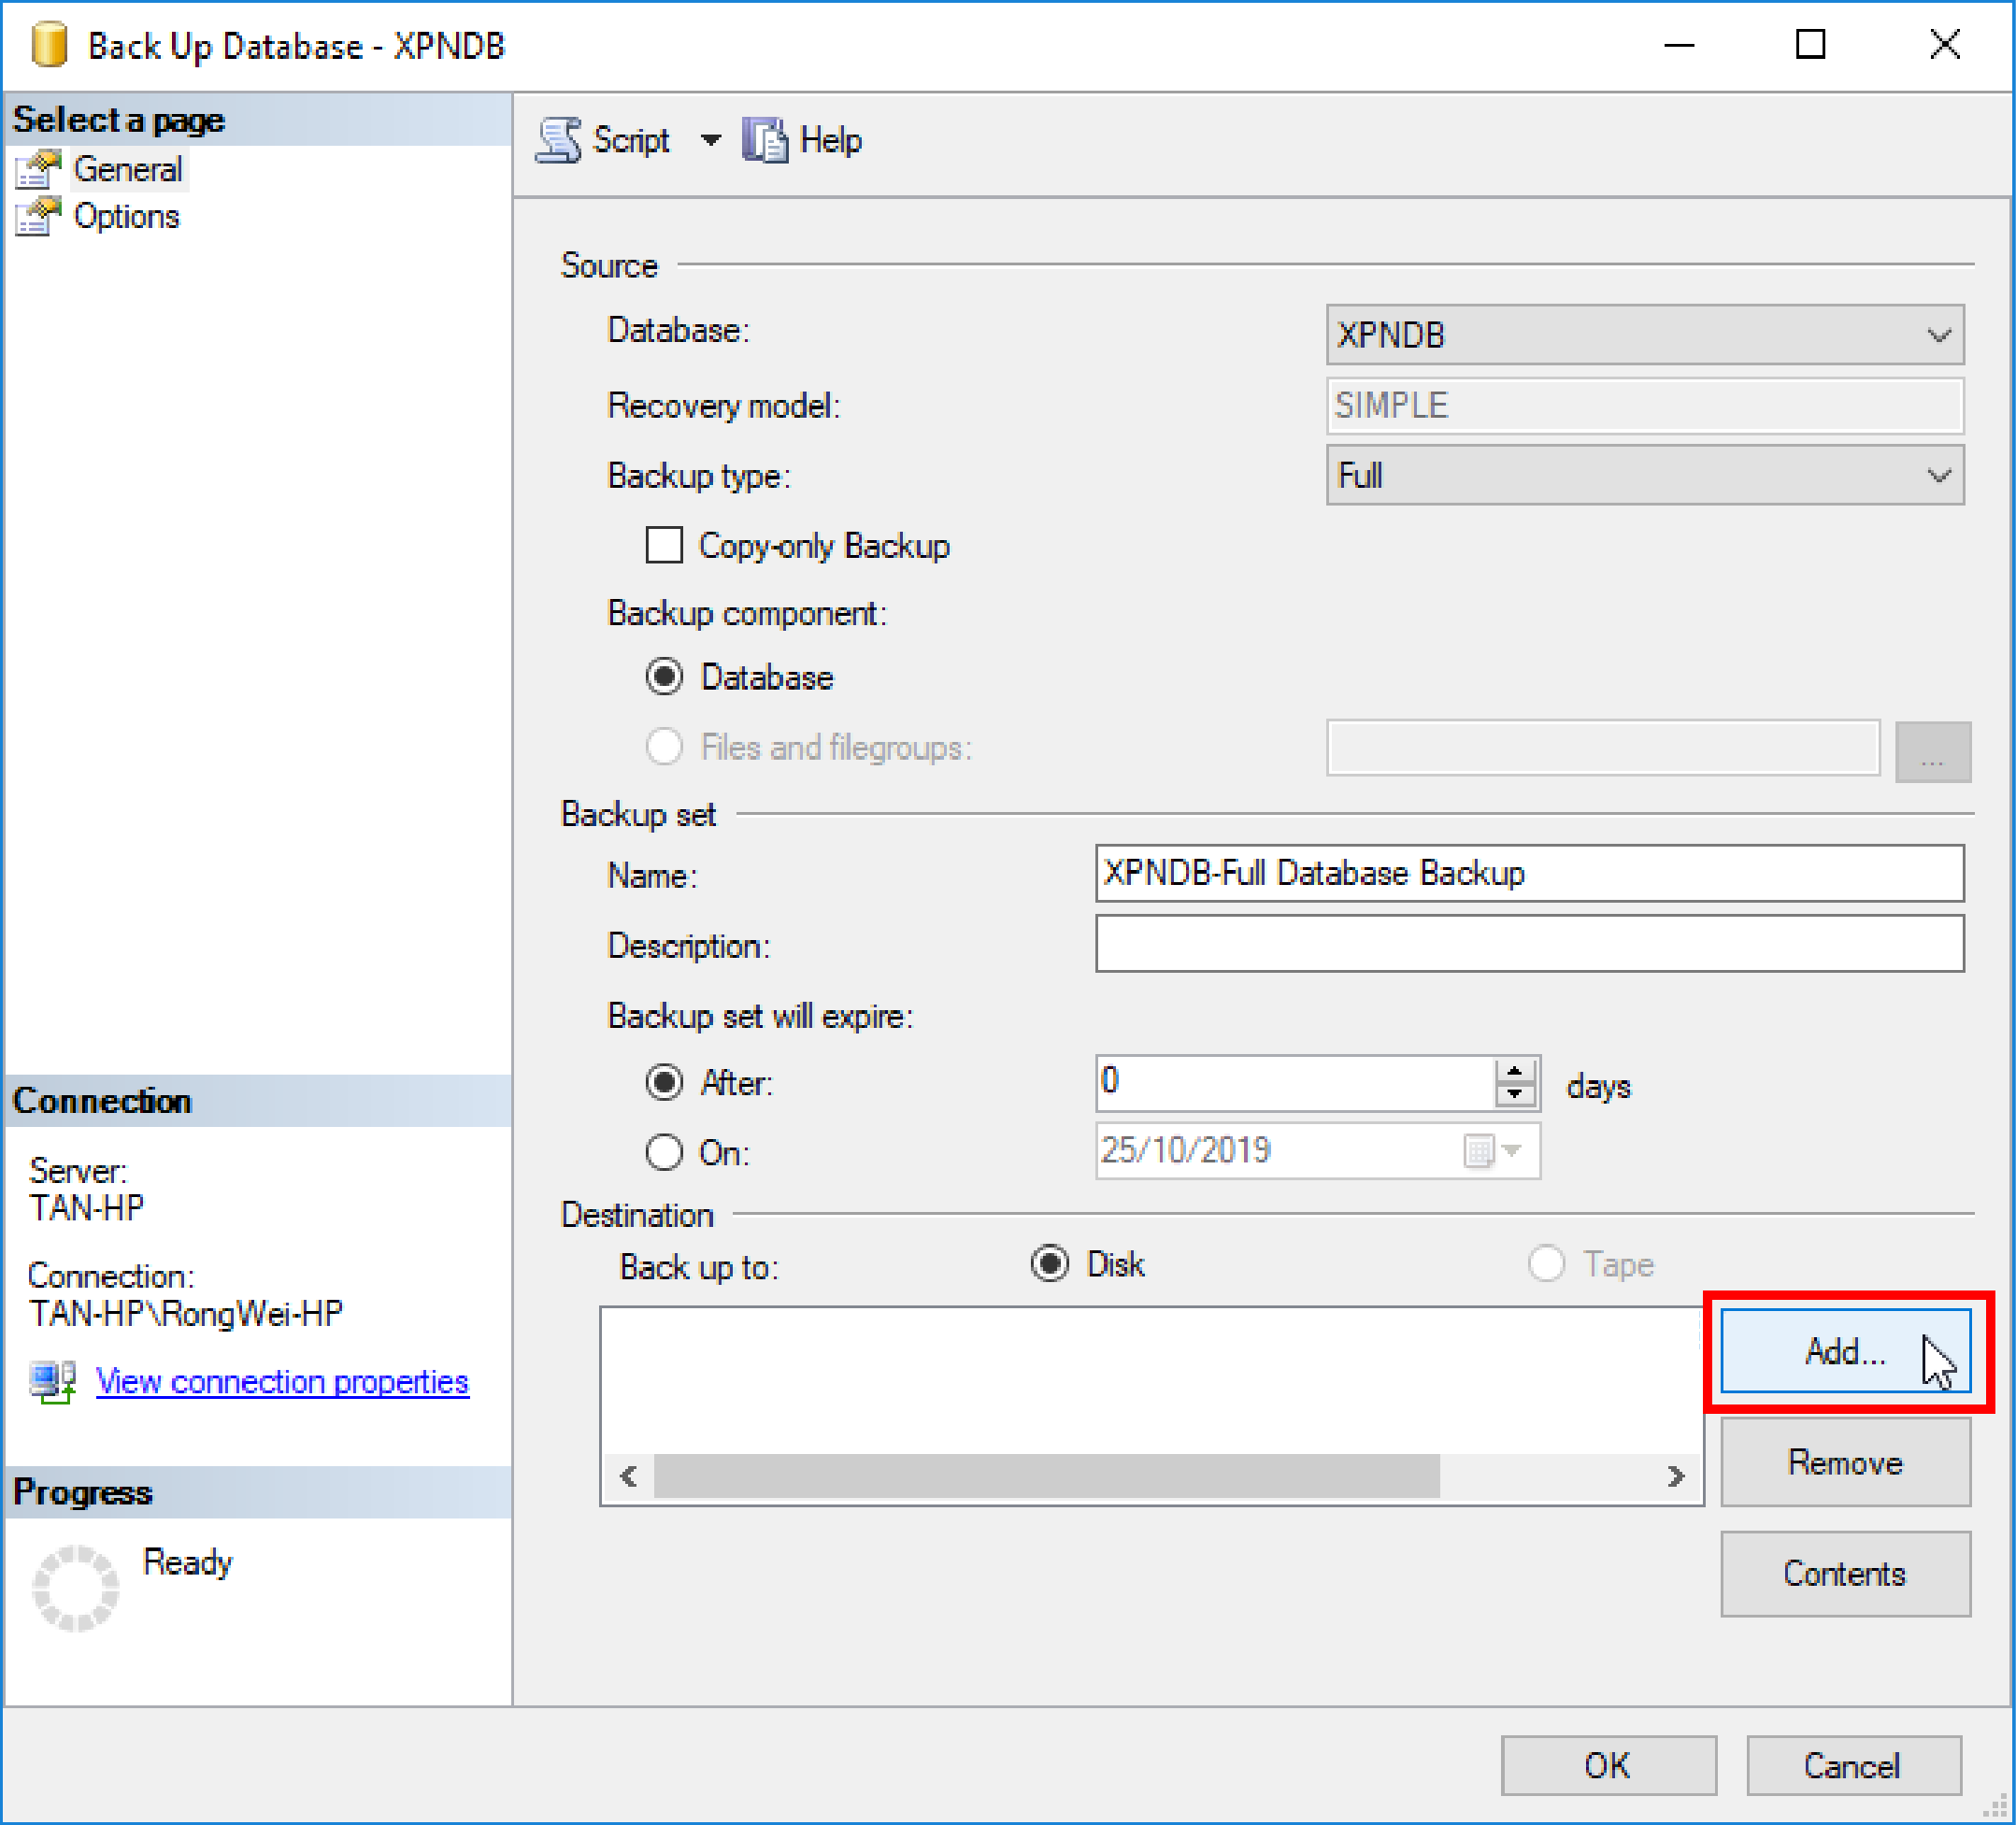
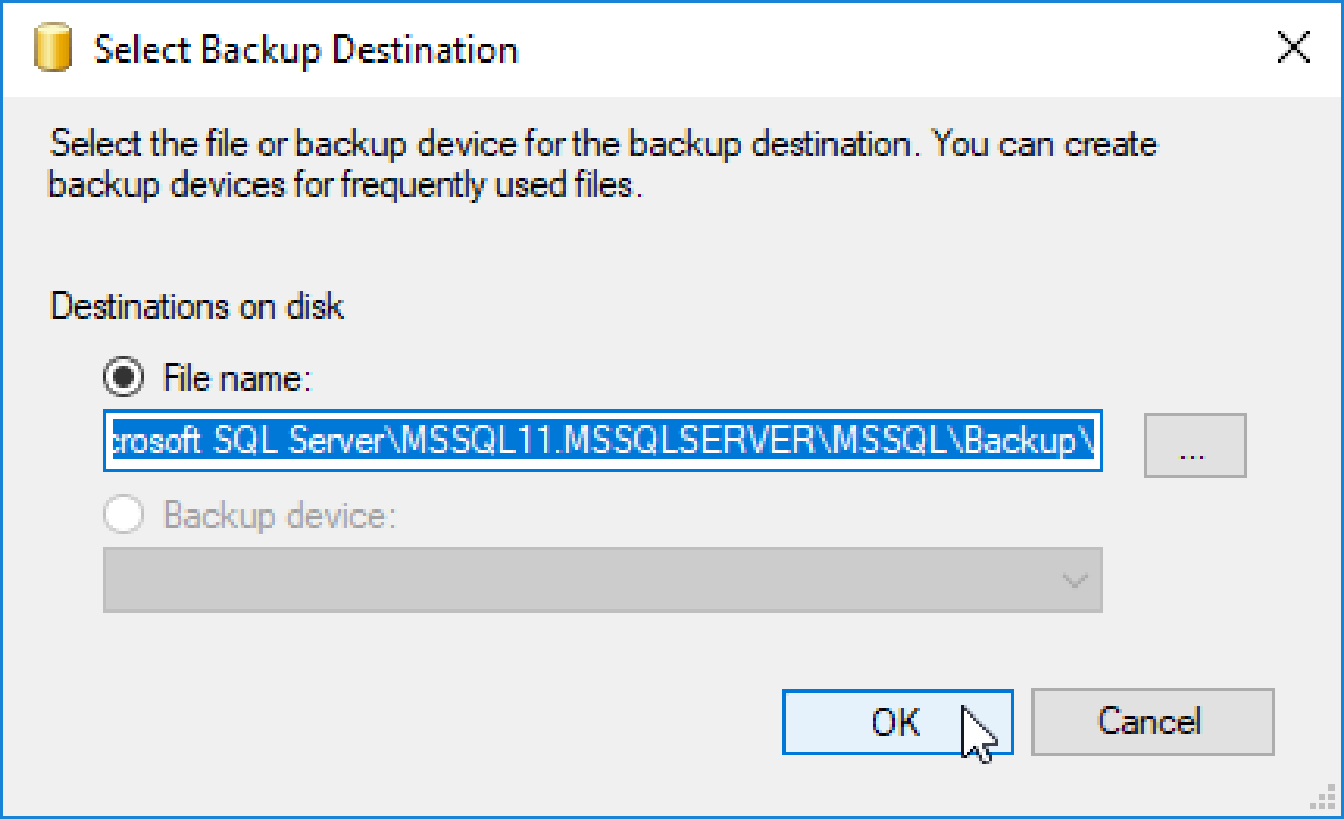
Step 1: Double-click on the SQL Management Studio software icon. . Step 2: The Connect to Server window will be shown on top of the Microsoft SQL Server Management Studio window. Click Connect to login to the SQL Server Management Studio. . Step 3: Once successfully logged into the SQL Server Management Studio, the Object Explorer panel will be shown. Expand the Database folder. . Step 4: Once the Database folder is expanded, select XPNDB folder under Database folder. Right-click XPNDB > Tasks > Back Up... . Step 5: The Back Up Database - XPNDB window will then be shown. Under the Destination section, select the existing back up file path and click Remove. . Step 6: Once the existing file path is removed, click Add to add a new file path for the backup file. . Step 7: The Select Backup Destination window will be shown. Keep the file path as default and click OK to save the changes. . Step 8: Users can now proceed to backup the XPNDB database as usual. Knowledge Base Link Users may refer to How to Backup xPortalNet Database into .bak File Format for the complete steps on how to backup XPNDB database. | |
| Common Issues: | NIL |
| Date Documentation: | 25/10/2019 |


PROOF-READ
.
.
.
© MicroEngine Technology Sdn Bhd (535550-U). All rights reserved.