How to Sign In Visitor with Static QR Code through xPortalNet Software
| Problem (Issue) Statement: | How to sign in visitor with Static QR code through xPortalNet software |
| Description: | This article provides a guide for system user to sign in the visitor with Static QR code type. By signing in the visitor with QR code, visitor is allowed to enter the premise using the static QR code which is only valid within the visit period. |
| Related Software: |
|
| Related Hardware: |
|
| System Application: | NIL |
| Symptom and Finding: | NIL |
| Cause: | For first time guide to sign in visitor with static QR code through xPortalNet software. |
| Solution: | Pre-requisites / Requirements
Summary:
. Step-by-step Guide:
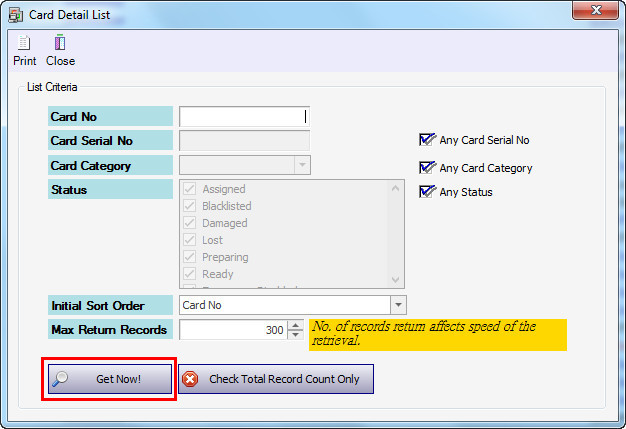
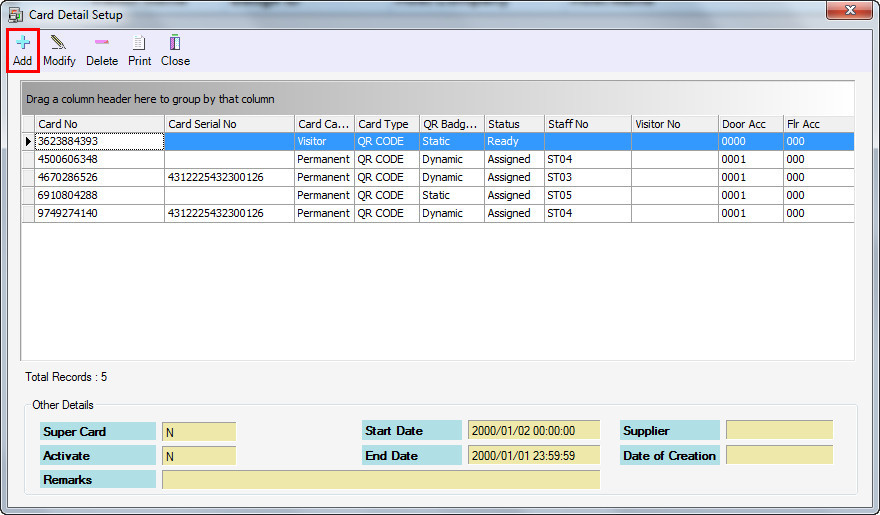
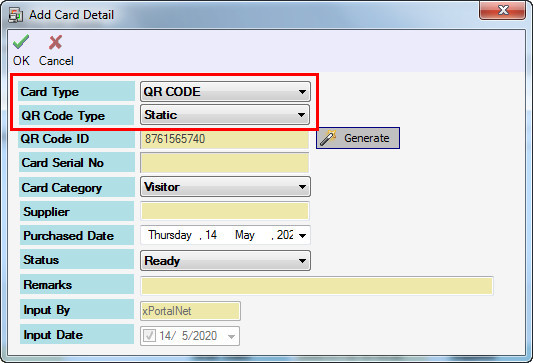
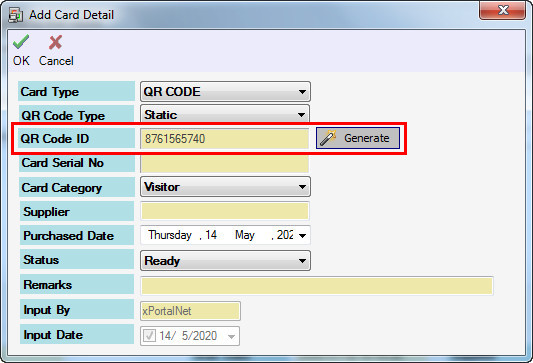
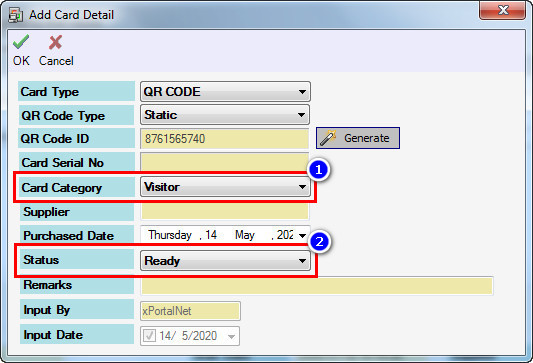
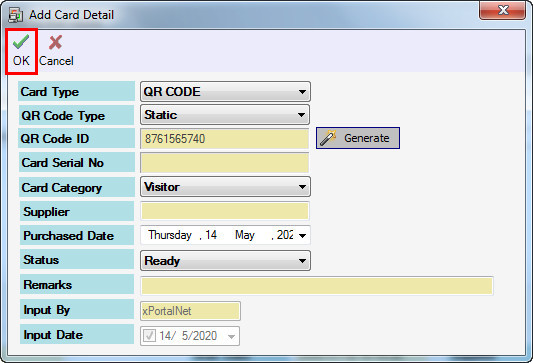
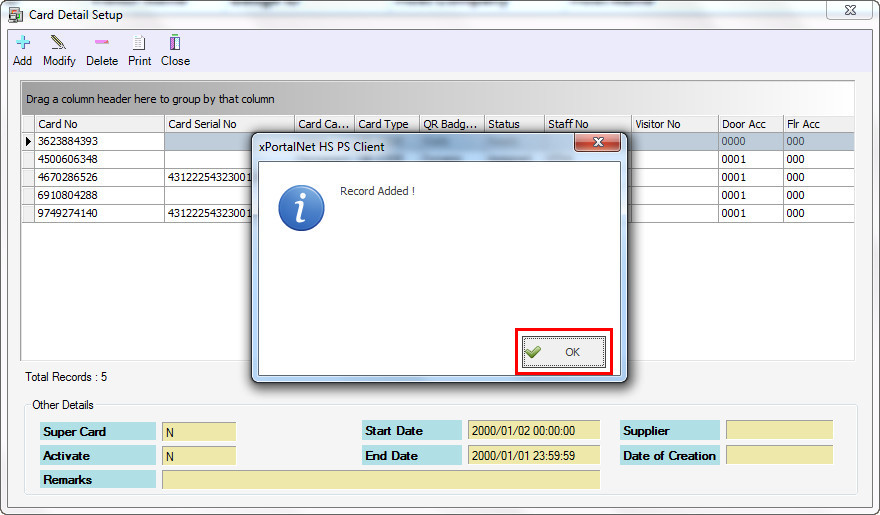
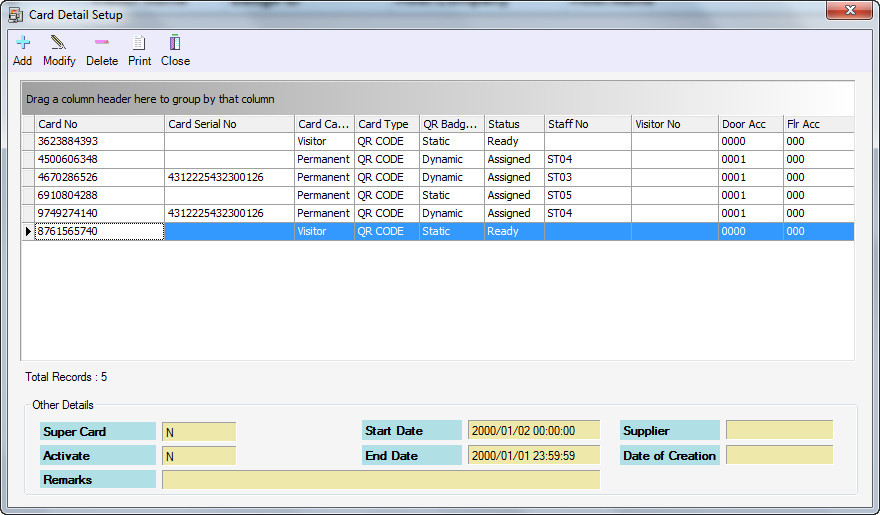
Step 1: In xPortalNet Client, go to Data Setup > Access Data Setting > Card Records. . Step 2: The Card Detail List window will be opened. Click Get Now! button. . Step 3: The Card Detail Setup window will then be shown. Click Add. . Step 4: The Add Card Detail window will be shown. Configure the Card Type as "QR CODE" and QR Code Type as "Static". . Step 5: Enter QR Code ID. You can also click the Generate button to automatically generate the QR Code ID. . Step 6: In the Card Category field, select "Visitor". In the Status field, select "Ready" . Step 7: Click OK to add and save the new visitor card record. . Step 8: The “Record Added!” message box will be displayed. Click OK. Step 9: Now, you should be able to see the newly added visitor card record in Card Detail Setup. . .
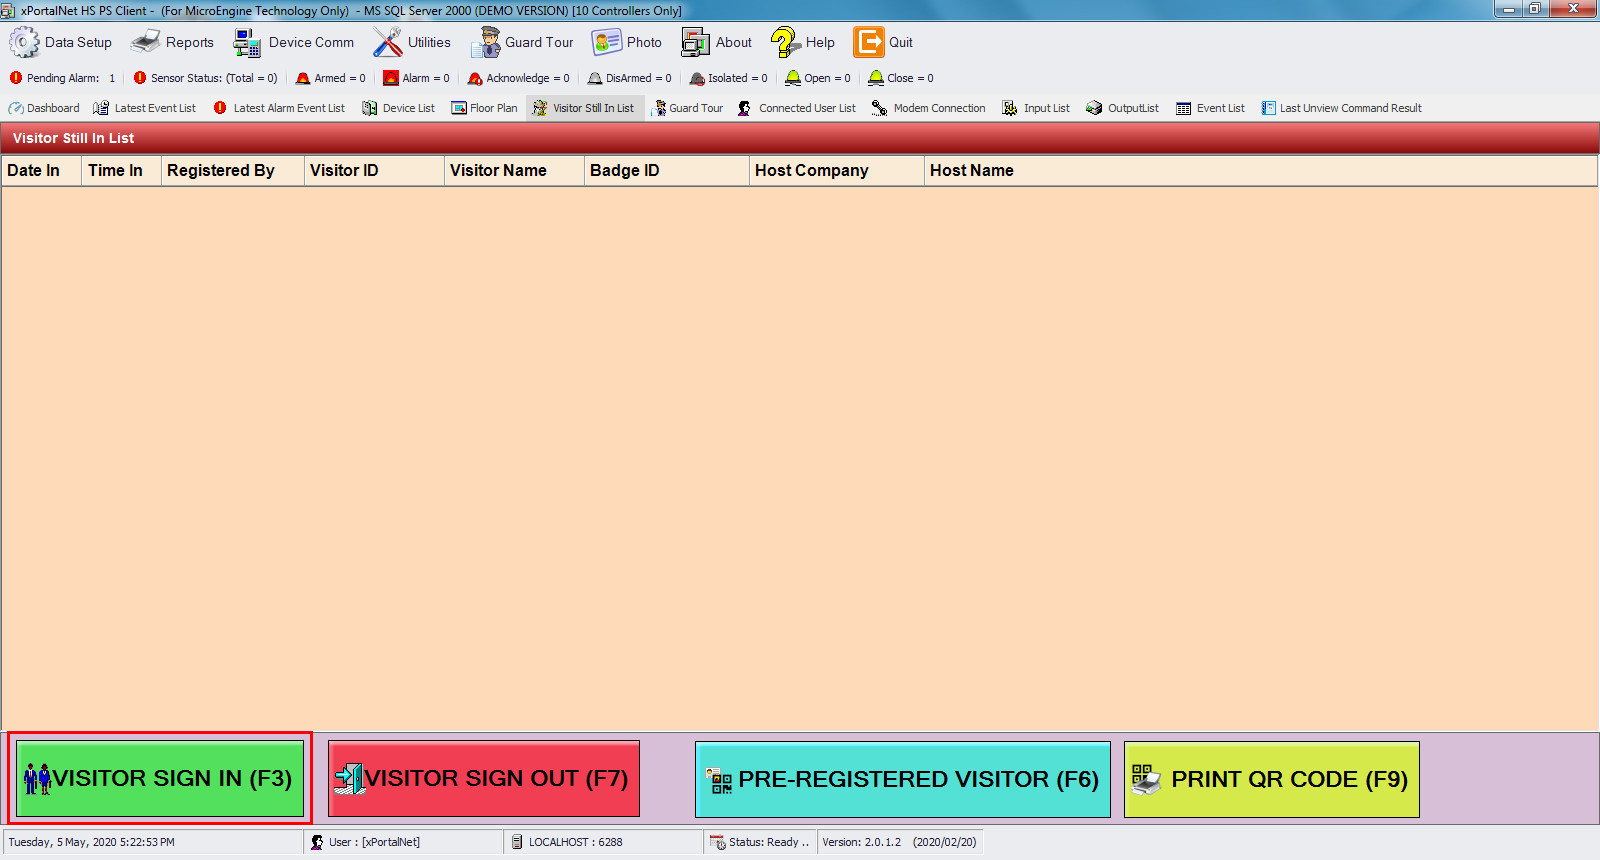
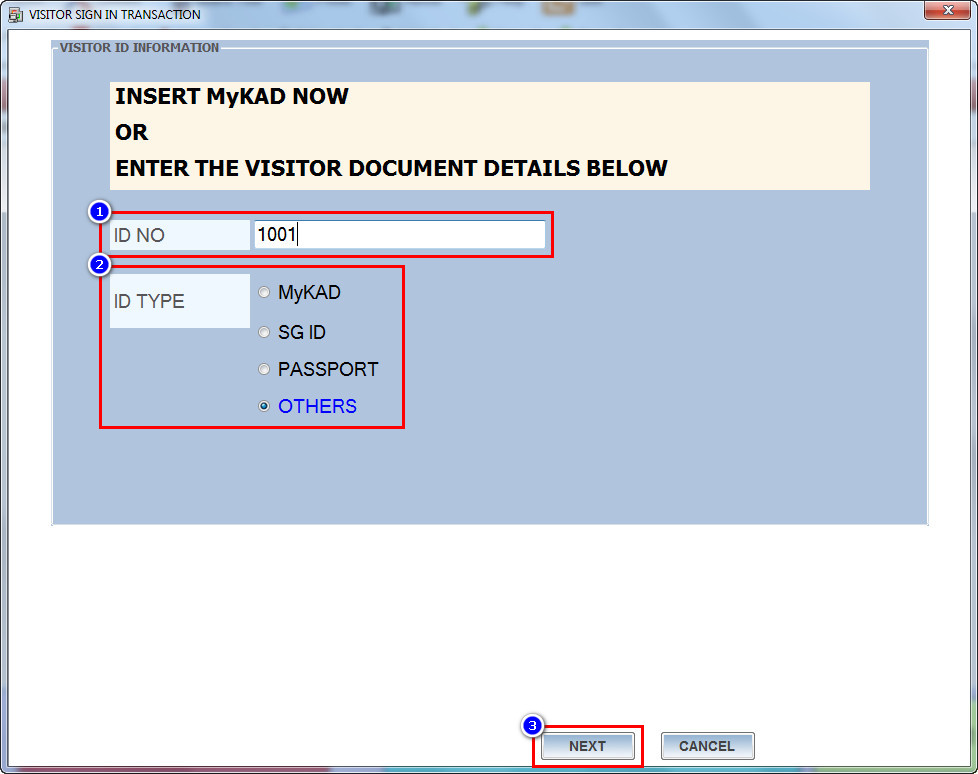
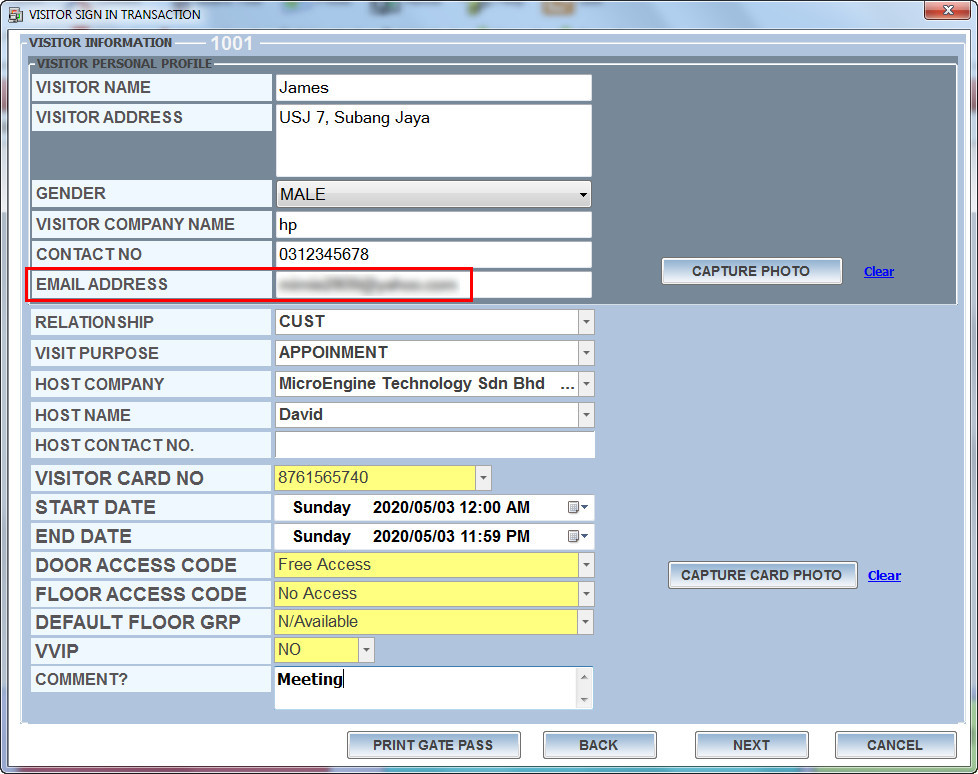
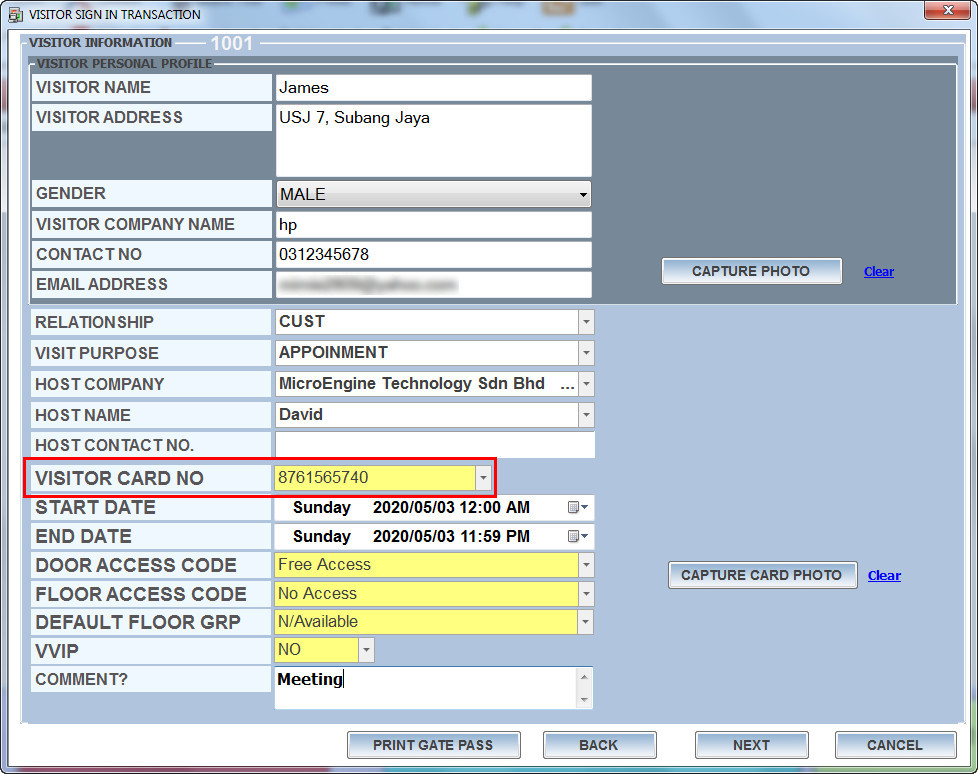
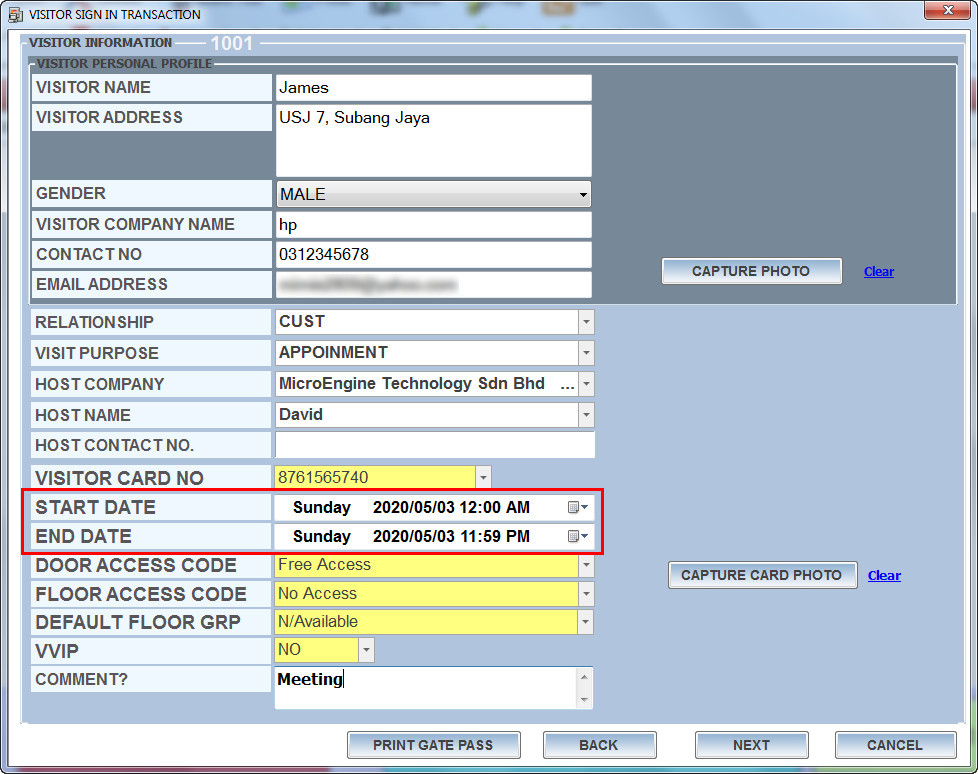
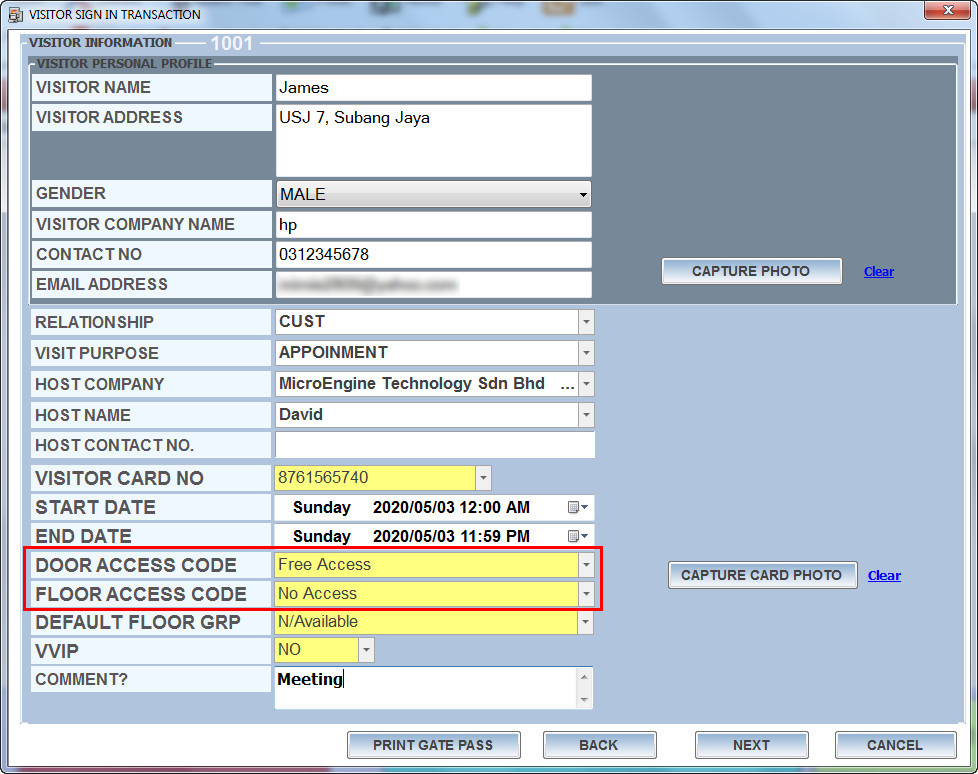
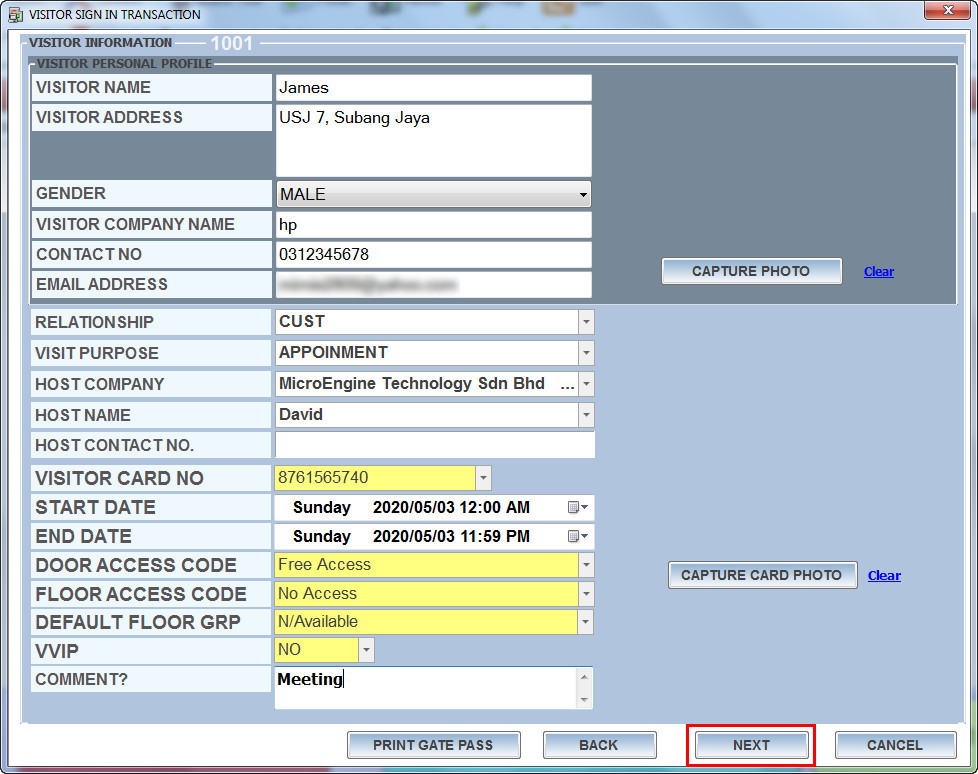
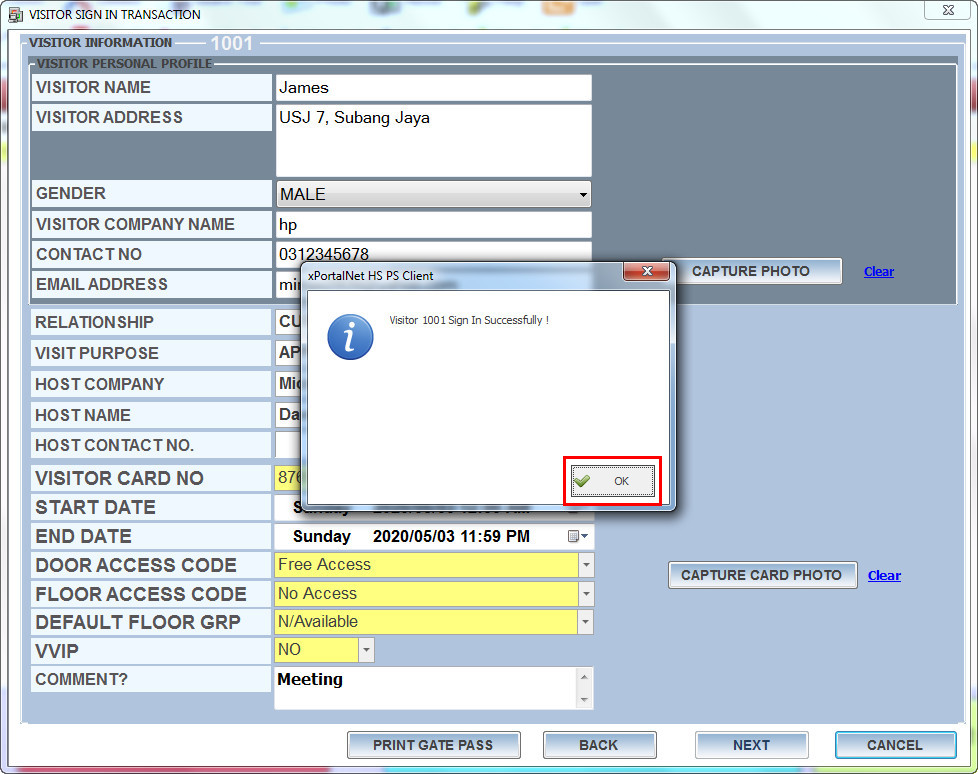
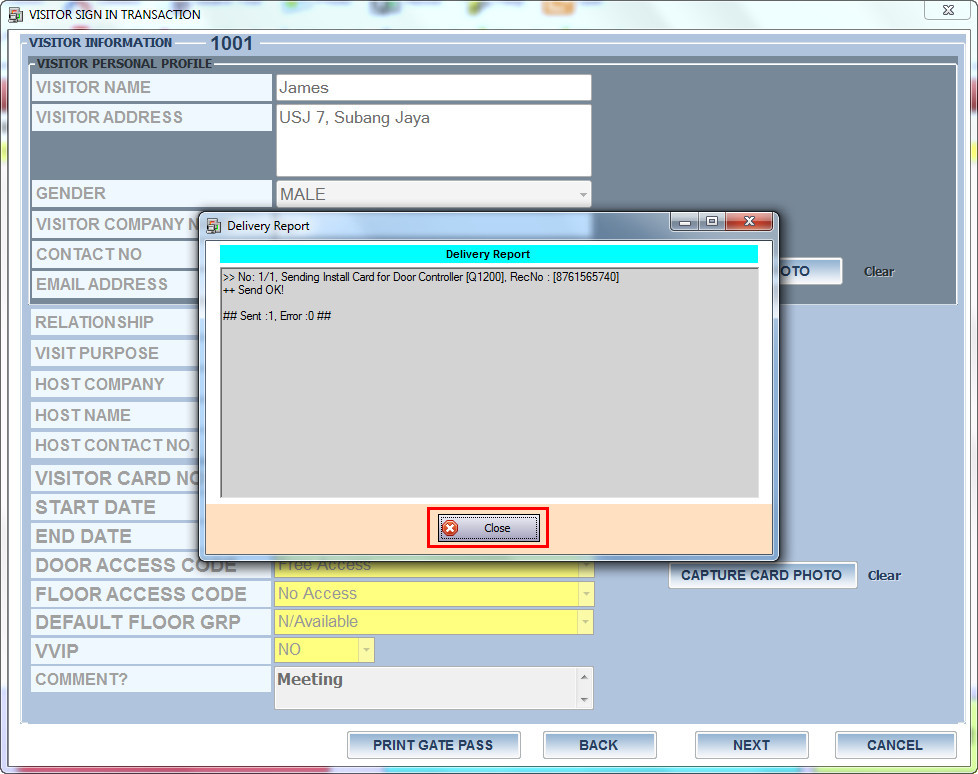
Step 1: Login to xPortalNet Client. Then, go to Visitor Still In List tab. Click VISITOR SIGN IN (F3) button. . Step 2: The Visitor Sign In Transaction window will be opened. In the VISITOR ID INFORMATION form, tick OTHERS for ID TYPE and enter the visitor ID number in ID NO field. Click Next. . Step 3: Fill up the visitor details in VISITOR INFORMATION form. Enter a valid email address as system will send a notification email that contains a QR code that can be used by visitor to access the premise. . Step 4: Select the VISITOR CARD NO with QR Code as configured in the section above. This card number will be displayed as Badge ID in Visitor Still In List. . Step 5: Select the START DATE and END DATE of the visit period. This is important as the visitor's static QR code will be valid within the assigned visit period only. . Step 6: Configure the access settings for visitor like DOOR ACCESS CODE and FLOOR ACCESS CODE. . Step 7: After completing all required visitor's information, click Next to sign in the visitor. Step 8: The Visitor [ID_No] Sign In Successfully message will appear after successfully signed in the visitor. Click OK. . Step 9: Software will send install visitor card command for door controller. Wait for the process to complete and click Close. . Step 10: The signed in visitor can now be seen in the Visitor Still In List. . In Latest Event List window, users should be able to see the (Hi) Visitor Sign In transaction along with the other related transactions for visitor sign in process. . Step 11: Meanwhile, visitor will receive an “Access Badge Generated” email. This email contains a QR code that can be used to obtain a valid access to the premise by scanning the QR code at MicroEngine QR Code reader. As long as the visit period is still valid, visitor should be able to gain valid entry or valid exit access when scanning the QR code at MicroEngine QR Code reader. |
| Common Issues: | NIL |
| Documentation Date: | 17/05/2020 (Rev 1.0) |
PROOF-READ
.
.
.
© MicroEngine Technology Sdn Bhd (535550-U). All rights reserved.
%205.jpg?version=1&modificationDate=1591085311019&cacheVersion=1&api=v2&width=800&height=430)
.jpg?version=1&modificationDate=1591085310754&cacheVersion=1&api=v2&width=800&height=100)
.jpg?version=1&modificationDate=1591085310495&cacheVersion=1&api=v2&width=800&height=509)
%208.jpg?version=1&modificationDate=1591085310181&cacheVersion=1&api=v2&width=800&height=65)