.
.
.
.
.
.
Summary:
.
Step-by-step Guide:
Step 1: Run the xPortal3000 Installation CD. The installation wizard will auto-run when the CD is detected as below. Click INSTALL SERVER to begin the installation process.
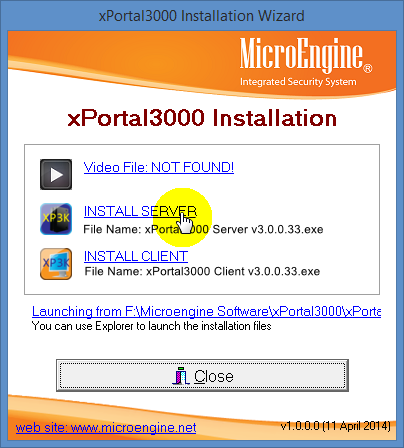
Figure 1: xPortal3000 Installation Wizard Window
.
.
OR
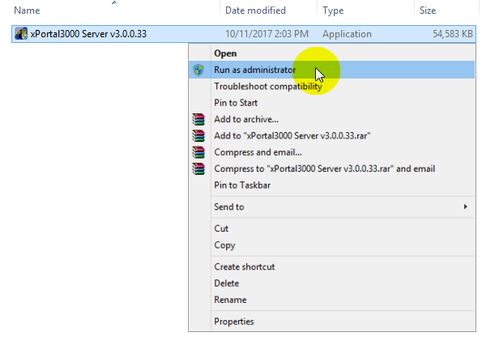
Figure 2: Running xPortal3000 Server Installer File as Administrator
Step 2: The InstallShield Wizard window will be shown. Click Next to continue.
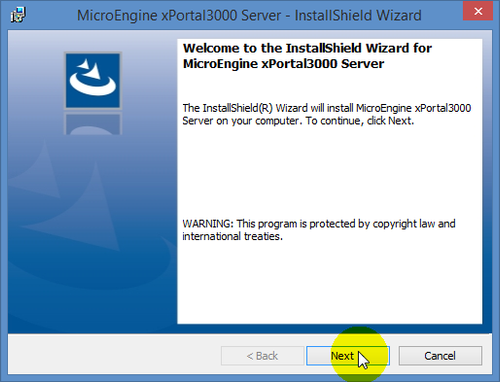
Figure 3: InstallShield Wizard Window
Step 3: The following License Agreement window will be shown. Read it carefully and check the I accept the terms in the license agreement checkbox and click Next to continue.
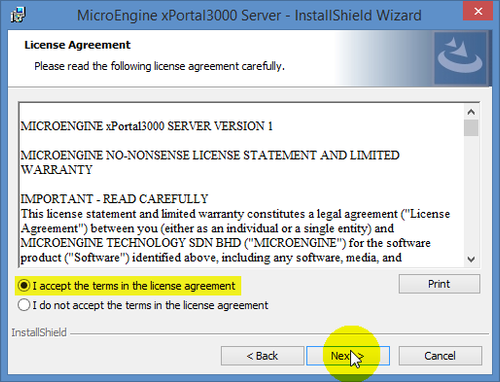
Figure 4: License Agreement Window
Step 4: At the Customer Information window, enter the specified information and click Next to continue..
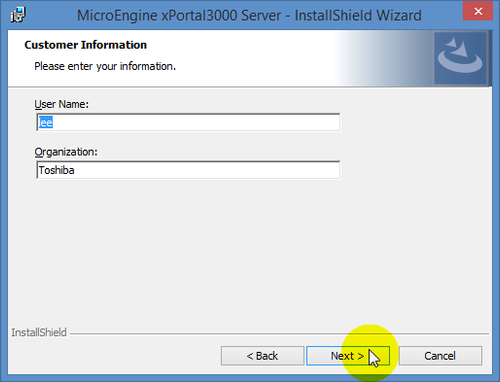
Figure 5: Customer Information Window
Step 5: The Destination Folder window will be shown. Click Next to install this folder at the default destination or click Change to specify a different installation folder.
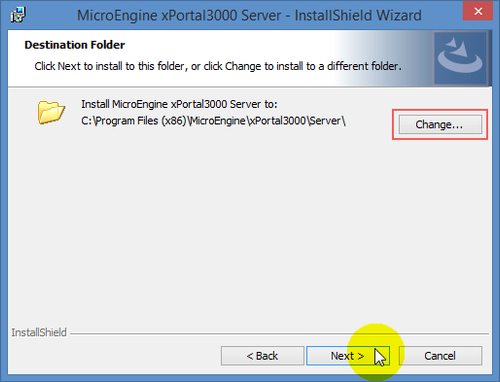
Figure 6: Destination Folder Window
Step 6: At the Ready to Install the Program window, verify that current settings information are correct and click Install to begin the installation process.
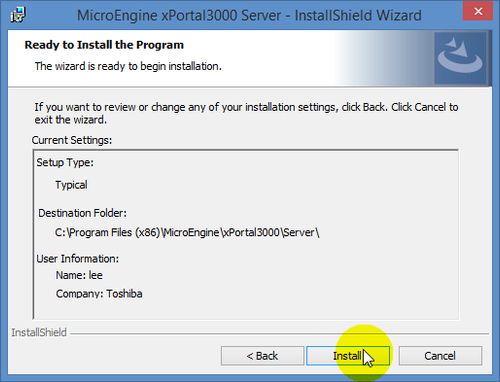
Figure 7: Ready to Install the Program Window
Step 7: The Configure Database Setting Wizard window will be shown. Click Next to setup the fresh database.
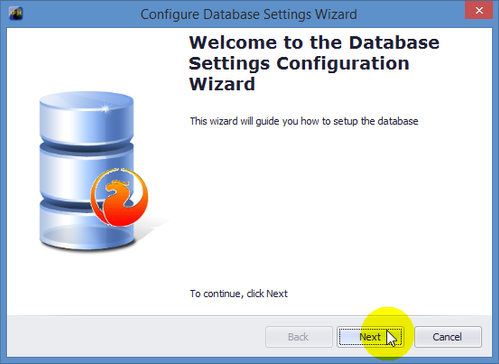
Figure 8: Configure Database Settings Wizard Window
Step 8: Once the system recognizes existing database in the same PC, the Database Migration window will be shown. Please select the database version to be migrated and click Next to continue.
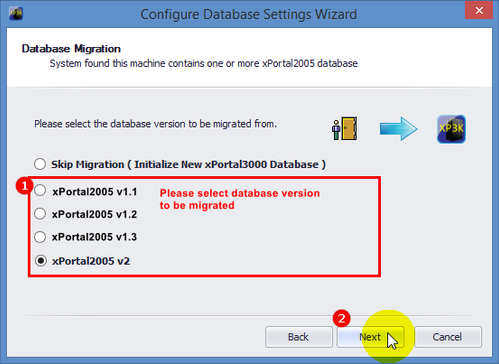
Figure 9: Database Migration Window
Step 9: At the General Information window, confirm the setting for the system and Next to continue.
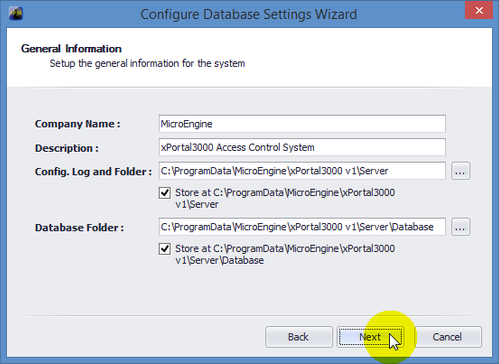
Figure 10: General Information Window
Step 10: The Target Database Engine window will be shown. Click Next to continue.
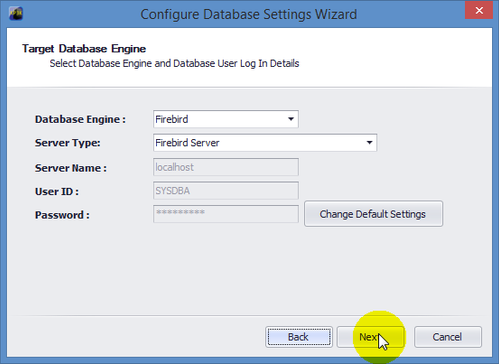
Figure 11: Target Database Engine Window
Step 11: The Initialize Database window will be shown. Click Next to continue.
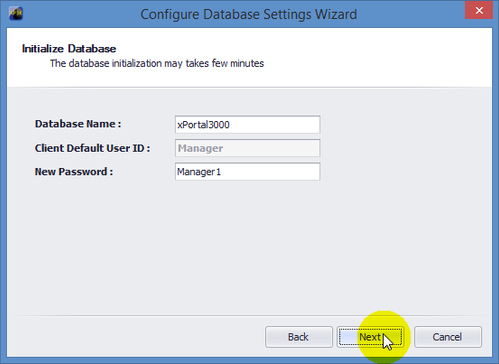
Figure 12: Initialize Database Window
Step 12: Please wait for the database migration process to complete. Upon completion, the following message window will be shown to indicate that the migration is completed. Click OK to continue.
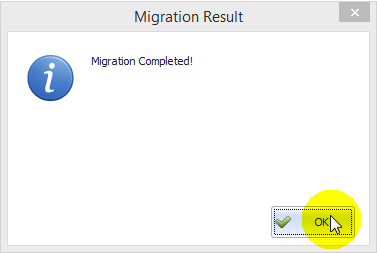
Figure 13: Migration Completed Window
Step 13: The Database Migration window will then be shown. Click Close to continue.
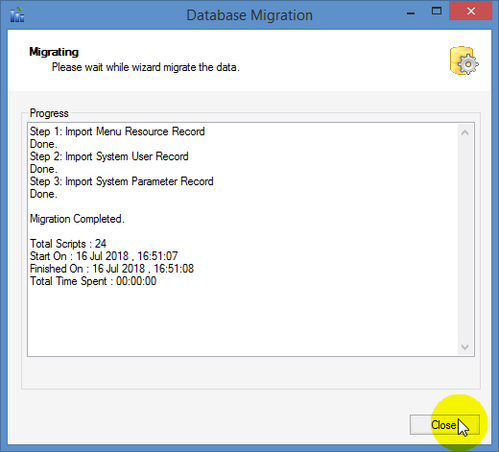
Figure 14: Database Migration Window
Step 14: The following message window will then be shown to indicate that the physical database files folder has been renamed. Click OK to continue.
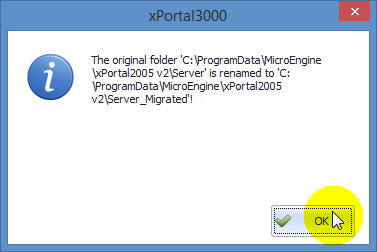
Figure 15: Physical Database Renamed Window
Step 15: The following message window will be shown to indicate that the database has been migrated successfully. Click OK to continue.
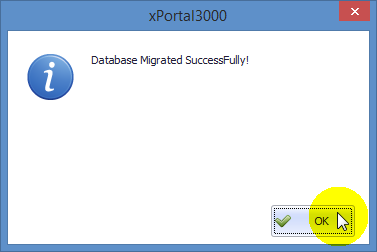
Figure 16: Database Migrated Successfully Window
Step 16: At the following Configuring Settings window, wait for the configuration process to complete before clicking Next to continue.
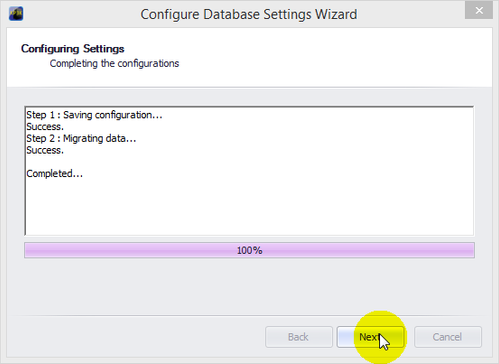
Figure 17: Configuring Settings Window
Step 17: The Company Logo window will be shown. Upload the company logo to the system or use the default logo. Click Next to continue.
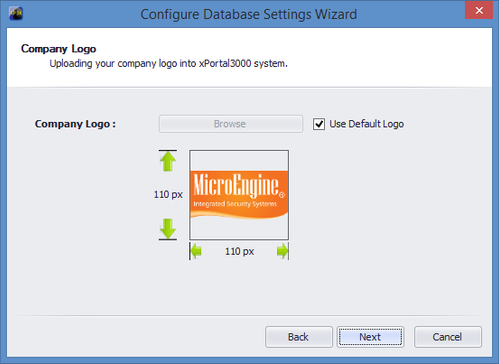
Figure 18: Company Logo Window
Step 18: The Completing the wizard window will then be shown to indicate that the database configuration is completed. Click Finish to continue.
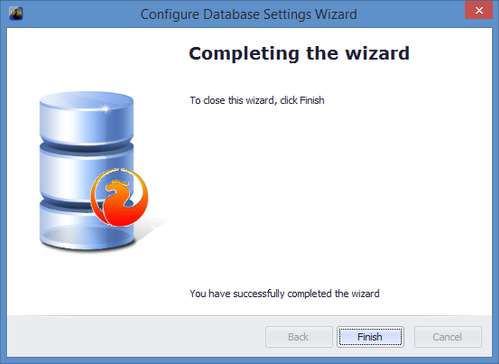
Figure 19: Completing the Wizard Window
Step 19: The Installation Status window will be shown. Click OK to continue.
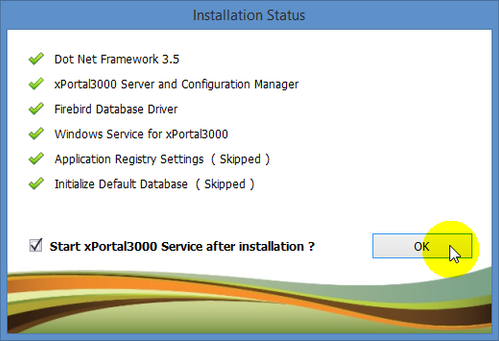
Figure 20: Installation Status Window
Step 20: The following message window will be shown to remind users to plug in the USB dongle license. To run the free edition, ignore the message and click OK.
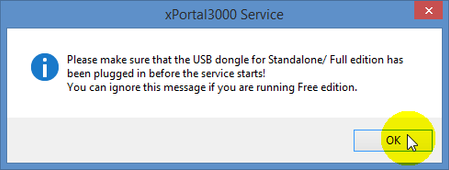
Figure 21: USB Dongle License Reminder
Step 21: The InstallShield Wizard Completed window will then be shown to indicate that the installation has been completed. Click Finish and launch the program.
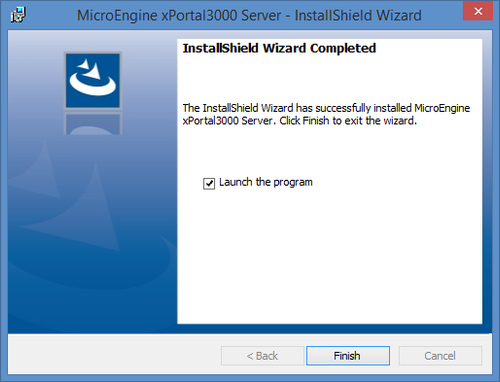
Figure 22: InstallShield Wizard Completed Window
.
.
To install xPortal3000 Client:
Step 1: Click INSTALL CLIENT to run install wizard at the CD launcher.
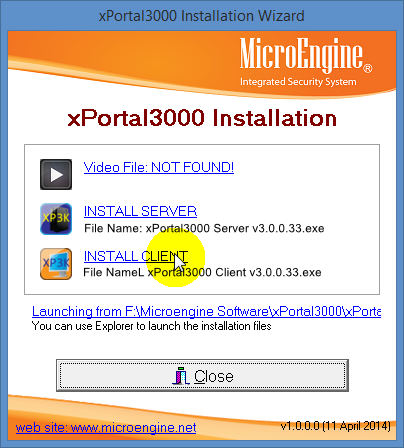
Figure 23: xPortal3000 Installation Wizard Window
.
.
.
OR
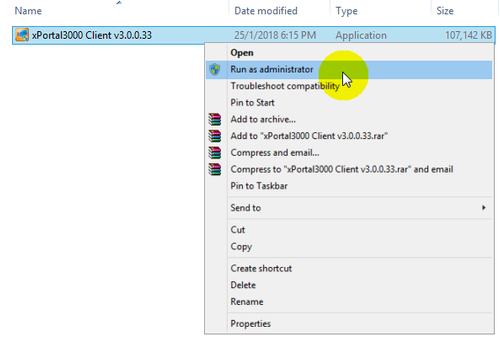
Figure 24: Running xPortal3000 Server Installer File as Administrator
Step 2: At the Preparing to Install window, wait for the extraction process to complete.
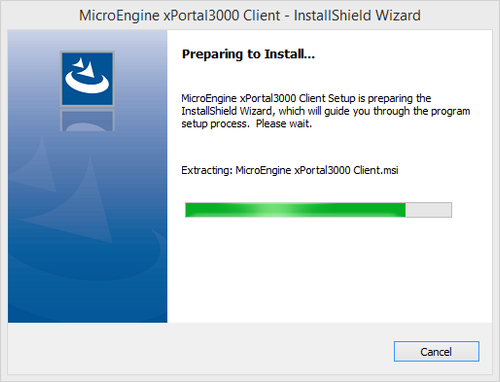
Figure 25: Preparing to Install Window
Step 3: The InstallShield Wizard window will be shown. Click Next to continue.
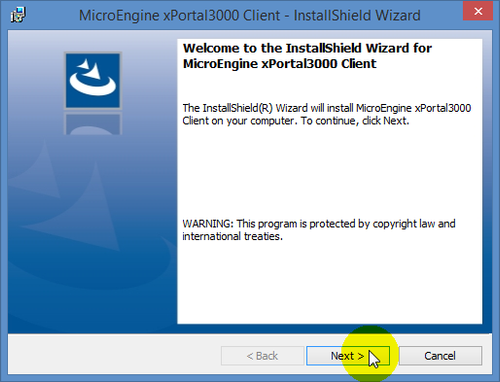
Figure 26: InstallShield Wizard Window
Step 4: At the License Agreement window, read the license agreement carefully and check the I accept the terms in the license agreement checkbox. Click Next to continue.
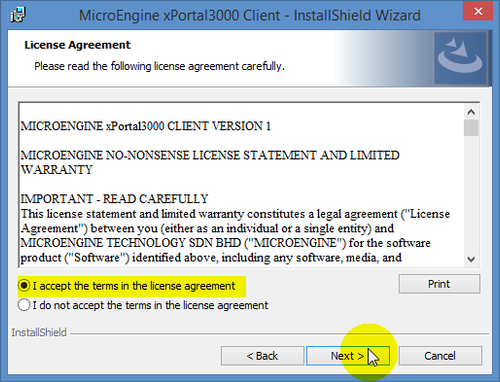
Figure 27: License Agreement Window
Step 5: The Customer Information window will then be shown. Enter the specified information and click Next to continue.
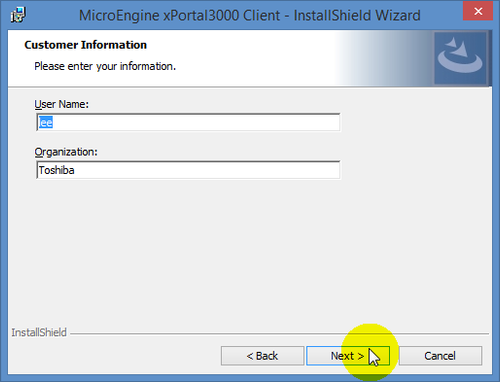
Figure 28: Customer Information Window
Step 6: At the Ready to Install the Program window, verify that current settings information are correct and click Install to begin the installation process.
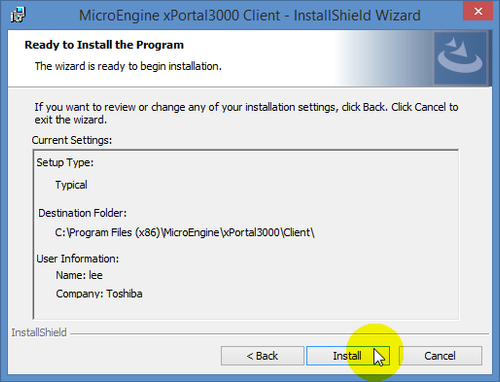
Figure 29: Ready to Install the Program Window
Step 7: The Installing MicroEngine xPortal3000 Client window will be shown. Wait for the installation process to complete.
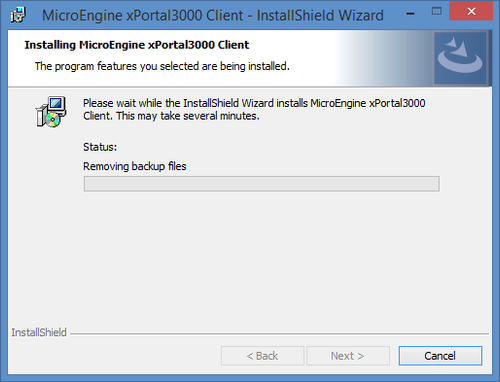
Figure 30: Installing MicroEngine xPortal3000 Client Window
Step 8: Upon completion, the InstallShield Wizard Completed window will be shown. Click Finish and launch the program.
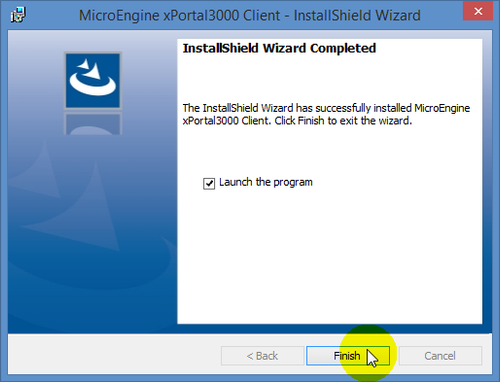
Figure 31: InstallShield Wizard Completed Window
Step 9: At the xPortal3000 Client Login window, enter the login credentials to access xPortal3000 Client.
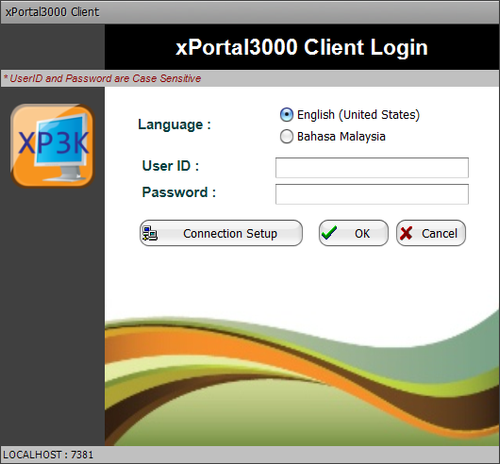
Figure 32: xPortal3000 Client Login Window


