Step 1: Install and run the Restore Trans Log.exe application in the xPortalNet Server PC.
Step 2: Ensure that the xPortalNet Comm Service is stopped.
Step 2: Launch the Restore TransLog tool.

Figure 1: Restore Trans Log Icon in Desktop
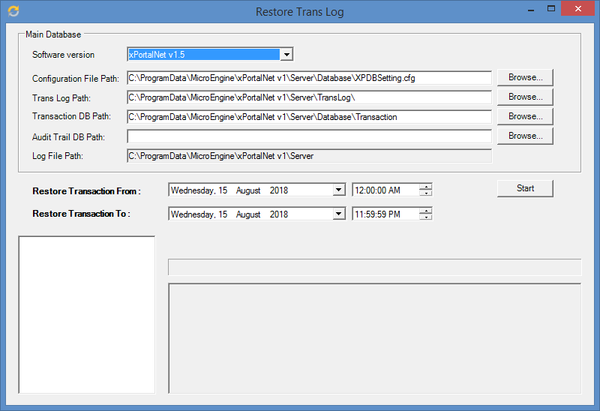
Step 3: The following Restore Trans Log window will be shown as below.

Figure 2: Restore Trans Log Window
To set up Main Database configuration section:
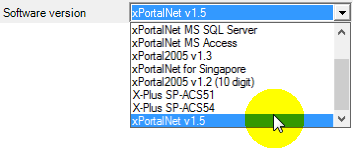
Step 1: First, click on the drop-down list and select the correct Software version.

Figure 3: Selecting the Correct Software Version
Step 2: Click Browse on the Configuration File Path section to attach the Configuration Settings file from Server PC.

Figure 4: Selecting the Configuration Settings File from Server PC
Step 3: Click Browse on the Trans Log Path to locate the Trans Log folder from the Server PC.

Figure 5: Selecting the Trans Log Path from Server PC
Step 4: Click Browse on the Transaction DB Path to locate the Transaction DB Path from the Server PC.

Figure 6: Selecting the Transaction DB Path from Server PC
Step 5: Click Browse on the Audit Trail DB Path to locate the Audit Trail DB Path from the Server PC.

Figure 6: Selecting the Audit Trail DB Path
Step 1: Select the Restore Transaction From and Restore Transaction To dates to specify the duration to restore the transactions from. Click Start to proceed with the restore transaction process.

Figure 7: Selecting the Start and End Dates to Restore Transactions
Step 2: During the restore transaction process, take note of the progress of restoration from the processing bar and the message box as below.

Figure 8: Processing Bar and Message Box Indicating the Progress of the Restore Transaction Process
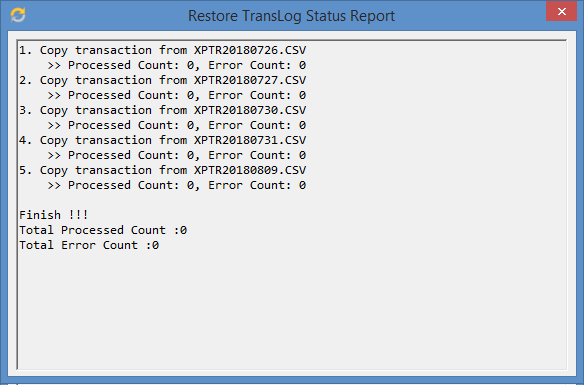
Step 3: Once the restoration process is completed, the Restore TransLog Status Report will be shown as below. Ensure that there are no errors after the restoration process has been completed.

Figure 9: Restore TransLog Status Report
Step 4: Run the xPortalNet software and verify that the transactions have been restored; either by opening the Transaction Report or rebuilding the Daily Attendance Report.


