How to Configure the Real-Time Export Transaction in xPortalNet Software

Problem (Issue) Statement:

How to configure the Real-Time Export Transaction in xPortalNet software

Description:

A guide to configure Real-Time Export Transaction feature in xPortalNet software.

Related Software:

  • xPortalNet Standard v1.5
  • xPortalNet Lite v1.5
  • xPortalNet PS v1.5
  • xPortalNet HS v1.8

Related Hardware:

NIL

System Application:

NIL

Symptom and Finding:

NIL

Cause:

For first time configuration of the Real-Time Export Transaction feature in xPortalNet software.

Solution:

Warning!

  • Users are not recommended to run any xPortal software in Windows XP operating system as the system is unstable

  • Users are also advised to stop the xPortal Services before shutting down the Server PC to prevent any missing transaction issues.

.

.

Summary:


Step-by-step Guide:

  • To configure the Transaction Export setting setup:

Step 1: Go to xPortalNet Server > Transaction > Export Setting.
Export Setting Button in Transaction Icon
Figure 1: Export Setting Button in Transaction Icon


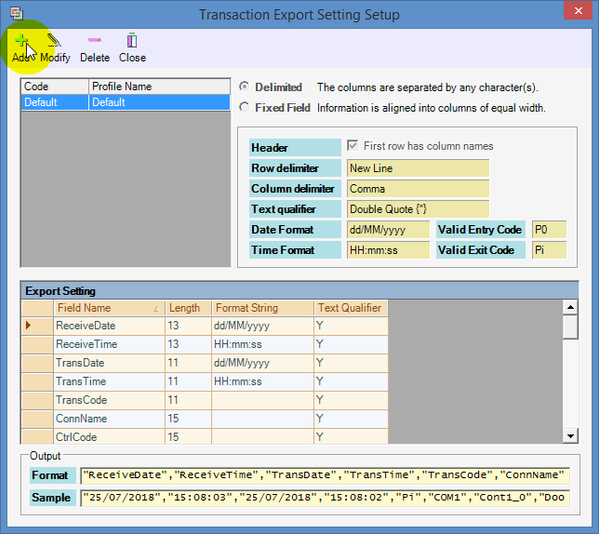
Step 2: The Transaction Export Setting Setup window will be shown. Click Add to create a new Transaction Export Setting.
Transaction Export Setting Setup Window
Figure 2: Transaction Export Setting Setup Window


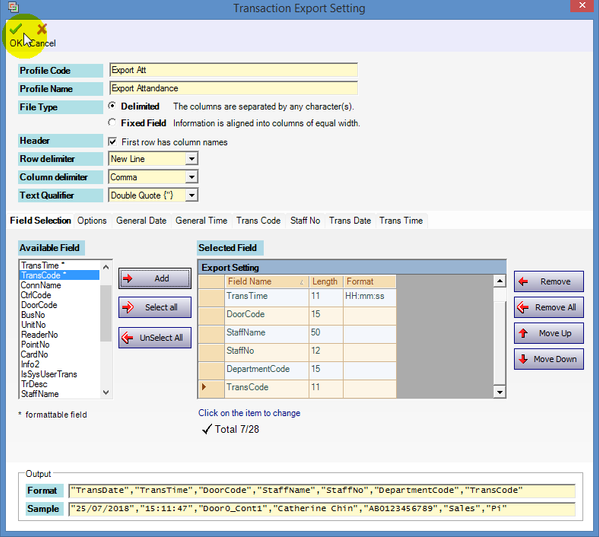
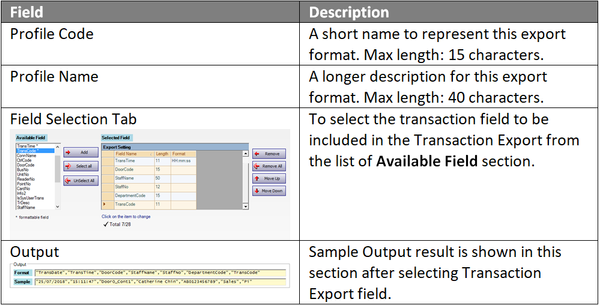
Step 3: The Transaction Export Setting window will be shown as below. Fill in all relevant information and click OK to save the changes.
Transaction Export Setting Window
Figure 3: Transaction Export Setting Window


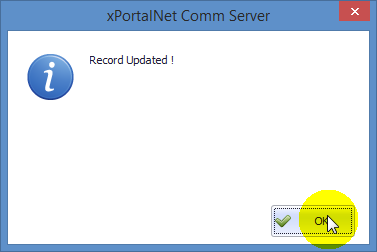
Step 4: The xPortalNet Comm Server window will be shown with the Record Updated message. Click OK to continue. Back at the Transaction Export Setting Setup window, click Close to exit the window.

Figure 4: Record Updated Window


  • To configure the Real-Time Export Transaction settings:

Step 1: Go to xPortalNet Server > Transaction > Real Time Export Trans.
Real Time Export Trans Button in Transaction Icon
Figure 5: Real Time Export Trans Button in Transaction Icon


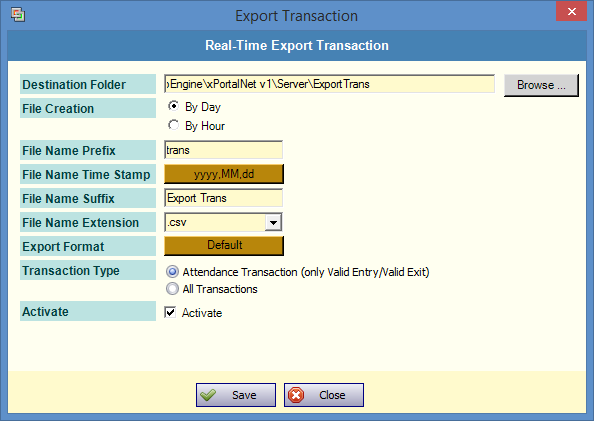
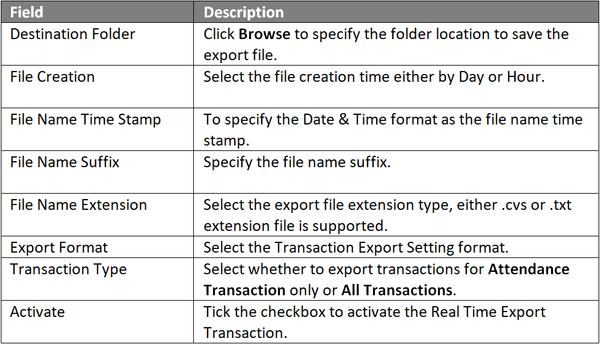
Step 2: The Export Transaction window will be shown. Fill in all relevant information and configuration settings. Click Save to save the changes.
Export Transaction Window
Figure 6: Export Transaction Window


Step 3: The xPortalNet Comm Server window will be shown with the Record Updated message. Click OK to continue.

Record Updated Window
Figure 7: Record Updated Window


  • To verify the Real Time Export Transaction file is generated:

Step 1: Flash card on the reader to trigger any event transactions.


Step 2: Go to the specified export file destination folder.
(default destination folder location C:\ProgramData\MicroEngine\xPortalNet v1\Server\ExportTrans )


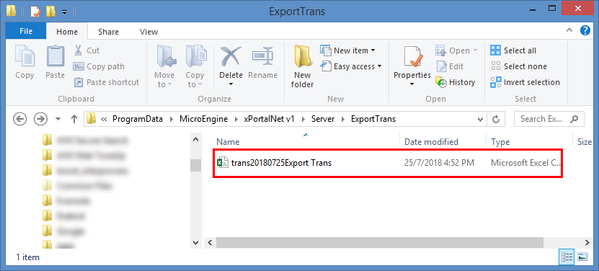
Step 3: Verify that the export transaction file has been generated in the ExportTrans folder.
Export Transaction File in the Specified Folder
Figure 8: Export Transaction File in the Specified Folder

Date Documentation:

24/7/2018 (Rev 1.0)

PROOF-READ

.

.


.

© MicroEngine Technology Sdn Bhd (535550-U). All rights reserved.