How to Configure Lift Access in xPortalNet HS Software
Problem (Issue) Statement: | How to configure lift access in xPortalNet HS software |
Description: | A guide to configure lift access in xPortalNet HS software. |
Related Software: |
|
Related Hardware: |
|
System Application: | Lift Masking Access System |
Symptom and Finding: | NA |
Cause: | For first time configuration on lift access in xPortalNet HS software. |
Solution: | Warning!
. . Summary
Note Ensure that the XP-GLS300 / XP-GLS5000 Controller Setting DIP switch has been configured to Lift Controller operation mode before starting the configuration setup. . . Step-by-step Guide:
Step 1: Ensure that the xPortalNet HS Services is running.
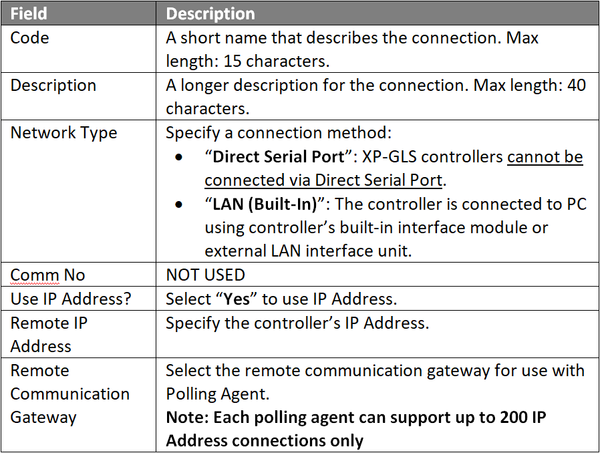
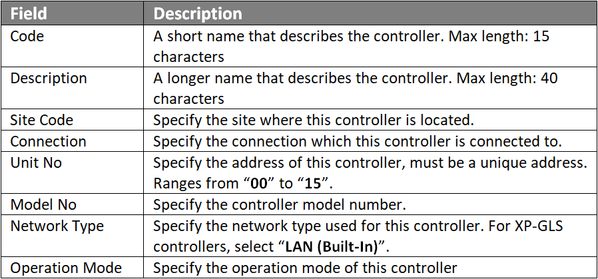
Step 1: Go to xPortalNet HS Server > Server Admin > System Device Setup > Controller.
Tips
. .
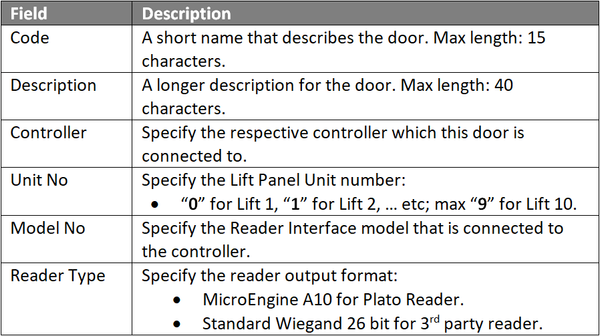
Step 1: Go to xPortalNet HS Server > Server Admin > System Device Setup > Door.
.
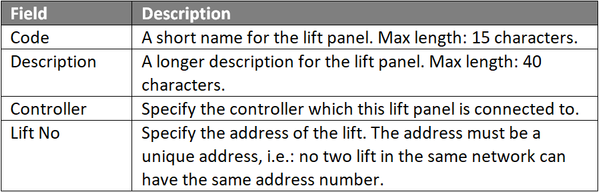
Step 1: Go to xPortalNet HS Server > Server Admin > System Device Setup > Lift Panel.
.
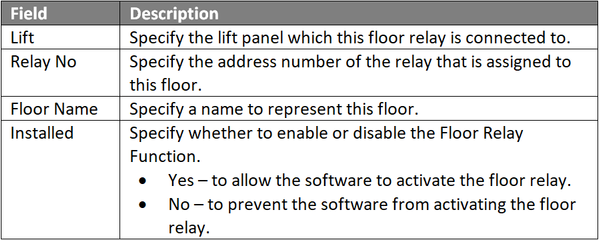
Step 1: Go to xPortalNet Server HS > Server Admin > System Device Setup > Floor Relay.
Note The table below shows the relay number scheme to be followed. 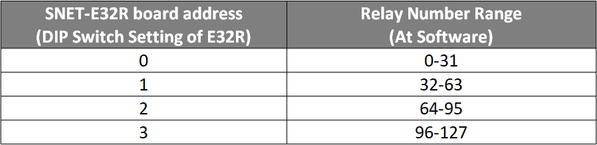 . . Knowledge Base Link Users can refer to KB- ID-000101 How to create Floor Zone and Floor Accessibility at xPortalNet HS v1.8 Client for the complete steps to create Floor Zone and Floor Accessibility configurations. . . Note XP-GLS300v4 controller models can only be connected to Plato Reader model RM80KLS and RM80MS. |
Date Documentation: | 27/6/2018 (Rev 1.0) |


PROOF-READ
.
.
.
© MicroEngine Technology Sdn Bhd (535550-U). All rights reserved.