How to Configure Alarm Definition in xPortalNet Software
Problem (Issue) Statement: | How to Configure Alarm Definition in xPortalNet Software |
Description: | Alarm Definition is used to re-classify transaction as alarm events and its handling. All existing alarm transactions are initialized in Alarm Definition. User can modify the existing default Alarm Definition or create new one. When the configured alarm is triggered, the transaction can be found from the Latest Alarm Event List tab at the Client main window. User can perform action like acknowledge alarm, mute alarm audio and jump to the floor plan where the device of the alarm triggered is located. |
Related Software: | xPortalNet PS v1.5.0.147 or higher |
Related Hardware: | NIL |
System Application: | Door Access System |
Symptom and Finding: | NIL |
Cause: | For first time guide to configure the Alarm Definition. |
Solution: | Warning!
. . Summary. Step-by-step Guide:
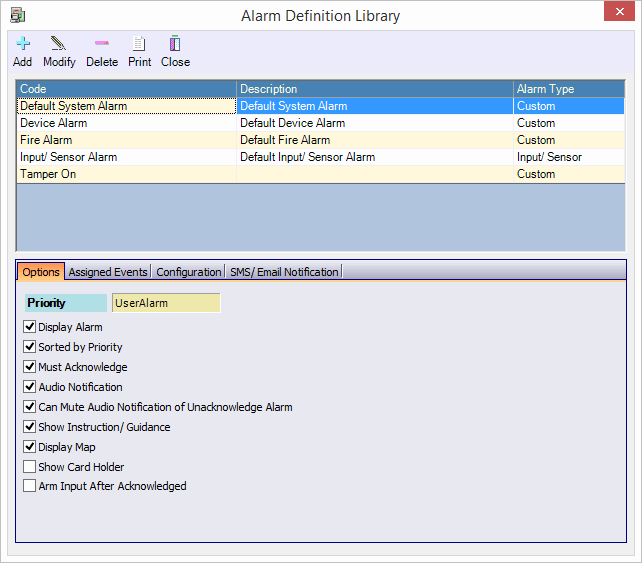
In these steps, user will be guided to add new Alarm Definition. Step 1: Login to xPortalNet Client. Step 2: Open Alarm Definition. Go to Data Setup > System Setting > Alarm Configuration > Alarm Definition. Step 3: The Alarm Definition Library window will be shown. Step 4: Click Add to add new Alarm Definition. Step 5: Fill up the fields according to the description below.
Step 5: Configure the Options Tab.
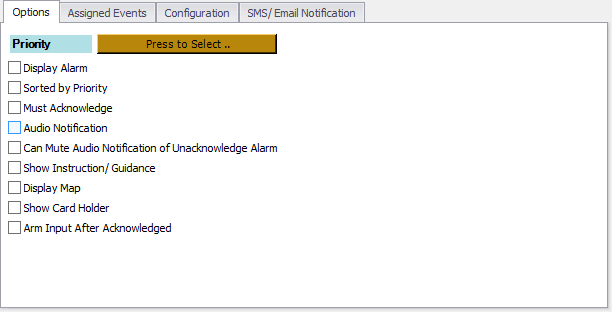
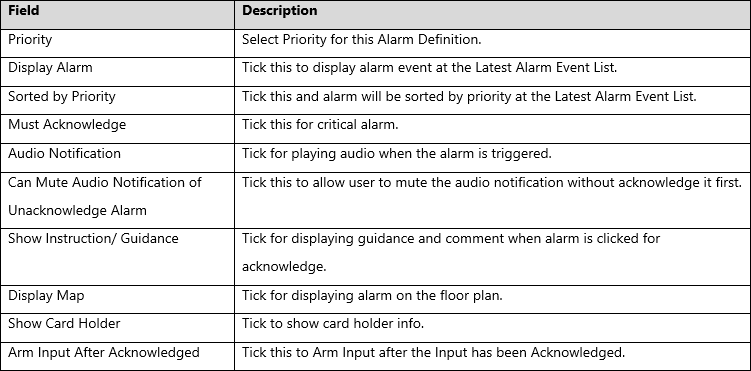
In these steps, user will be guided to configure the options for this Alarm Definition. These options provided to cater for most of user's preferences. Step 1: Select Options Tab. Step 2: Configure the fields according to the description below.
Step 3: Configure the Assigned Events Tab.
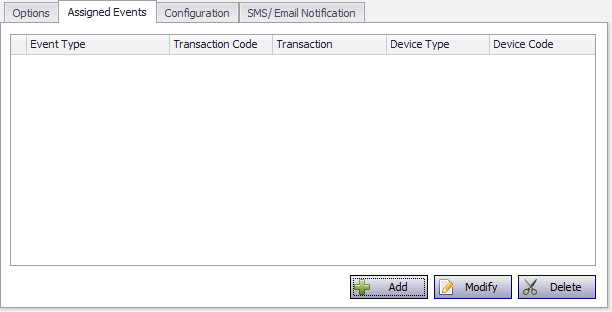
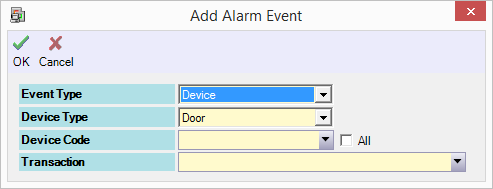
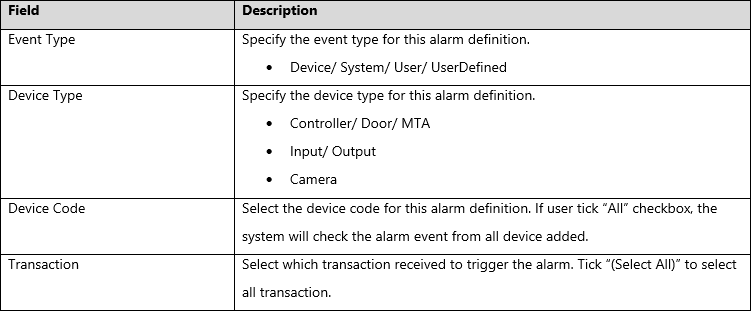
In these steps, user will be guided to add new assigned events for this Alarm Definition. When the software received the configured transactions, it will then trigger the alarm. Step 1: Select Assigned Events Tab. Step 2: Click Add to add new assigned events Step 3: The Add Alarm Event window will be shown. Configure the fields according to the description below.
Step 4: Configure the Configuration Tab.
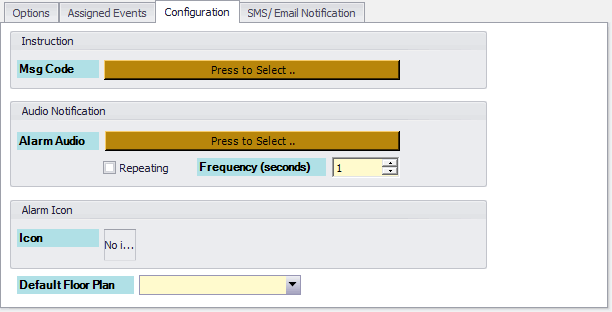
In these steps, user will be guided to configure the configurations for this Alarm Definition. These sections consist of Instruction, Audio Notification and Alarm Icon configurations. Step 1: Select Configurations Tab. Step 2: Configure the fields according to the description below.
Step 3: Configure the SMS / Email Notification Tab.
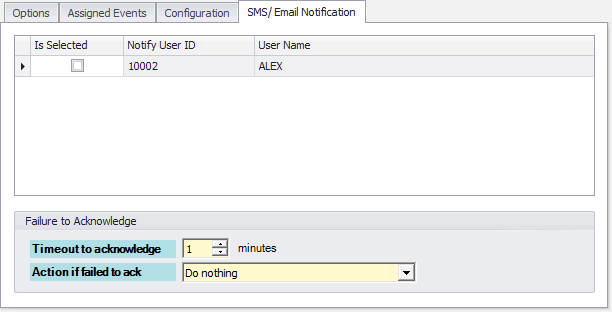
In these steps, user will be guided to configure the SMS / email notification for this Alarm Definition. SMS / email notification will be sent to the selected user when the alarm is triggered. Step 1: Select SMS / Email Notification Tab. Step 2: Configure the fields according to the description below.
Step 3: Click OK to confirm and save the changes. |
Document Date | 31/07/2018 (Rev 1.0) |
PROOF-READ
.
.
.
Related content
© MicroEngine Technology Sdn Bhd (535550-U). All rights reserved.
