How to Configure 5 Door Access Code in xPortalNet Software
| Problem (Issue) Statement: | How to configure 5 door access code in xPortalNet software |
| Description: | 5 Door Access Code feature is only applicable to controller models XP-SNETv4 and XP-SNET-GAC. This feature allows users to assign up to 5 Door Accessibility to the staff records. Warning! Users must remove other controller models from the controller list in Server software to proceed with using this feature. |
| Related Software: |
|
| Related Hardware: |
|
| System Application: | NIL |
| Symptom and Finding: | NIL |
| Cause: | For first time guide to configure 5 door access code in xPortalNet software |
| Solution: | Warning!
. . Summary:
. Step-by-step Guide:
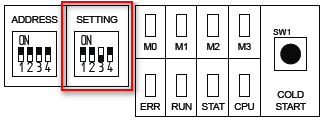
Step 1: At the XP-SNETv4 or XP-SNET-GAC controller, set the DIP switch 3 under SETTING to be in ON position . .
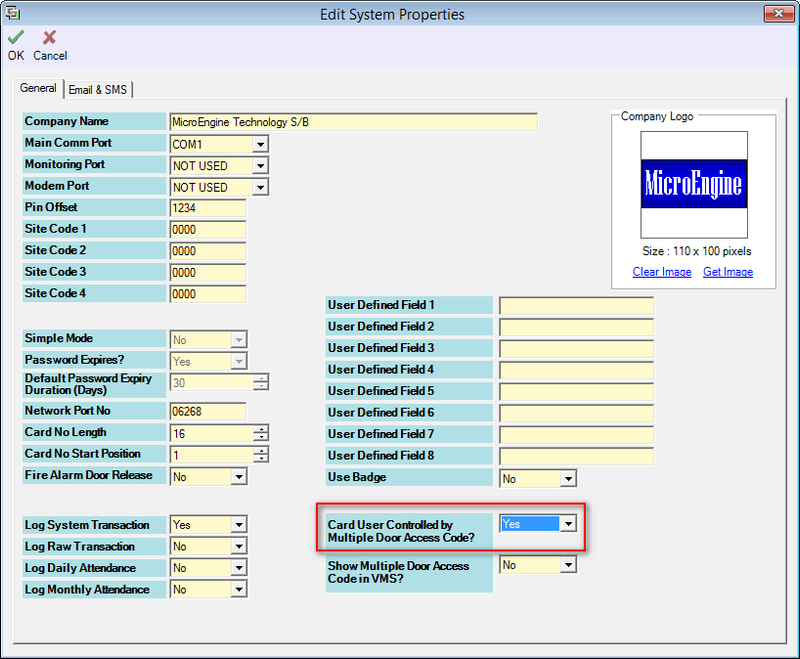
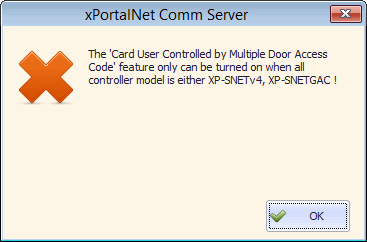
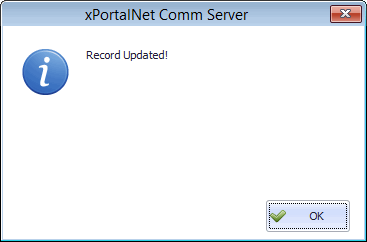
Step 1: Go to xPortalNet Server > Server Admin > System Properties > Modify. Step 2: The Edit System Properties window will be shown. At the Card User Controlled by Multiple Door Access Code field, select Yes to enable the feature. Step 3: If the following message window is prompted by the software, please make sure that the existing controller from the controller list is either XP-SNETv4 or XP-SNET-GAC only. Otherwise, please remove all other controller models first before proceeding to enable the feature again. Step 4: If the feature is enabled successfully, the software will prompt the following message window to indicate that the record is updated. Step 5: The following window will then be shown to remind users to download the staff and visitor card settings to the controller. . .
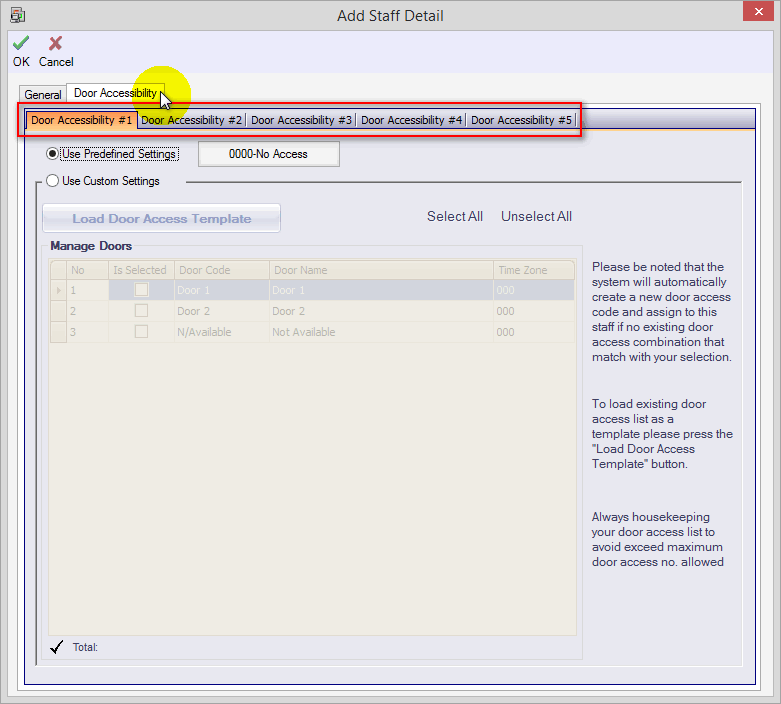
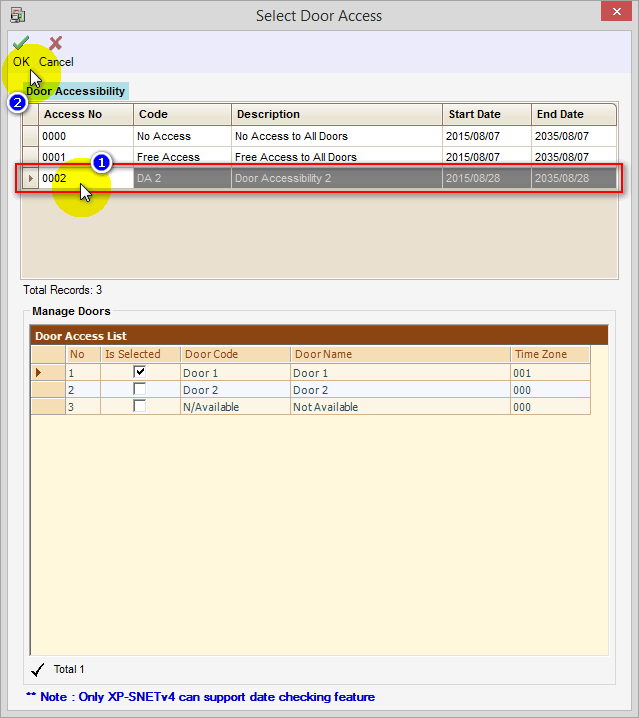
Step 1: Go to xPortalNet Client > Device Comm > Send Staff Setting and/or Send Visitor Setting . Step 2: Select the controller name and then click Send All. . Step 3: Create a new Door Accessibility Code. Knowledge Base Link Users can refer to How to Configure Door Access Level at xPortalNet Software for the complete steps to create a new Door Accessibility Code . . Step 4: Users can now assign the newly created Door Accessibility Code to the respective staff. Go to xPortalNet Client > Data Setup > Access Data Setting > Staff Records > Get Now! Click Add to add a new staff or Modify to modify existing staff records. . Step 5: The Add Staff Detail / Edit Staff Detail window will then be shown. Click Door Accessibility tab to view the Door Accessibility window. Users can now configure the 5 available door accessibility for this particular user. . Note By default, the software has 2 Door Accessibility Codes: "000" for No Access, and "001" for Free Access. . . Step 6: In each of the 5 door accessibility configuration, click on the button next to Use Predefined Settings field. The Select Door Access window will then be shown. Select your preferable Door Accessibility for all the doors and click OK to save the changes. . Step 7: Back at the Add Staff Detail / Edit Staff Detail window, fill up the relevant fields and click OK to save the changes. . Step 8: Go to xPortalNet Client > Device Comm > Send Staff Setting. Select the controller and click Send All. . Step 9: The staff has been successfully configured with the 5 Door Accessibility Codes. |
| Common Issues: | NIL |
| Porting Date: | 22/2/2019 |
PROOF-READ
.
.
.
© MicroEngine Technology Sdn Bhd (535550-U). All rights reserved.
