How to Configure xPortalNet Software to Prevent Door Access During Holidays
| Problem (Issue) Statement: | How to configure xPortalNet software to prevent door access during holidays |
| Description: | Users can configure the door to not be accessible during the holidays. This can be done by configuring the Holiday Set, the Time Zone, and Door Accessibility Setup. Then, the Door Access Code can be assigned to the staff profile accordingly. |
| Related Software: |
|
| Related Hardware: | All Controller Models |
| System Application: | NIL |
| Symptom and Finding: | NIL |
| Cause: | For first time guide to configure xPortalNet software to prevent door access during holidays |
| Solution: | Warning!
. . Summary:
. Step-by-step Guide:
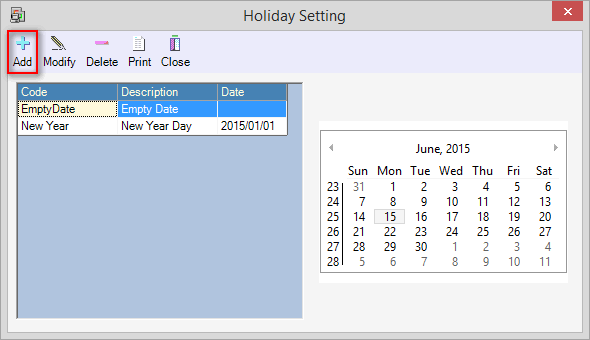
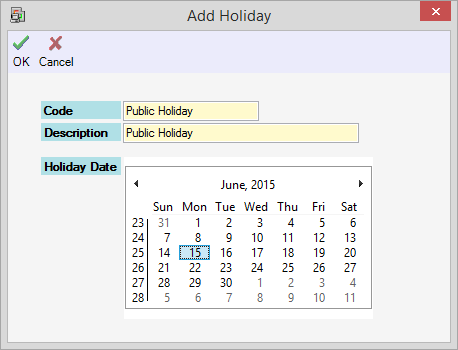
Step 1: Ensure that the xPortalNet Services is running. Step 2: Go to xPortalNet Client > Data Setup > Access Data Setting > Holiday Set > All Holiday Dates. Step 3: The Holiday Setting window will be shown. Click Add. Step 4: The Add Holiday window will then be shown. Set the holiday date correctly by giving it a reference name (code) and description. Click OK to save the changes. Step 5: Repeat Steps 2 to 4 to add the remainder of the holiday dates. . .
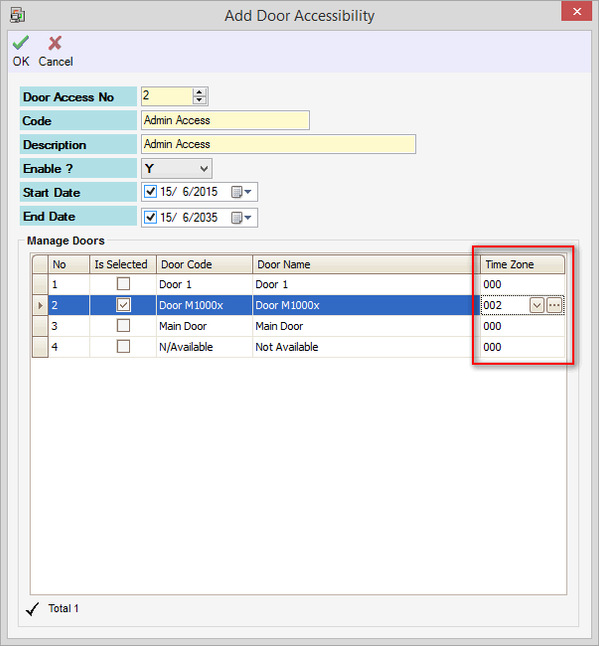
Step 1: Set a new Time Zone which contains the normal hours where card users are permitted to gain access to the doors during the weekday, but selecting Time Set "000" for Holiday. Knowledge Base Link Users can refer to How to Configure Time Zone Settings in xPortalNet Software to complete the procedures to set Time Zone configurations. . . Step 2: To assign the pre-configured Time Zone in Step 1, go to xPortalNet Client > Data Setup > Access Data Setting > Door Accessibility Schedule > Add.
. .
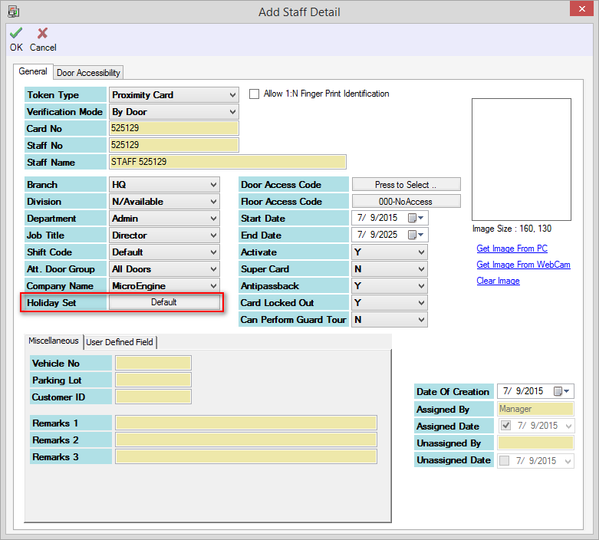
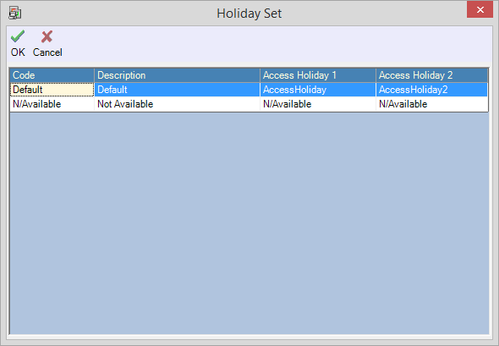
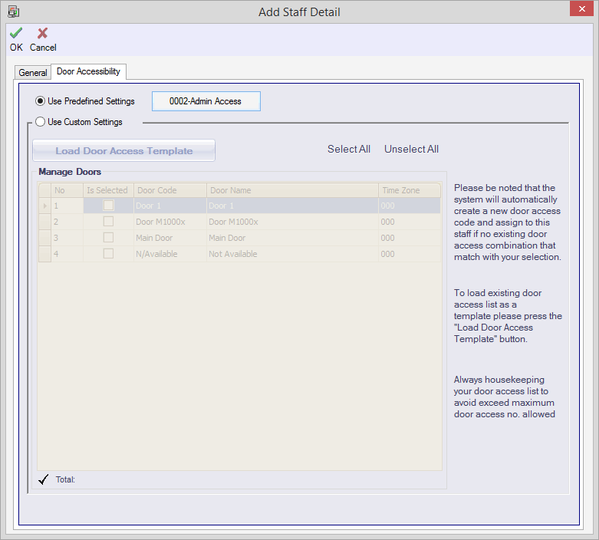
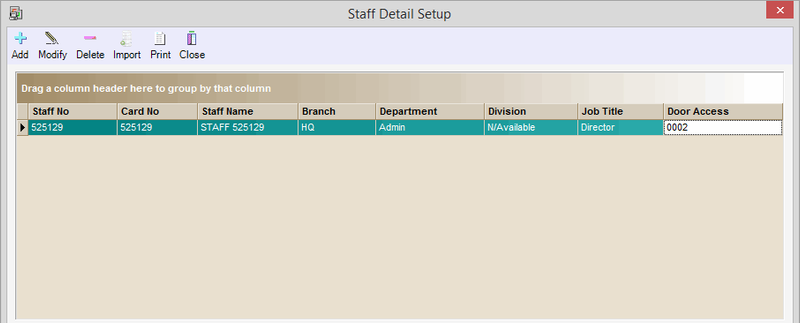
Step 1: Go to xPortalNet Client > Data Setup > Access Data Setting > Staff Records and click Get Now! to continue. Step 2: At the Staff Detail Setup window, users can choose whether to add a new staff or to modify existing staffs to assign with the Door Accessibility. Step 3: At the Add Staff Detail or Edit Staff Detail window, click "Default" button for Holiday Set field. Step 4: The Holiday Set window will then be shown. Select the pre-configured Holiday Set in section 1. Click OK to save the changes. Step 5: Back at the Add Staff Detail or Edit Staff Detail window, click Door Accessibility tab. At the Use Predefined Settings field, select the pre-configured Door Accessibility at section 2. Click OK to save the changes. Step 6: Back at Staff Detail Setup, users will be able to see the added / edited staff records with the correct details. . .
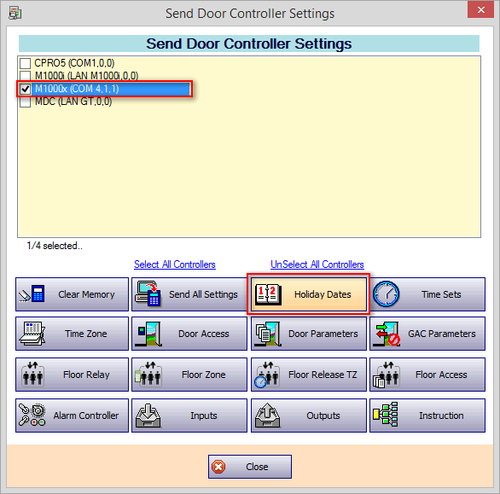
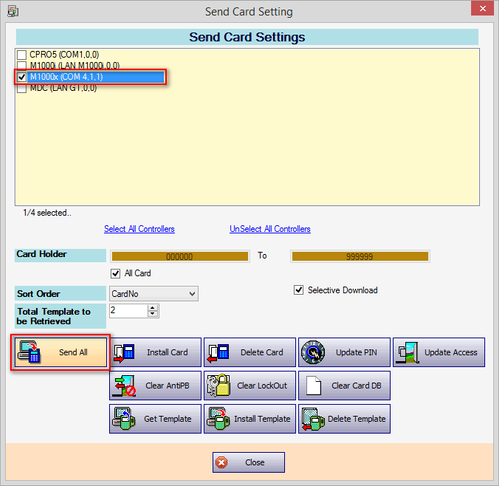
Step 1: Go to xPortalNet Client > Device Comm > Send Door Settings. Step 2: The Send Door Controller Settings window will be shown. Select the relevant controller(s) and click Holiday Dates. Step 3: Go to xPortalNet Client > Device Comm > Send Staff Settings. Step 4: The Send Card Settings window will then be shown. Select the relevant controller(s) and click Send All. Step 5: Ensure that the Delivery Report for both processes in Step 2 and Step 4 does not yield any errors. Step 6: Users can then attempt to flash a valid access card to the controller during the holidays to verify that the transaction recorded is "Wrong Time Zone" transaction. |
| Common Issues: | NIL |
| Porting Date: | 30/11/2018 (Rev 1.0) |
PROOF-READ
.
.
.
© MicroEngine Technology Sdn Bhd (535550-U). All rights reserved.
