How to Add Staff Record using Import Staff in xPortalNet Software
| Problem (Issue) Statement: | How to add Staff Record using Import Staff in xPortalNet software |
| Description: | A guide to add Staff Record using Import Staff in xPortalNet software |
| Related Software: |
|
| Related Hardware: |
|
| System Application: |
|
| Symptom and Finding: | NIL |
| Cause: | For first time guide to add Staff Record using Import Staff in xPortalNet software |
| Solution: | Warning!
. . Summary:
Step-by-step Guide:
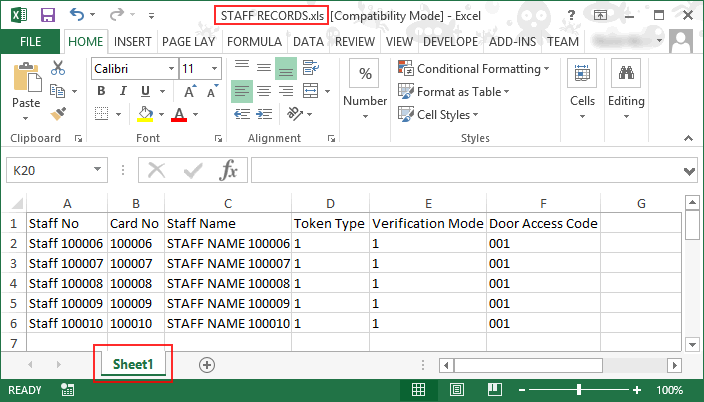
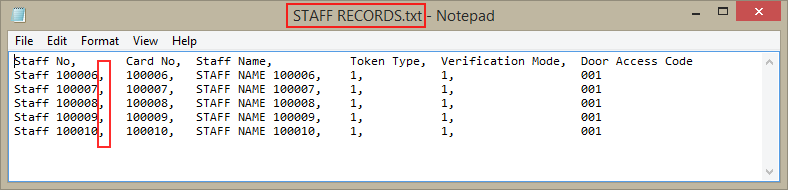
Step 1: To start importing staff, system users first need to create staff records using Microsoft Excel or Text File first. Save the file at a designated location for later access.
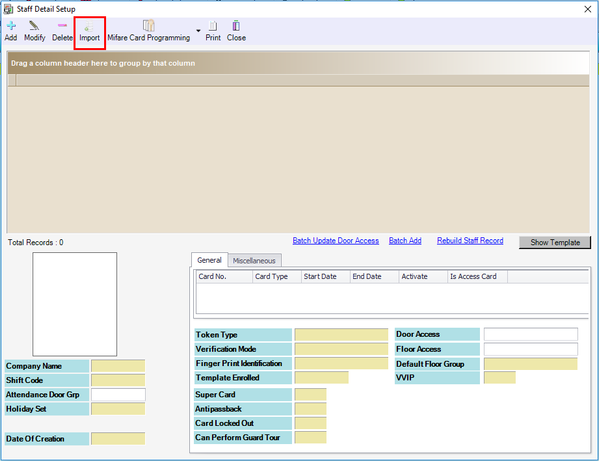
Note Some compulsory fields for the Staff Records file include Staff No, Card No and Staff Name Step 2: Ensure that xPortalNet Services is running Step 3: Go to xPortalNet Client > Data Setup > Access Data Setting > Staff Record and click Get Now! to continue. Step 4: The Staff Detail Setup Window will be shown. Click Import. Step 5: The Import Staff window will be shown. Click Next to continue.
Step 6: The Column Mapping window will then be shown. Map the Source Column Number with the Destination Field to allow the software to make sense of the imported data. Click OK.
Note Ensure that the Start From Row and End At Row is correct Step 7: The Ready to Import window will then be shown. Check and ensure that there are no errors. Click Confirm to continue. Step 8: The software will then proceed to import the Staff Records. Once the import process is completed, the following Import Staff Result window will be shown. Click Close to continue. Step 9: The software will then automatically Send Door Setting (install card) to all controllers. The Delivery Report window will then be shown to indicate the send process results. Step 10: The newly added staff records will be listed in the Staff Detail Setup window. |
Common Issues: | NIL |
| Porting Date: | 27/11/2018 (Rev 1.0) |


PROOF-READ
.
.
.
© MicroEngine Technology Sdn Bhd (535550-U). All rights reserved.