How to Backup xPortal3000 Database

Problem (Issue) Statement:

How to backup xPortal3000 database

Description:

A guide to backup xPortal3000 software database to be used for restoration in a new PC or for future database restoration.

Related Software:

  • xPortal3000 v3.0.0.12

Related Hardware:

NA

System Application:

  • xPortal3000 Standard Software

Symptom and Finding:

NA

Cause:

For first time backup of xPortal3000 database for restoration to a new PC.

Solution:

Warning!

  • Users are not recommended to run any xPortal software in Windows XP operating system as the system is unstable

  • Users are also advised to stop the xPortal Services before shutting down the Server PC to prevent any missing transaction issues.

.

.

Summary

  • To backup xPortal3000 database.


Before performing the following steps, please ensure that the xPortal3000 Client has been closed.


Step-by-step Guide:

  • To backup xPortal3000 database:

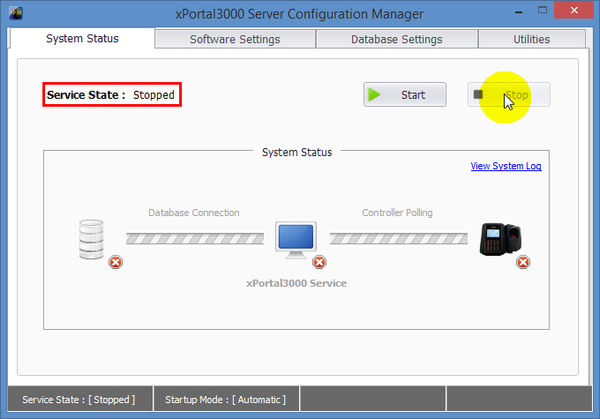
Step 1: Open xPortal3000 Server Configuration Manager and click Stop to stop the xPortal3000 Services in the System Status tab.
Ensuring that xPortal3000 Service State is Stopped
Figure 1: Ensuring that xPortal3000 Service State is Stopped


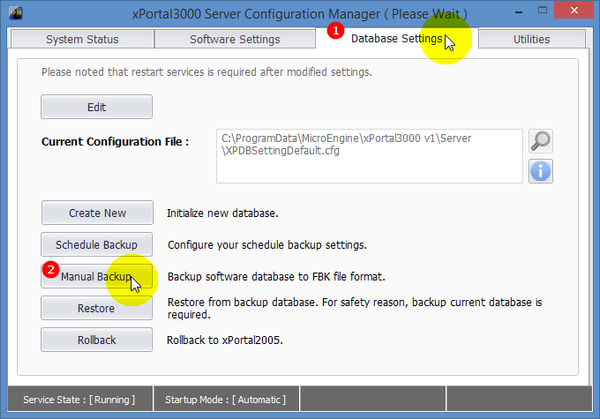
Step 2: Go to Database Setting tab and click Manual Backup.
Manual Backup in Database Settings Tab
Figure 2: Manual Backup in Database Settings Tab


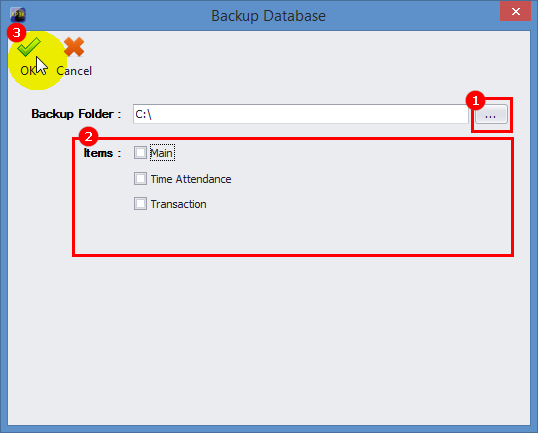
Step 3: The Backup Database window will be shown as below. Click icon to define backup folder location and check items that users wish to backup. Click Ok and continue.
Backup Database Window
Figure 3: Backup Database Window


Tips

Users are able to select more than one item for backup.


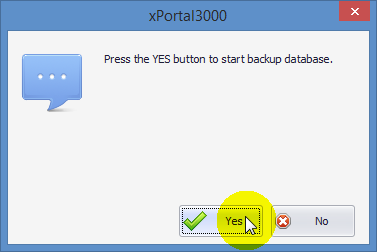
Step 4: The following message window will be shown to confirm starting the database backup process. Click Yes to continue.
Database Backup Confirmation
Figure 4: Database Backup Confirmation


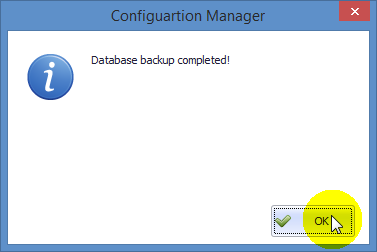
Step 5: Wait for the backup process to complete. Upon completion, the following message window will be shown. Click OK to complete the backup process.
Database Backup Completed Window
Figure 5: Database Backup Completed Window


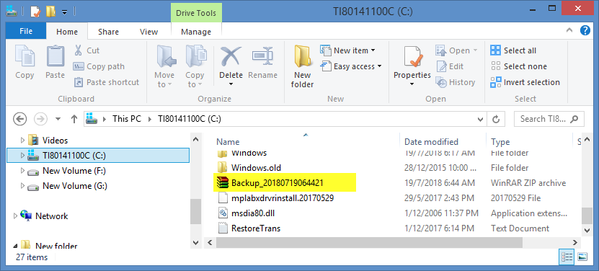
Step 6: Proceed to the folder location specified earlier in Step 3 to confirm that the backup file is created.
Created Backup File in the Designated Folder
Figure 6: Created Backup File in the Designated Folder 

Date Documentation:

18/7/2018 (Rev 1.0)

PROOF-READ

.

.


.

© MicroEngine Technology Sdn Bhd (535550-U). All rights reserved.