How to Configure Time Zone Settings in xPortal3000 Software

Problem (Issue) Statement:

How to configure Time Zone settings in xPortal3000 software

Description:

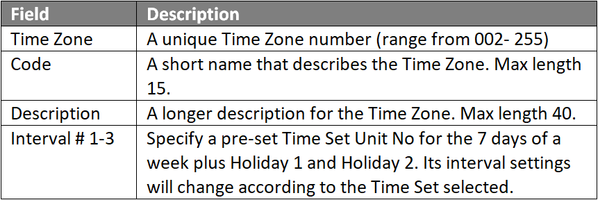
A guide to configure Time Zone settings in xPortal3000 software. The Time Zone settings can be assigned to certain functions (such as Door Accessibility, Auto Lock Release, Card + PIN, AutoPIN) to determine at which day and time the system will enable / operate the functions.

Related Software:

  • xPortal3000

Related Hardware:

  • All controller model

System Application:

  • Software configuration for assign time zone

Symptom and Finding:

NIL

Cause:

For first time configuration for Time Zone settings in xPortal3000 software.

Solution:

Warning!

  • Users are not recommended to run any xPortal software in Windows XP operating system as the system is unstable

  • Users are also advised to stop the xPortal Services before shutting down the Server PC to prevent any missing transaction issues.

.

.

Summary

  • To configure the Time Zone settings on xPortal3000.


Step-by-step Guide:

  • To configure the Time Zone settings on xPortal3000:

Step 1: Ensure that xPortal3000 Service is running.


Step 2: Go to xPortal3000 Client > Control Panel > Accessibility Settings > Time Zone.
Time Zone Icon in Accessibility Menu
Figure 1: Time Zone Icon in Accessibility Menu


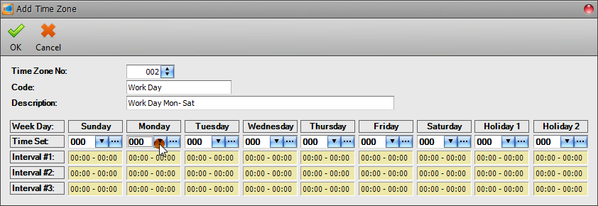
Step 3: Click Add to add a new Time Zone. The Add Time Zone window will be shown as below. Fill in all the necessary fields.
Add Time Zone Window
Figure 2: Add Time Zone Window


Note

  • There are two (2) sets of default setting which you cannot delete or edit this setting. Code "000" is "No Access" and "001" is "Full Access".
  • "Holiday 2" setting is only applicable to XP-M2000i / XP-M2300i / XP-M1000iv2 / XP-M1300i / XP-C2000 controller models.
  • Time Zone can be considered as the grouping of Time Set for 7 days including Holiday.


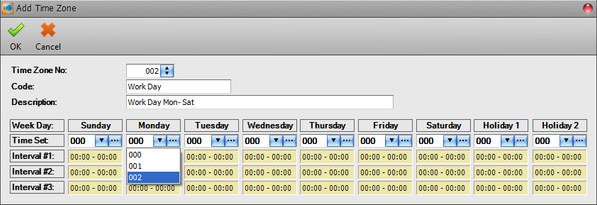
Step 4: To change the Time Set settings for each day of the week plus Holiday 1 and Holiday 2, simply click at the dropdown arrow. All available, pre-set Time Sets will be shown. Select the desired Time Set and click OK to save the changes.
Add Time Zone Window
Figure 3: Selecting the Time Set


Knowledge Base Link

Users can refer to How to Configure Time Set settings in xPortal3000 Software to configure the Time Set settings.


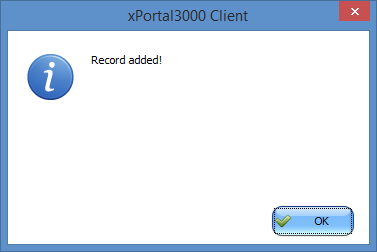
Step 5: The following message window will then be shown to indicate that the Record is Updated. Click OK to continue.
Record Added Window
Figure 4: Record Added Window

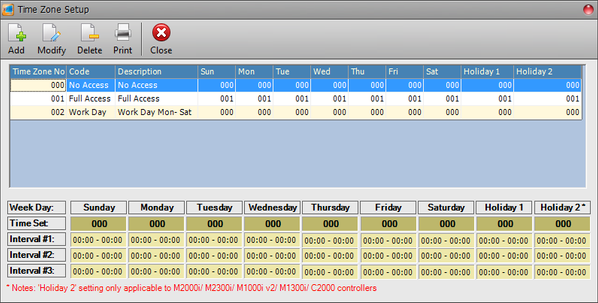
Step 6: Note that the Time Zone has been created and is shown in the Time Zone Setup window. Click Close to exit from the window.
Time Zone Setup Window
Figure 5: Time Zone Setup Window

Date Documentation:

4/6/2018 (Rev 1.0)

PROOF-READ

.

.


.

© MicroEngine Technology Sdn Bhd (535550-U). All rights reserved.