How to Install Fingerprint Template from One XP-GT Controller to Another XP-GT Controller

Problem (Issue) Statement:

How to install fingerprint templates from one XP-GT controller to another XP-GT controller

Description:

A guide to install fingerprint templates from one XP-GT controller to another XP-GT controller.

Related Software:

  • xPortal3000
  • xPortalNet Lite
  • xPortalNet Standard
  • xPortalNet PS

Related Hardware:

  • XP- GT3500L/ ABL
  • XP- GT3200L/ ABL

System Application:

This article can be used as reference for the following scenarios:

  • To copy and transfer the fingerprint template data installed in one XP-GT controller to another unit of XP-GT controller installed in the area with the same card users.
  • Fingerprint template is not downloaded or installed into the controller's memory.
  • To copy fingerprint template data from faulty XP-GT controller unit to the replacement XP-GT controller unit.
  • To install fingerprint template data to XP-GT controller after the controller memory is cleared and/or database is deleted.
  • To install fingerprint templates from one XP-GT controller to another XP-GT controller.

Symptom and Finding:

When card users place finger on fingerprint reader of XP-GT, the following responses are observed:

  • The LCD shows "FingerPrint Verification Fail" when fingerprint is presented to access the door.
  • The LCD shows "Unknown FingerPrint" when fingerprint is presented to access the door.
  • Software shows "Wrong Finger Print" transaction.
  • Software shows "Invalid Finger Print Access" transaction.

Cause:

Card user's fingerprint template was not downloaded / installed in the XP-GT controller.

Solution:

Warning!

  • Users are not recommended to run any xPortal software in Windows XP operating system as the system is unstable

  • Users are also advised to stop the xPortal Services before shutting down the Server PC to prevent any missing transaction issues.

.

.

Summary


Note

  • XP-GT controller must be connected to either xPortalNet / xPortal3000 software.
  • Ensure that XP-GT controller status at Device List > Controller List is shown as UP.


Step by step:

  • To ensure that the pre-requisite requirements are fulfilled:

Step 1: Ensure that the card user has enrolled his / her fingerprint template at the XP-GT controller that is designated as the Master Controller (for site layout which installed more than 1 unit of XP-GT controller).


Knowledge Base Link


Step 2: Ensure that the card user's fingerprint template is able to be retrieved by the xPortalNet / xPortal3000 software


Knowledge Base Link


Step 3: Ensure that the XP-GT controller's status is shown as UP.


  • To install fingerprint templates from one XP-GT controller to another XP-GT controller via xPortalNet software:

Step 1: Go to xPortalNet Client > Device Comm > Send Staff Setting.
Send Staff Setting Button
Figure 1: Send Staff Setting Button


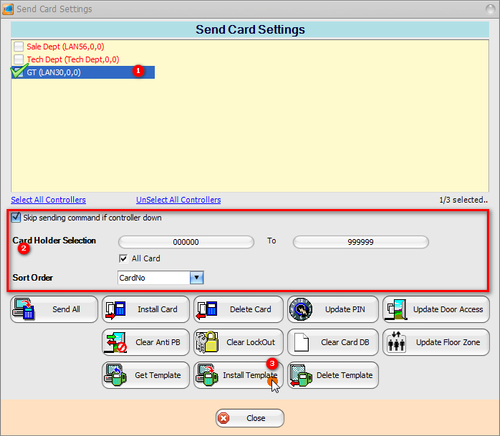
Step 2: The Send Staff Settings window will be shown as below. Check the controller checkbox to retrieve the fingerprint templates from, specify the card number to be retrieved, and click Get Template.
Send Card Setting Window
Figure 2: Send Card Setting Window


Tip

  • There are two (2) methods to send fingerprint templates under Card Holder Selection section: either by checking the All card checkbox or specifying the user's card number.
  • The download process to download fingerprint templates from all cards may take longer.
  • If users checked the All Card checkbox to send all card settings, the software will first clear existing fingerprint database that is present in the controller memory, before sending the new card database to the controller memory. This process is more suited for fresh controllers that do not have existing card database.


Warning!

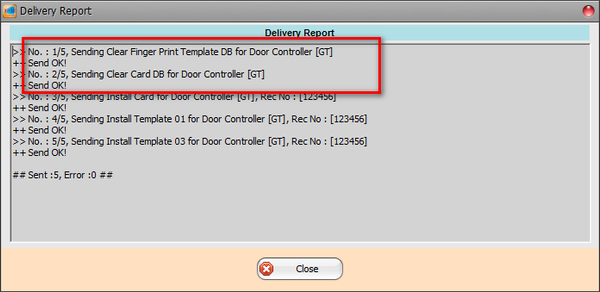
If users click Send All command with the All Card checkbox checked, the first two commands that the software will issue to the controller are Clear Finger Print DB and Clear Card DB respectively. During this process, card users may not be able to gain access due to the aforementioned command issued by software. System users are advised to only perform this procedure during low traffic movement to minimize access interruptions.

Delivery Report Window Showing Clear Finger Print Template DB and Clear Card DB Command from Software
Figure 3: Delivery Report Window Showing Clear Finger Print Template DB and Clear Card DB Command from Software


Step 3: The Delivery Report window will be shown. Wait until the Delivery Report prompts the download process is complete before clicking Close to continue.
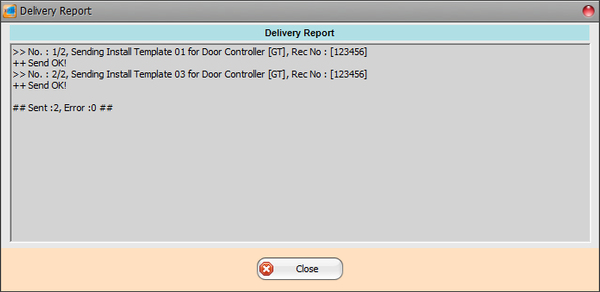
Delivery Report Window
Figure 4: Delivery Report Window


Step 4: The Communication Retrieval Result window will be shown to indicate the number of templates downloaded / retrieved from the controller. Click Close to continue.
Communication Retrieval Result Window
Figure 5: Communication Retrieval Result Window


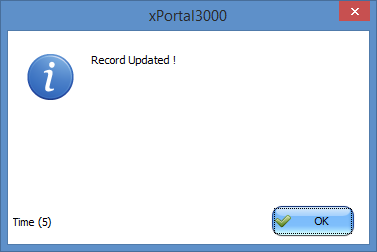
Step 5: The following message window will be shown to indicate that the Record is Updated. Click OK to continue. The fingerprint template data has been sent to the XP-GT controller.
Record Updated Window
Figure 6: Record Updated Window


  • To install fingerprint templates from one XP-GT controller to another XP-GT controller via xPortalNet software:

Step 1: Go to xPortal3000 Client > Device Comm > Send Card Setting.
Send Card Setting Icon in Device Comm Menu
Figure 7: Send Card Setting Icon in Device Comm Menu


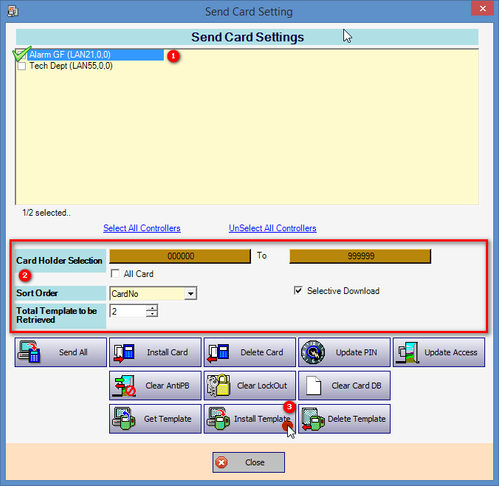
Step 2: The Send Staff Settings window will be shown as below. Check the controller checkbox to retrieve the fingerprint templates from, specify the card number to be retrieved, and click Get Template.

Send Card Setting Window
Figure 8: Send Card Settings Window


Tip

  • There are two (2) methods to send fingerprint templates under Card Holder Selection section: either by checking the All card checkbox or specifying the user's card number.
  • The download process to download fingerprint templates from all cards may take longer.
  • If users checked the All Card checkbox to send all card settings, the software will first clear existing fingerprint database that is present in the controller memory, before sending the new card database to the controller memory. This process is more suited for fresh controllers that do not have existing card database.


Warning!

If users click Send All command with the All Card checkbox checked, the first two commands that the software will issue to the controller are Clear Finger Print DB and Clear Card DB respectively. During this process, card users may not be able to gain access due to the aforementioned command issued by software. System users are advised to only perform this procedure during low traffic movement to minimize access interruptions.

Delivery Report Window Showing Clear Finger Print Template DB and Clear Card DB Command from Software
Figure 9: Delivery Report Window Showing Clear Finger Print Template DB and Clear Card DB Command from Software


Step 3: The Delivery Report window will be shown. Wait until the Delivery Report prompts the download process is complete before clicking Close to continue.
Delivery Report Window
Figure 10: Delivery Report Window


Step 4: The Communication Retrieval Result window will be shown to indicate the number of templates downloaded / retrieved from the controller. Click Close to continue.
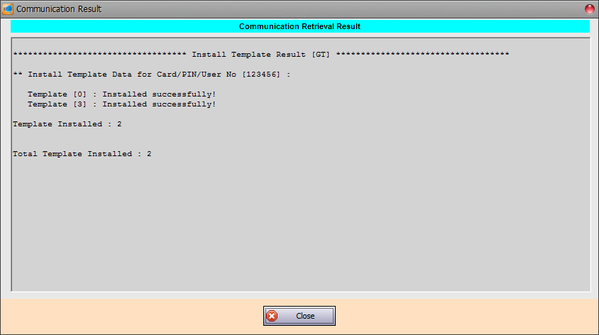
Communication Retrieval Result Window
Figure 11: Communication Retrieval Result Window


Step 5: The following message window will be shown to indicate that the Record is Updated. Click OK to continue. The fingerprint template data has been sent to the XP-GT controller.
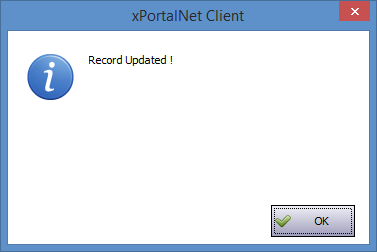
Record Updated Window
Figure 12: Record Updated Window

Date Documentation:

11/6/2018 (Rev 1.0)

PROOF-READ

.

.


.

© MicroEngine Technology Sdn Bhd (535550-U). All rights reserved.