How to Configure Guard Tour Check Point in xPortalNet Software
Problem (Issue) Statement: | How to Configure Guard Tour Check Point in xPortalNet Software |
Description: | A guide to configure the Guard Tour Check Point. This feature is applicable when user want to apply guard tour checking. This setup is to configure which route checkpoint and the time allocated for each guard tour checking. Every route checkpoint can be assigned to a different guard. User also can activate or deactivated the checkpoint created. |
Related Software: | xPortalNet v1.5.0.104 or higher |
Related Hardware: | XP-M2000i v6.10 and above, XP-M1000i v2 v6.00 and above |
System Application: | Door Access System |
Symptom and Finding: | NIL |
Cause: | For first time guide to configure the Guard Tour Check Point in xPortalNet software. |
Solution: | Warning!
. . Summary
Step-by-step Guide:
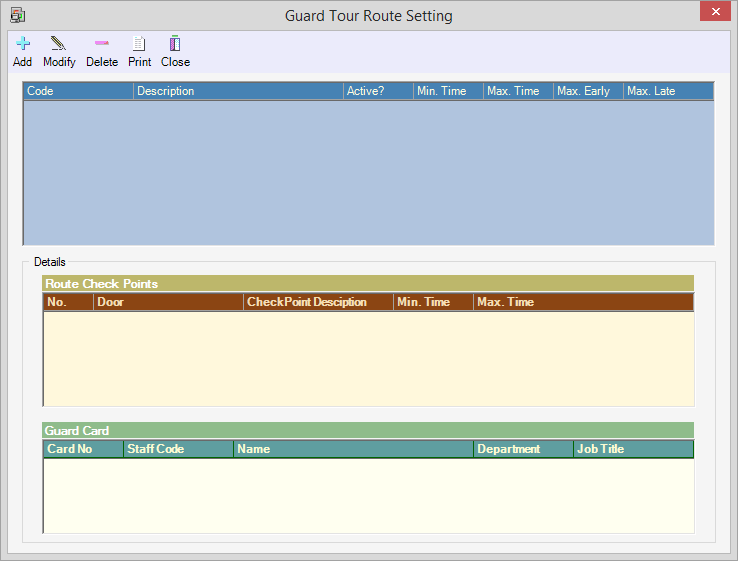
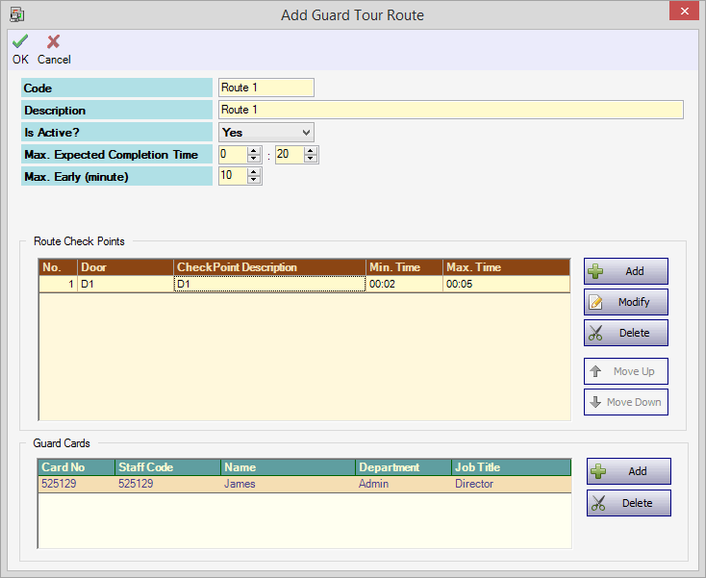
In these steps, user will be guided to configure the route for guard tour, including the route check points and the guard card assign for each route. Pre-Configuration Please add new Guard record from the Staff Records prior the guard card assignment in this step. Step 1: Open Guard Tour Reader Check Point. Go to Guard Tour > Guard Tour Check Point. Step 2: The following window will be shown. Step 3: There are 3 setups in this section. Please perform all. Guard Tour Check Point : Configure Route In these steps, user will be guided to add new route for guard tour. Step 1: Click Add to add new route. Step 2: Fill in the fields according to the description below: Guard Tour Check Point : Configure Route Check Points
Step 1: Click Add to add new route check points. Step 2: The following window will be shown. Step 3: Fill in the fields according to the description below: Step 4: Click OK to confirm and save settings. Guard Tour Check Point : Assign Guard Card
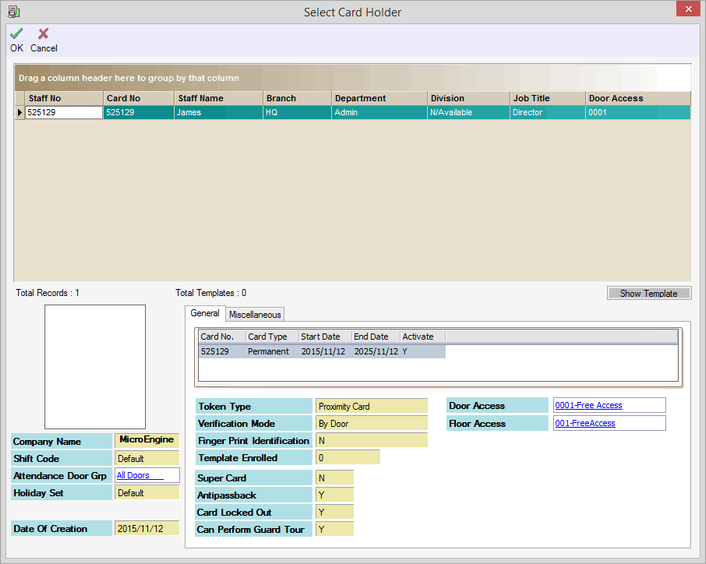
Step 1: Click Add to assign the guard card for the route. Step 2: The list of guard card will be shown. Please select the guard card to assign for the route checking. Step 3: After configuring the Route, Route Check Points and Guard Card, click OK to confirm and save settings. Step 4: Please repeat this steps to add next route. Next step: To Configure the Guard Tour Schedule Previous step: To Configure Guard Tour Reader |
Document Date | 19/07/2018 (Rev1.0) |
PROOF-READ
.
.
.
© MicroEngine Technology Sdn Bhd (535550-U). All rights reserved.


