How to Setup Auto Sign Out Expired Visits Action Procedures in xPortalNet Software
Problem (Issue) Statement: | How to Setup Auto Sign Out Expired Visits Action Procedures in xPortalNet Software |
Description: | A guide to configure the Auto Sign Out Expired Visits Action Procedure. By executing this action, the system will auto signing out the visitor which is still signing in but the visits access is already expired. Once this action procedures is executed, the signed in visitor that matched the expired access condition will automatically be signed out by the system. User must configure the Action Procedures and Schedule Task for this operation to be completed. |
Related Software: | xPortalNet v1.5.0.117 or higher |
Related Hardware: | NIL |
System Application: | Door Access System |
Symptom and Finding: | NIL |
Cause: | For first time guide to configure the Auto Sign Out Expired Visits Action Procedures in xPortalNet software. |
Solution: | Warning!
. . Summary
Step-by-step Guide:
In these steps, user will be guided to setup the Action Procedures. The Auto Sign Out Expired Visits is an action that will automatically sign out any visitor that is still signing in but their visits access has already expired. Step 1: Login to xPortalNet Server software. Step 2: Open Action Procedures. Go to Server Admin > Action Procedures. Step 3: The Add Action Procedures window will be shown.
Step 4: The Add Action Type window will be shown.
Step 5: Make sure the settings is correct. Then, click OK to save the changes. Step 6: The following message will be shown. Click OK to continue. Step 7: You have successfully configured the action procedures.
In these steps, user will be guided to configure the Schedule Task. It will be used to schedule the Auto Sign Out Expired Visits when it is to be executed. Step 1: Login to xPortalNet Server software. Step 2: Open Schedule Task. Go to Server Admin > Schedule Task. Step 3: The Add Schedule Task window will be shown.
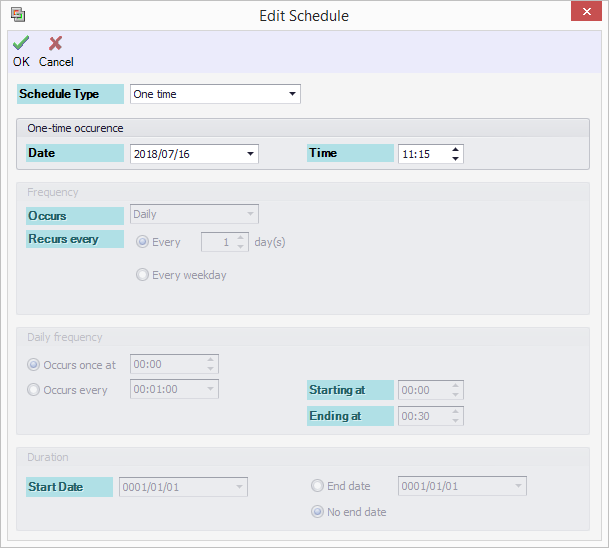
Step 4: Select the pre-configured Visitor Auto Sign Out Action Procedures. Then, click OK. Step 5: Click Schedule and the following window will be shown.
Knowledge Base Link User can choose from 3 Schedule Type which are Once at services startup, Recurring and One time. Further details on Schedule Type, please refer to the following link: How to Configure Schedule Task in xPortalNet? Step 6: After user confirm the settings and click OK, the following message will be shown. Click OK to continue.
Step 7: You have successfully added the Schedule Task.
In these steps, user will be guided on how to validate the Visitor Auto Sign Out Action Procedures. User can see when the action will be executed from the Latest Event List. Step 1: Login to xPortalNet Server software. Step 2: Open Visitor Still In List tab and check the signed in visitor records. Step 3: Check the Visitor Information.
Step 4: Observe the Latest Event List.
|
Document Date | 16/07/2018 (Rev 1.0) |


PROOF-READ
.
.
.
© MicroEngine Technology Sdn Bhd (535550-U). All rights reserved.