Summary
To manually add card user via Staff Records.
To observe the Latest Event List window to ensure that staff is able to gain door access.
Step-by-step Guide:
To manually add card user via Staff Records:
Step 1: Ensure that xPortalNet Services is running.
Step 2: Go to xPortalNet Client > Data Setup > Access Data Setting > Staff Record and click Get Now! to continue.

Figure 1: Staff Detail List
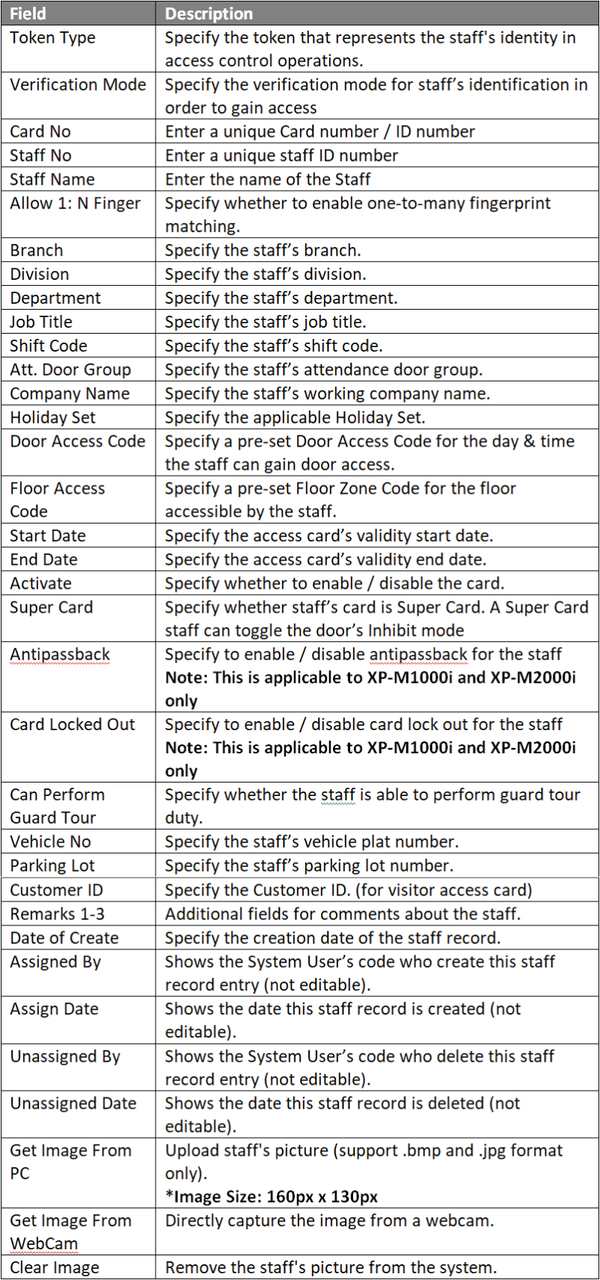
Step 3: Click Add to add a new card user. The Add Staff Detail window will be shown as below. Fill in all the necessary information at General tab.

Figure 2: Add Staff Detail Window
Step 4: Next, users have to assign a door accessibility level for the newly added staff. At the Add Staff Detail window, click Press to Select .. under the Door Access Code field. The Select Door Access window will be shown as below. Check the door accessible by the staff and click OK to continue.

Figure 3: Select Door Access Window
Step 5: The following message window will be shown to indicate that the Record is Updated. Click OK to continue.

Figure 4: Record Updated Window
Step 6: The Send Data and Command window will be shown. Please wait for the Send Data and Command process to complete before clicking Close.

Figure 5: Send Data and Command Window
Step 7: Ensure that the newly added staff record is listed in the Staff Detail Setup window.
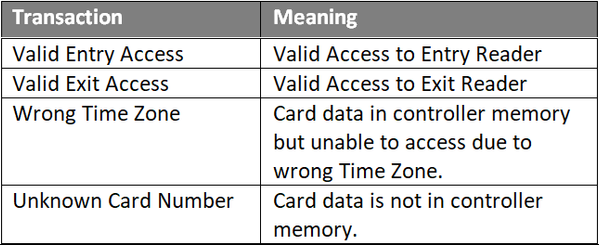
To observe the Latest Event List window to ensure that staff is able to gain door access:
Step 1: Test the configuration steps by flashing the access card to the connected controller / reader to verify that the staff is able to gain the respective door access.
Step 2: At the Latest Event List window, the software will be logging several different transactions under the respective scenarios.