How to Detach xPortalNet database from SQL Server

Problem (Issue) Statement:

How to detach xPortalNet database from SQL Server

Description:

A guide to detach xPortalNet database from SQL Server.

Related Software:

  • xPortalNet v1.0.0.69
  • SQL Server Express 20008 R2 (Version: 10.50.4000.0)

Related Hardware:

NA

System Application:

xPortalNet Software

Symptom and Finding:

NA

Cause:

For first time detaching of xPortalNet database from SQL Server.

Solution:

Warning!

  • Users are not recommended to run any xPortal software in Windows XP operating system as the system is unstable

  • Users are also advised to stop the xPortal Services before shutting down the Server PC to prevent any missing transaction issues.

.

.

Summary

  • To detach xPortalNet database from SQL Server.


Note

Detaching xPortalNet database is required in order to delete / move the physical xPortalNet database.

Default location of physical xPortalNet database: C: Program Data\MicroEngine\xPortalNet v1.


Step-by-step Guide:

  • To detach xPortalNet database from SQL Server:

Step 1: To close xPortalNet Server & Client if any of the software instances are still running.


Step 2: Right-click the xPortalNet Service icon, click Stop. Wait for the pop-up message indicating that the xPortalNet Service has been stopped.
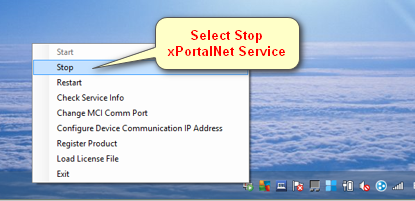
Right-click xPortalNet Service Icon and Click Stop
Figure 1: Right-click xPortalNet Service Icon and click Stop


xPortalNet Comm Service Stopped Pop-up Message
Figure 2: xPortalNet Service Stopped Pop-up Message


Step 3: Open SQL Server Management Studio on desktop.
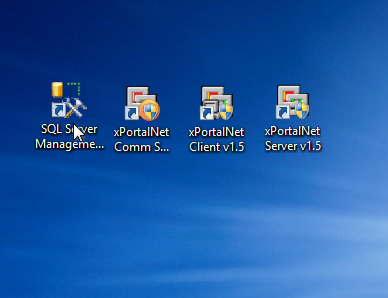
SQL Server Management Studio Icon
Figure 3: SQL Server Management Studio Icon


Step 4: The Connect to Server window will be shown. Click Connect to continue.
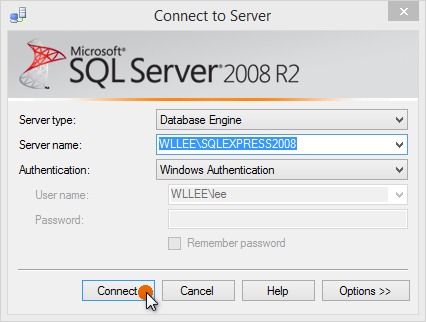
Connect to Server Window from SQL Server Management Studio Software
Figure 4: Connect to Server Window


Note

  • If Authentication is done under SQL Server Authentication, please key-in the User Name and Password before clicking Connect.
  • The User Name and Password is created during Microsoft SQL Server 2012 installation. Please refer to How to Install Microsoft SQL Server 2012 for the installation step.


Step 5: Under the Object Explorer window, expand the Databases folder.
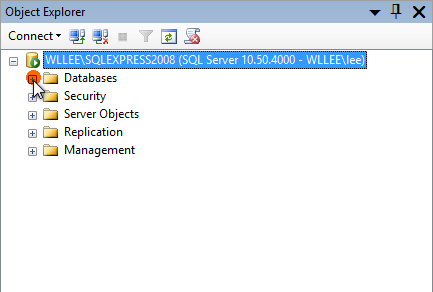
Databases Folder under the Object Explorer Window
Figure 5: Databases Folder under the Object Explorer Window


Step 6: A drop down list of components inside the Databases folder will be shown as below. The XPNDB and XPNTR components will be visible after expanding the Databases folder.
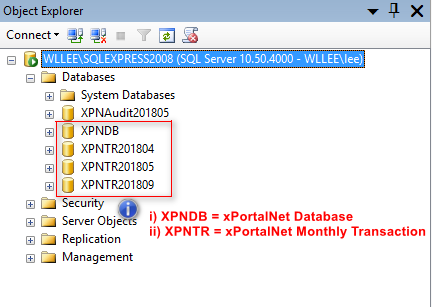
Components inside Databases Folder
Figure 6: Components inside the Databases Folder

Note

The list of XPNTR folder may be slightly different for different users. The transaction database is structured based on the monthly transactions pulled up by the software.


Step 7: To detach the XPNDB component, right-click the XPNDB > Tasks > Detach.
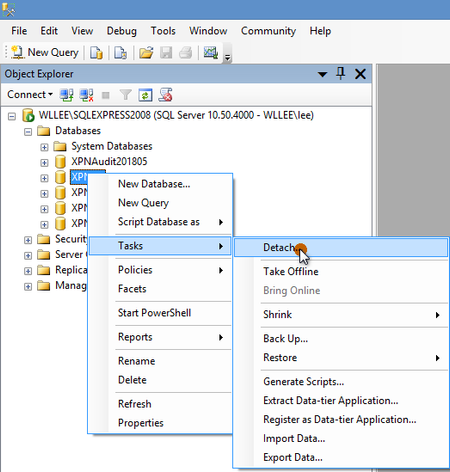
To Detach XPNDB Component
Figure 7: To Detach XPNDB Component


Step 8: The Detach Database window will be shown. Check both Drop Connections and Update Statistics checkboxes and click OK to continue.
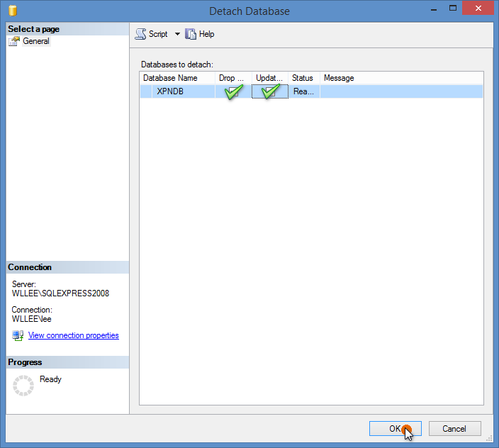
Detach Database Window
Figure 8: Detach Database Window


Step 9: The window will automatically be closed after the selected database is successfully detached.


Step 10: The XPNDB database will no longer be shown in the Databases folder.
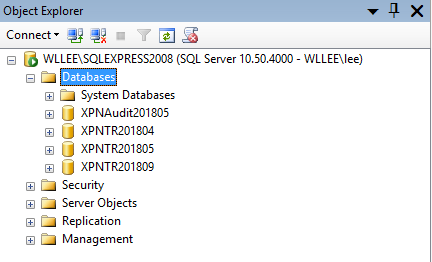
The XPNDB Component is No Longer Shown
Figure 9: The XPNDB Component is No Longer Shown

Step 11: To completely delete / move the xPortalNet database, repeat steps 7 to 9 to detach all remaining databases such as XPNDB, XPNTR, and XPNAudit.


Step 12: Users may safely delete / move the physical databases after detaching the databases from the SQL Server Database.

Date Documentation:

28/5/2018 (Rev 1.0)

PROOF-READ

.

.


.

© MicroEngine Technology Sdn Bhd (535550-U). All rights reserved.