How to Create Floor Zone and Floor Accessibility at xPortalNet Client
Problem (Issue) Statement: | How to create Floor Zone and Floor Accessibility at xPortalNet Client |
Description: | A guide to configure Floor Zone and Floor Accessibility at xPortalNet Client. |
Related Software: |
|
Related Hardware: | SNETv2 v3.48, MK800E v1.47, E32R & HID R10 Reader |
System Application: | Lift Masking Access System |
Symptom and Finding: | NA |
Cause: | For first time configuration on the xPortalNet Software to setup Floor Zone and Floor Accessibility for lift access control. |
Solution: | Warning!
. . Knowledge Base Link Ensure that the Connection, Controller, Door, Lift Panel & Floor Relay are configured at xPortalNet Server. Users can refer to How to Configure Lift Access Control at xPortalNet Server for the complete configuration steps. . . Warning! The XP-SNET controller will not send fire alarm signal over to the connected XP-SNET-E32R and/or XP-SNET-E248 extension boards if the configuration settings for the XP-SNET controller is not completed.Complete the configuration settings for XP-SNET controller in order for XP-SNET-E32R and/or XP-SNET-E248 to respond accordingly to fire alarm signals.. . Summary
Step-by-step Guide:
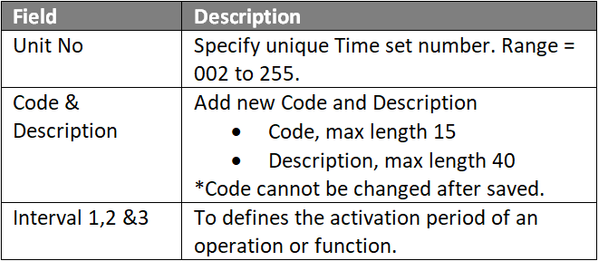
Step 1: Go to xPortalNet Client > Data Setup > Access Data Setting > Time Set > Add. Note Time Set determines the time interval (dictated by 3 timestamp intervals) in a day which the user can access the lift.
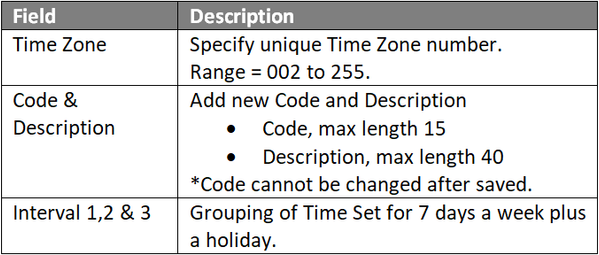
Step 1: Go to xPortalNet Client > Data Setup > Access Data Setting > Time Zone > Add.
Note Specify the pre-configured Time Sets to allow the card holder to access the selected floors at the respective timestamps as dictated by the Time Set. Users can select a different Time Set for different day of the week, including holidays. Step 2: Fill up the Time Zone information accordingly.
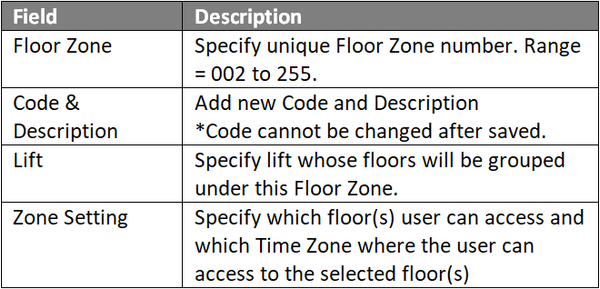
Step 1: Go to xPortalNet Client > Data Setup > Access Data Setting > Floor Zone > Add. Step 3: Figure 4 and Figure 5 above represent two different ways of configuring the Zone Setting section of the Edit Floor Zone window. Figure 4 (Floor Zone 3) specifies that the user can only have access to one single floor while the method specified in Figure 5 (Floor Zone 4) allows users to configure multiple floors using the same 1 field (Zone #1). Step 4: Suppose a maintenance personnel requires access to all 10 floors in a building, users can use the configuration method as shown in Figure 5, where the 'From' field will be ground floor or first floor of the building; and the 'To' field will the the 10th floor of the building. Once the Floor Accessibility containing the Floor Zone is assigned to the maintenance personnel's card, the personnel will have access to all 10 floors of the building.
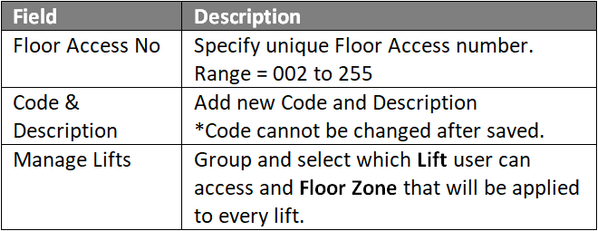
Step 1: Go to xPortalNet Client > Data Setup > Access Data Setting > Floor Accessibility > Add.
Step 1: Go to xPortalNet Client > Data Setup > Access Data Setting > Staff Record and click Get Now!
|
Documentation: | 6/4/2018 (Rev 1.0) |


PROOF-READ
.
.
.
© MicroEngine Technology Sdn Bhd (535550-U). All rights reserved.