How to Import Staff Record With Card No. and Card Serial No. in Hex Format in xPortalNet HS Software
Problem (Issue) Statement: | How to Import Staff Record With Card No. and Card Serial No. in Hex Format in xPortalNet HS Software |
Description: | xPortalNet HS software is provided with higher security features. One of them is to display the Card No. / Card Serial No. in Hexadecimal number format. This can tighten up the security to prevent from being tampered by others. Eg. Stolen Id No, Change Id No, etc. This article will show you how to import staff record in Hex format number. |
Related Software: | xPortalNetHS v1.8.0.3 |
Related Hardware: | NIL |
System Application: | Door Access System |
Symptom and Finding: | NIL |
Cause: | NIL |
Solution: | Warning!
. . Summary. Step-by-step Guide:
In these steps, user will be guided to create the import file. . Step 1: Run any spreadsheet application. Eg: Excel, OpenOffice Calc. . Step 2: Create a new blank sheet. . Step 3: Follow the following template. . Step 4: Save the changes made. . Step 5: Proceed to import the file in xPortalNet HS Client Software. . .
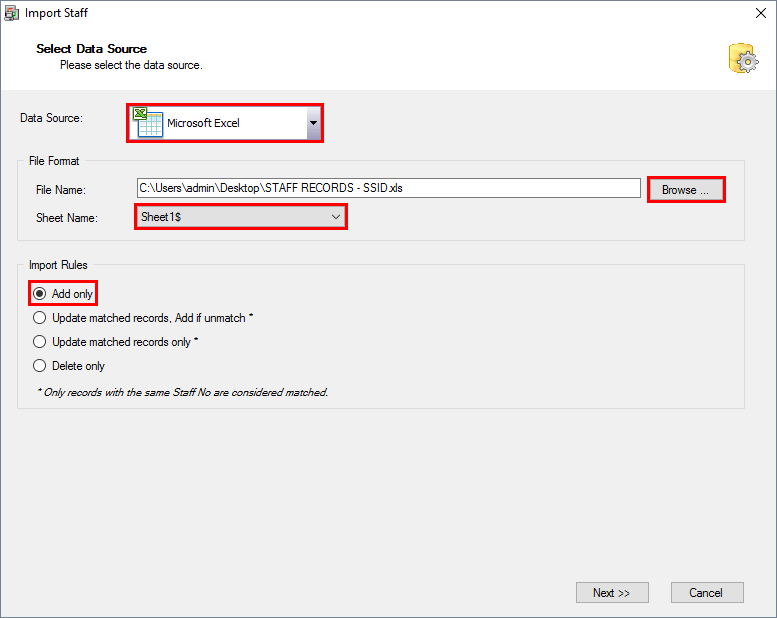
In these steps, user will be guided to import the staff record which the Card No. and Card Serial No. is in Hexadecimal format. . Step 1: Login to xPortalNet HS Client. . Step 2: Go to Data Setup > Access Data Setting > Staff Records. . Step 3: Staff Detail Setup window will be shown. Click Import. . Step 4: The Import Staff window will be shown.
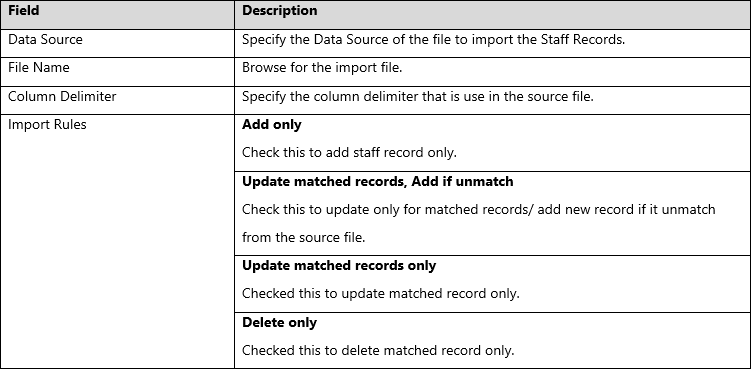
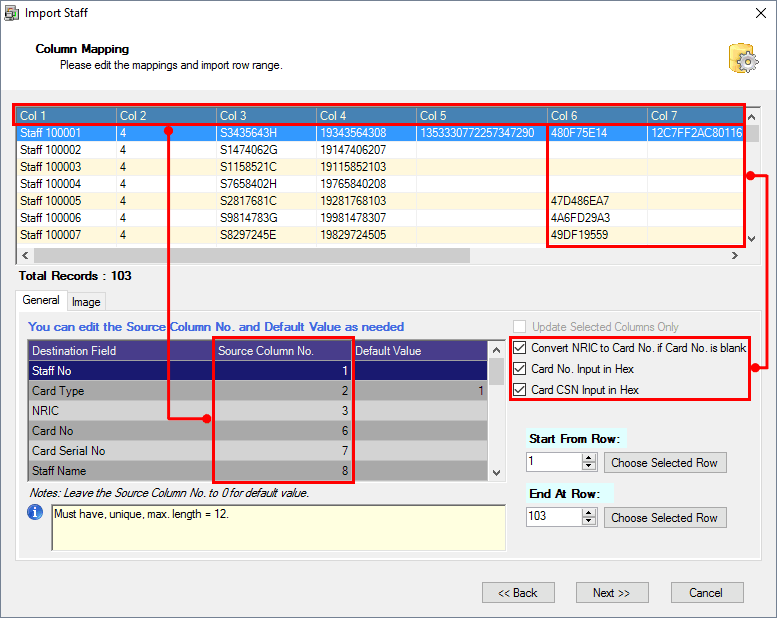
. Step 5: Click Next. . Step 6: Fill in the mappings section accordingly.
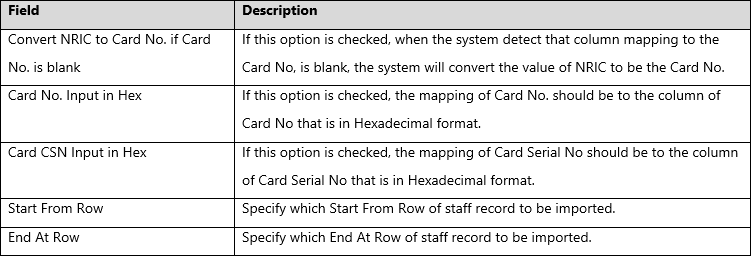
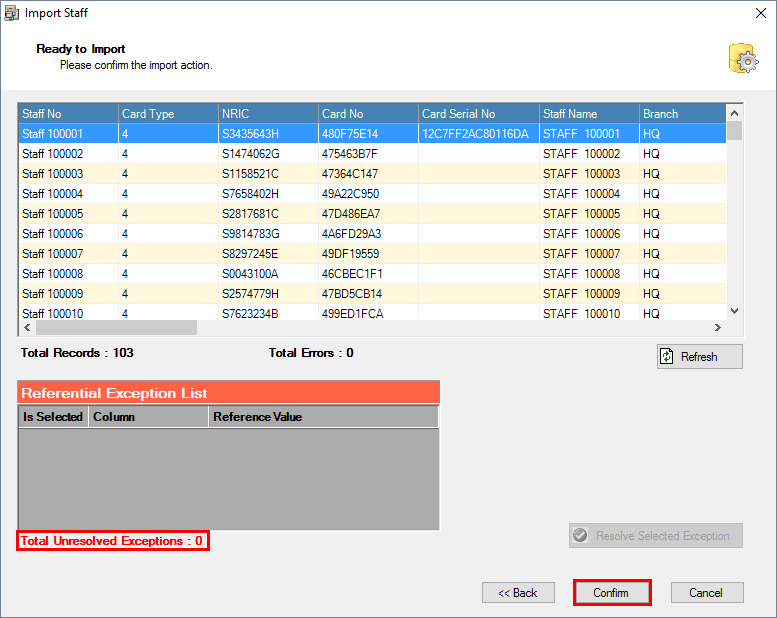
. Step 7: Click Next. . Step 8: Ready to Import Window will be shown. Make sure the "Total Unresolved Exceptions: 0". Otherwise, please resolve selected exception first. . Step 9: Click Confirm to start importing the staff record.
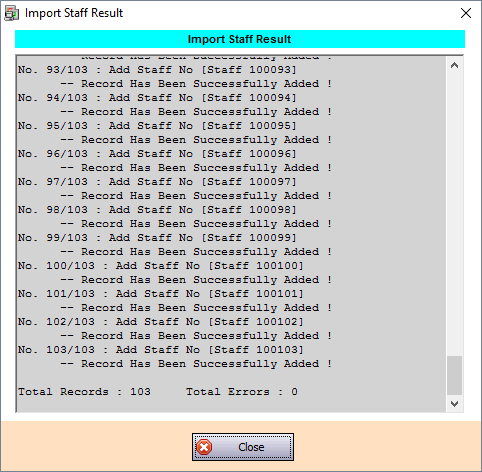
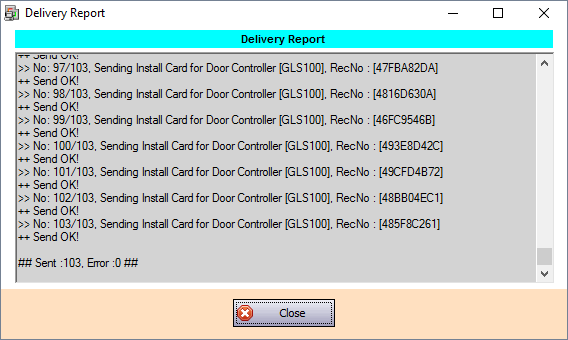
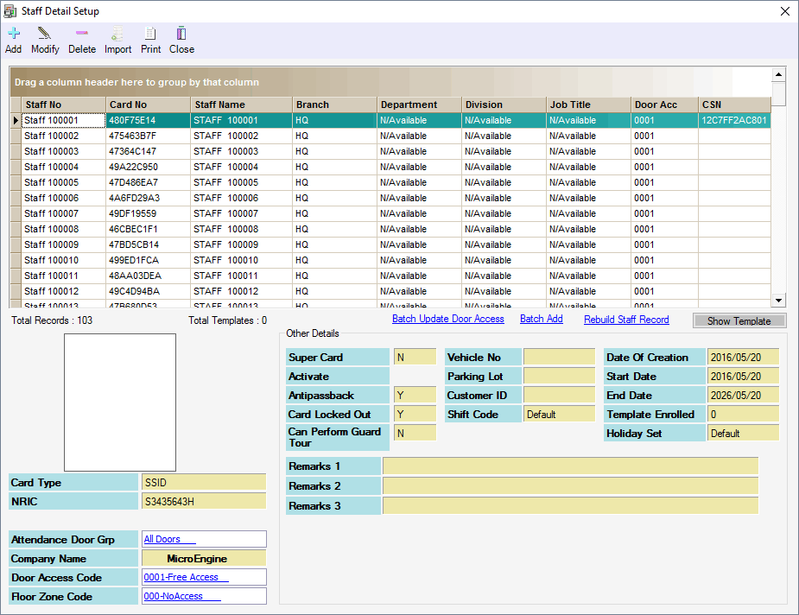
. Step 10: The Processing Data loading bar will be shown. . Step 11: The Import Staff Result window will be shown when the import to the software database is success. . Step 12: The Delivery Report window will be shown when the import to the controller is success. . Step 13: Check the staff record that is successfully imported to the software database from the Staff Records. . Step 14: Flash card to verify the record is successfully installed to the controller. |
| Common Issues: |
|
Document Date | 09/08/2018 (Rev 1.0) |
PROOF-READ
.
.
.
© MicroEngine Technology Sdn Bhd (535550-U). All rights reserved.

