How to Configure Event Filters in xPortalNet
Problem (Issue) Statement: | How to Configure Event Filters in xPortalNet |
Description: | A guide to configure Event Filters. This feature is applicable when user want to display / filter / discard specific event transaction in the xPortalNet software. This is also applicable to different Client machine accessing the same Server. Which means, user can specify the target Client machine for the event filtering. |
Related Software: | /wiki/spaces/SRN/pages/97387049 or higher |
Related Hardware: | NIL |
System Application: | Door Access System |
Symptom and Finding: | NIL |
Cause: | For first time guide to configure the Event Filters in xPortalNet software. |
Solution: | Warning!
. . Summary
Step-by-step Guide:
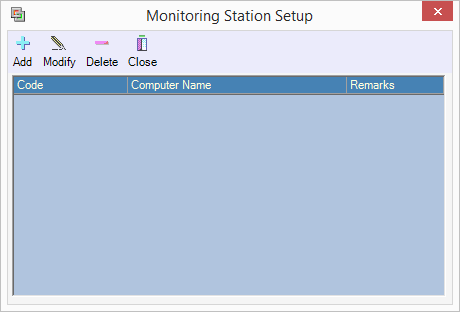
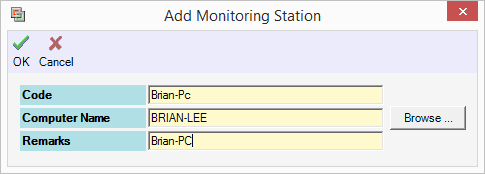
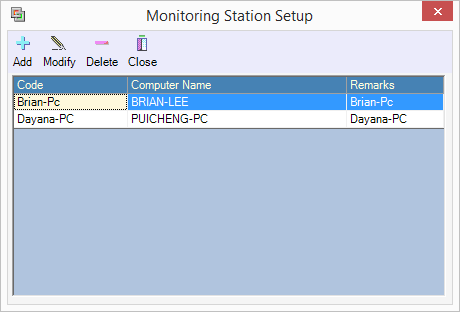
In these steps, user will be guided to setup the Monitoring Station that is going to apply the event filtering. Step 1: Login to xPortalNet Server. Go to Server Admin > Monitoring Station. Step 2: The following window will be shown. Step 3: Click Add to add a new Monitoring Station. Step 4: Fill up the Code and Remarks. User can browse for the Computer Name by clicking the Browse... button. Step 5: Click OK to confirm and save the settings. Step 6: Repeat the steps to add another Computer Name.
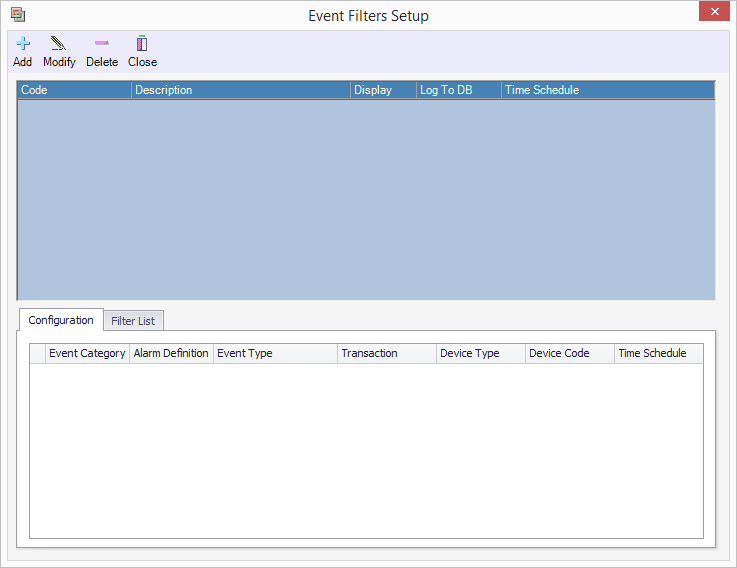
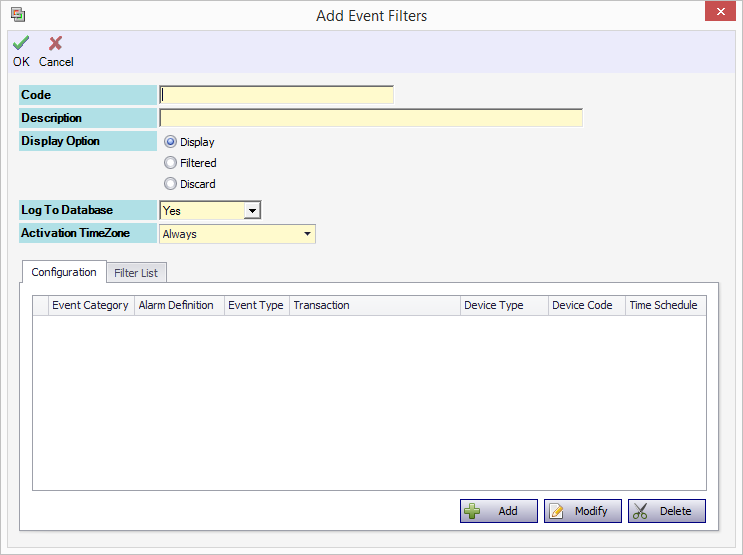
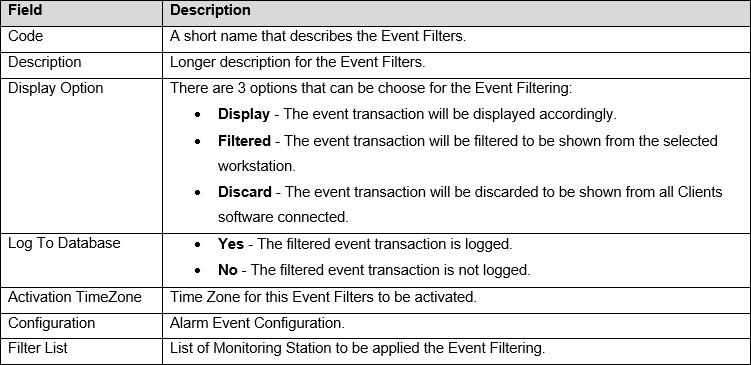
In these steps, user will be guided to setup the event filtering. User can customize which event to be filtered in the selected monitoring station accordingly. Step 1: Login to xPortalNet Server. Go to Server Admin > Event Filters. Step 2: The following window will be shown. Click Add to add new Event Filters. Step 3: The following window will be shown. Step 4: Setup the Event Filters according to the description below:
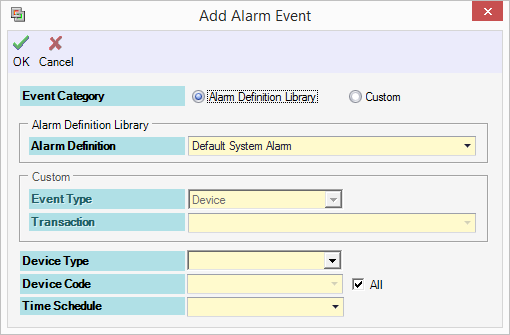
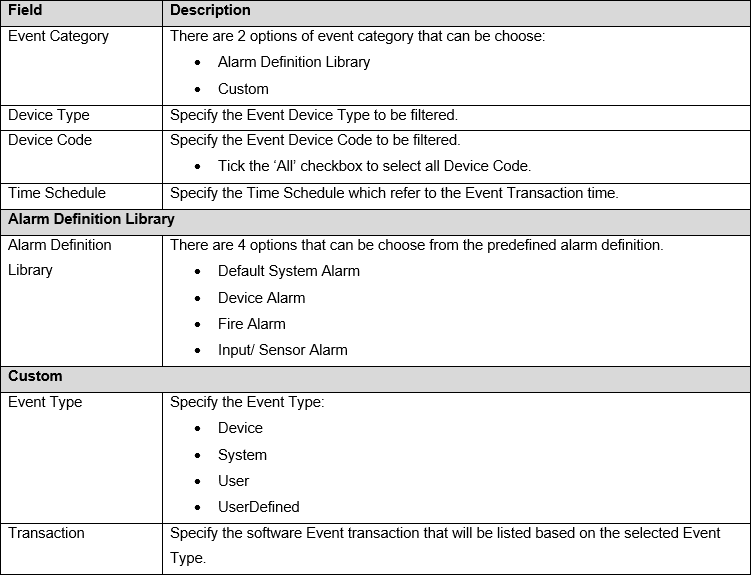
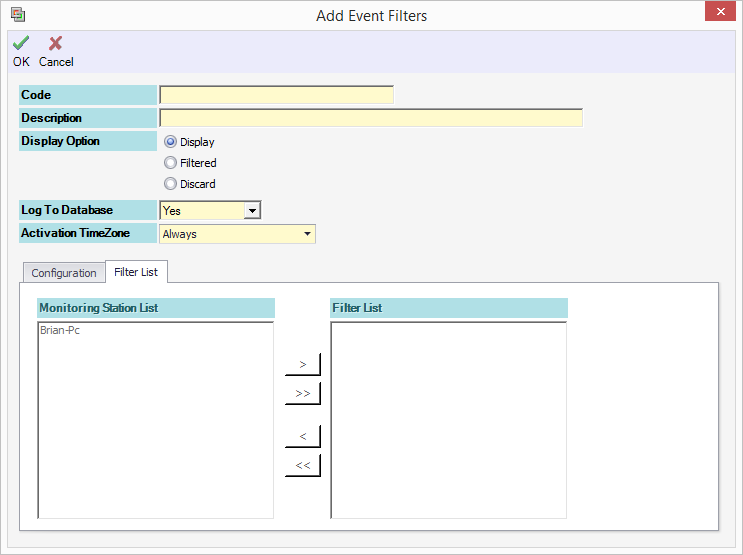
Knowledge Base Link For more details on Display Option Configuration, see the following article: How to Configure Display Option Configuration in Event Filters Step 5: Click Add to setup the Event Filters Configuration. The following window will be shown. Step 6: Setup the Alarm Event according to the description below: Step 7: Click OK to confirm and save the changes. Step 8: Click Filter List tab to configure the filter workstation. Step 9: Use the > / >> button to add / add all or < / << to remove / remove all the Computer Name to and from the Filter List.
Step 10: Click OK to confirm and save the changes. Step 11: You have successfully configured the Event Filters. |
Document Date | 17/07/2018 |
PROOF-READ
.
.
.
Related content
© MicroEngine Technology Sdn Bhd (535550-U). All rights reserved.
