Step 1: Go to xPortalNet Client > Data Setup > System Setting > Controller.
Step 2: The Controller Setup window will be shown. Select the specific controller(s) to enable AntiPassback feature and click Modify to continue.
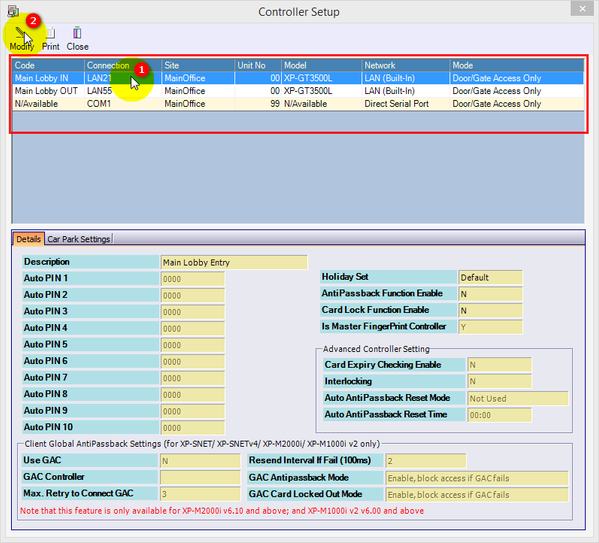
Figure 1: Controller Setup Window
Step 3: The Edit Controller window will then be shown. Under the AntiPassback Function Enabled field, click on the drop-down dialog box and select Yes to enable AntiPassback feature. Click OK to save the changes.
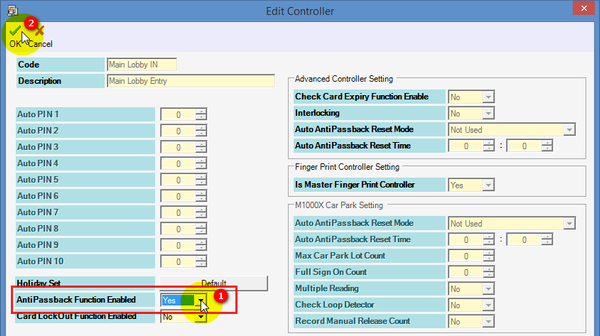
Figure 2: Edit Controller Window
Step 4: The software will then prompt the following message window to indicate that the Record is updated. Click OK to continue.
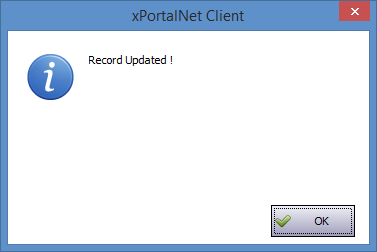
Figure 3: Record Updated Window
Step 5: The Delivery Report window will then be shown. Wait for the send door setting process to complete before clicking Close to continue.
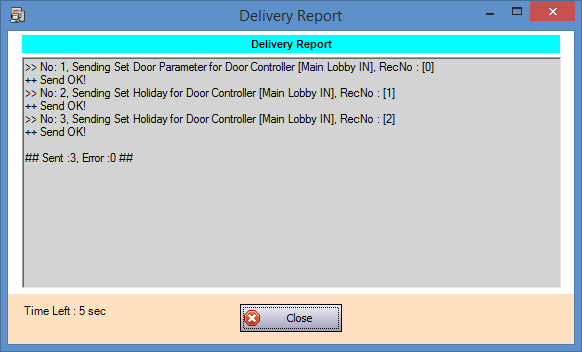
Figure 4: Delivery Report Window
Step 1: Go to xPortalNet Client > Data Setup > System Setting > Door.
Step 2: The Door Setup window will be shown. Select the specific door to configure zone code and click Modify to continue.
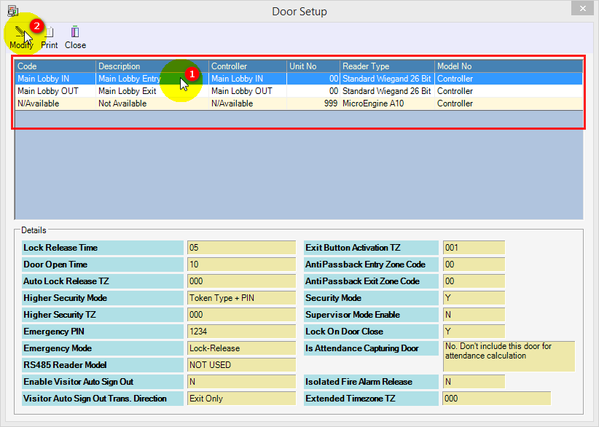
Figure 5: Door Setup Window
Step 3: The Edit Door window will then be shown. Configure the AntiPassback Entry & Exit Zone Code field and click OK to save the changes.
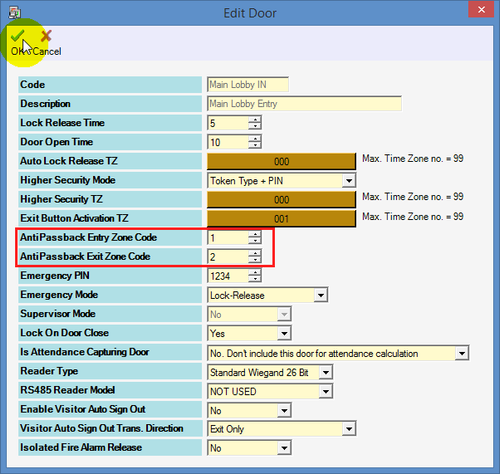
Figure 6: Edit Door Window

Step 4: The following message window will be shown to indicate that the Record is updated. Click OK to continue.

Figure 7: Record Updated Window
Step 5: The Send Data and Command window will then be shown. Wait for the send door setting process to complete before clicking Close to continue.
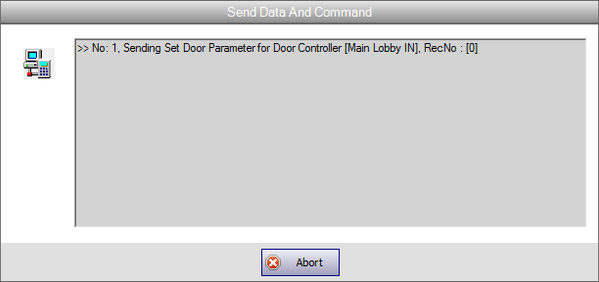
Figure 8: Send Data and Command Window
- To configure AntiPassback settings in Staff Records:
Step 1: Go to xPortalNet Client > Access Data Setting > Staff Record.
Step 2: The Staff Detail Setup window will be shown. Select the card user intended to enable the AntiPassback feature and click Modify.
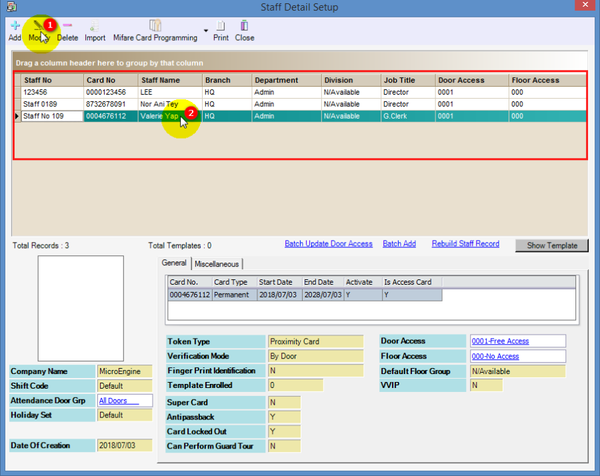
Figure 9: Staff Detail Setup Window
Step 3: The Edit Staff Detail window will be shown. At the Antipassback field, click on the drop-down dialog box and select Yes to enable AntiPassback. Click OK to save the changes.
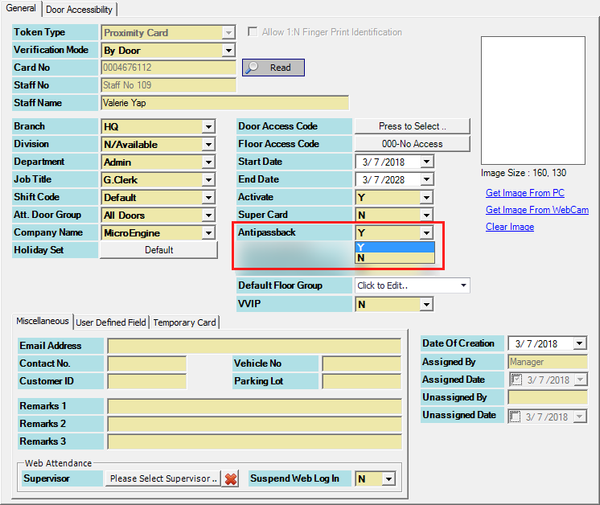
Figure 10: Edit Staff Detail Window
Step 4: The following message window will be shown to indicate that the Record is updated. Click OK to continue.

Figure 11: Record Updated Window
Step 5: The Delivery Report window will then be shown. Wait for the send door setting process to complete before clicking Close to continue.
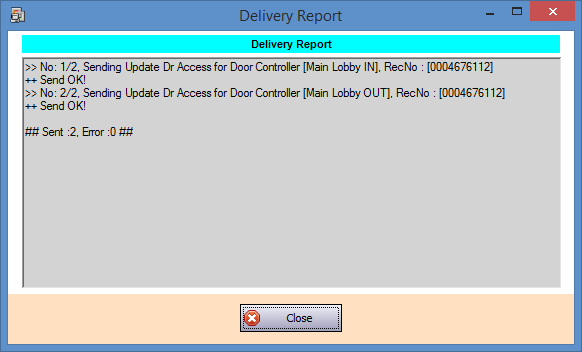
Figure 12: Delivery Report Window
- To verify that the AntiPassback feature is enabled:
Step 1: Use a test card to flash on the Entry and Exit Readers. Ensure that the Latest Event List recorded the Valid Entry / Exit Access transactions.

Figure 13: Valid Entry and Exit Access Transaction Logs
Step 2: Using the same card, flash on the Entry Reader more than twice. Ensure that the Latest Event List records one Valid Entry Access transaction and followed by continuous AntiPB Violation transaction logs.

Figure 14: Latest Event List Showing AntiPB Violation Transaction Logs
- To clear AntiPassback status for the card user:
Step 1: Go to xPortalNet Client > Device Comm > Send Staff Setting.

Figure 15: Send Staff Setting Button in Device Comm Icon
Step 2: The Send Card Setting window will be shown. Select the Controller and card holder whose AntiPassback status is to be cleared and click Clear Anti PB.
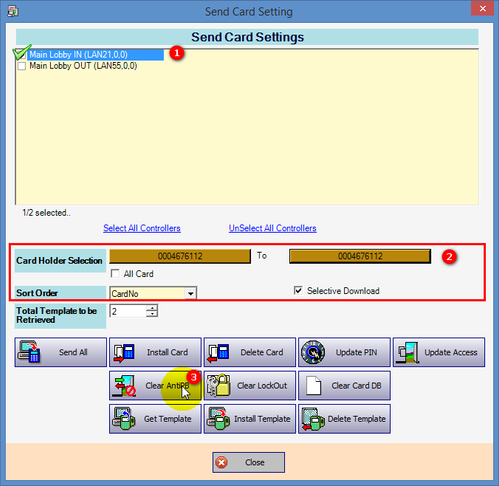
Figure 16: Send Card Setting Window
Step 3: The Delivery Report window will then be shown. Wait for the send clear antiPB process to complete before clicking Close to continue.
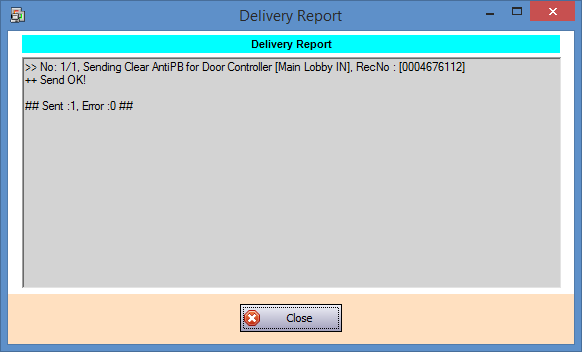
Figure 17: Delivery Report Window
Step 4: Flash the card on Entry Reader again and verify that the user should be able to access the door. The Latest Event List in xPortalNet software should record a Valid Entry Access or Valid Exit Access transactions.

Figure 18: Valid Entry Access and Valid Exit Access Transaction Logs Recorded


