How to Configure the Filtered Option in Event Filters
Problem (Issue) Statement: | How to Configure the Filtered Option in Event Filters |
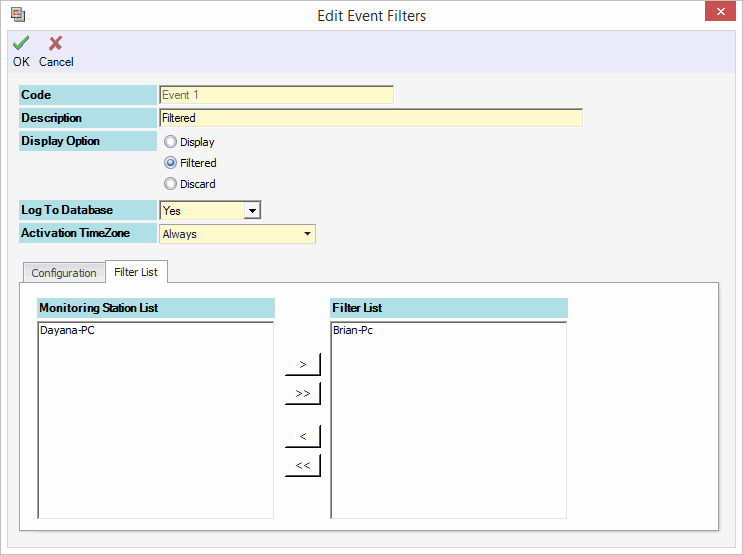
Description: | There are 3 options available in Event Filters Display Option which are to display / filter / discard event if the transaction match any condition that is defined in Event Filters. User will be guided to configure the Filtered Option in this article. When using this option, the event transaction will be filtered to be shown from the selected workstation. |
Related Software: | xPortalNet v1.5.0.147 or higher |
Related Hardware: | NIL |
System Application: | Door Access System |
Symptom and Finding: | NIL |
Cause: | For first time guide to configure the Display Option in Event Filters. |
Solution: | Warning!
. . Important User must configure the Event Filters prior to configuring the Display Option. See article How to Configure Event Filters in xPortalNet Software for the steps. . . Summary
Step-by-step Guide:
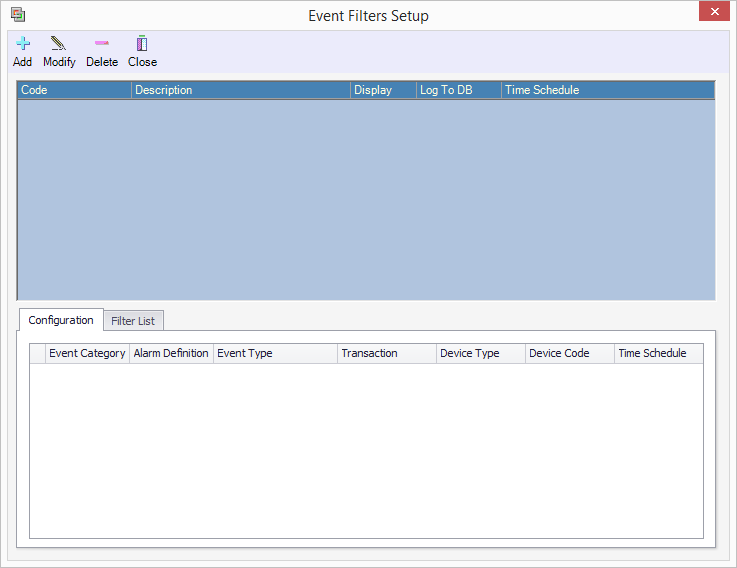
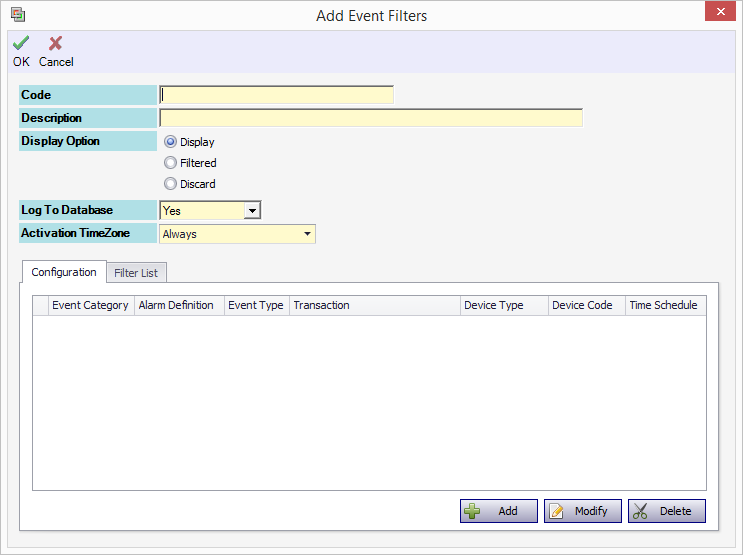
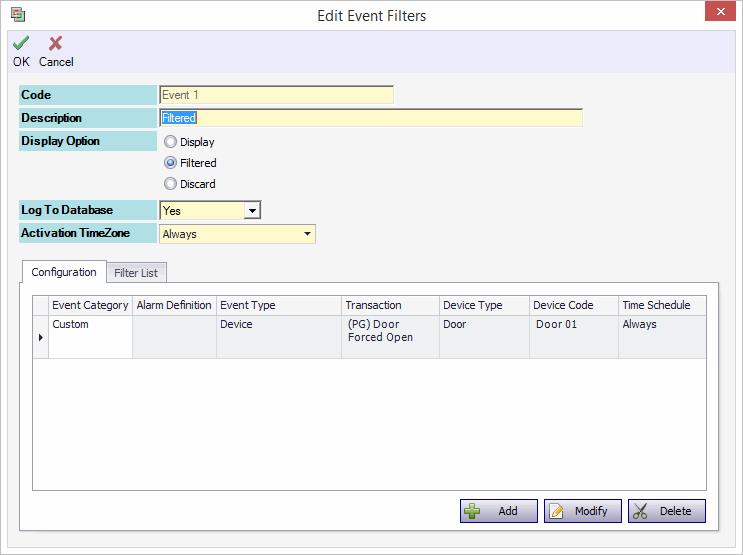
Step 1: Login to xPortalNet Server. Go to Server Admin > Event Filters. Step 2: The following window will be shown. Click Add to add new Event Filters. Step 3: The following window will be shown. Step 4: Setup the Event Filters accordingly. Filtered Option Scenario
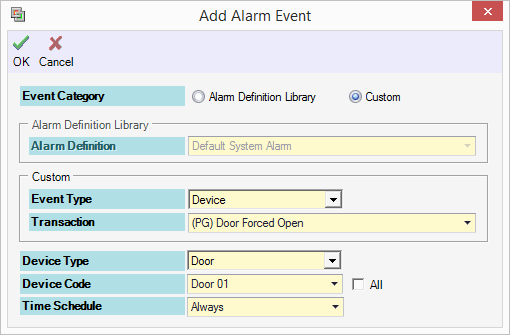
Step 2: Add the Event Filters Configuration. Click Add button.
Step 3: Filter the Monitoring Station. Click Filter List tab.
Step 4: Click OK to confirm and save the changes. Step 5: Observe the Latest Event List from the Server software when the configured event is triggered.
Step 6: Observe the Latest Event List from the Client software when the configured event is triggered.
Step 7: Check the transaction report. Login to xPortalNet Client. Go to Reports > Event Report > Transaction Reporting.
Step 8: Observe the Transaction List from the filtered Monitoring Station.
Step 9: You have successfully configured the Filtered Option configuration. Explanation: The configured event transaction " Related article: |
Document Date | 20/07/2018 (Rev 1.0) |
PROOF-READ
.
.
.
Related content
© MicroEngine Technology Sdn Bhd (535550-U). All rights reserved.
