.
.
Summary
Step-by-step Guide:
To install the xPortalNet Client software:
Step 1: Open the xPortalNet Installation CD. The contents of the CD will be shown in the following screenshot:
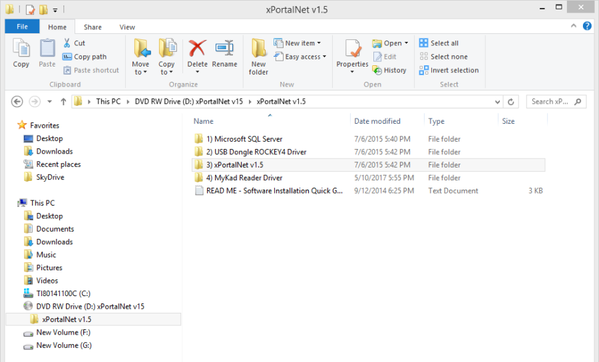
Figure 1: The Content Files within the xPortalNet Installation CD
.
Step 2: Open the '3) xPortalNet v1.5' folder. The contents of the folder will be shown in the following screenshot:
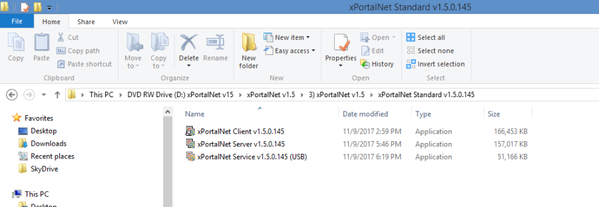
Figure 2: the Content Files within the 3) xPortalNet v1.5 Folder
.
Step 3: Right-click on the xPortalNet Client installation file > Run as administrator.
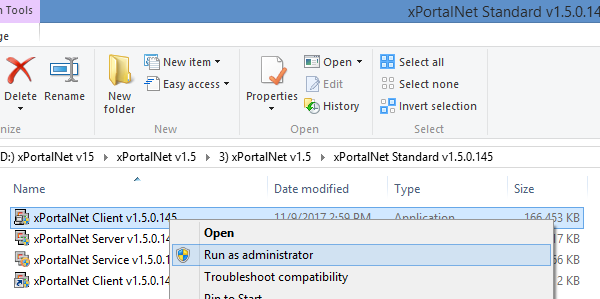
Figure 3: Selecting Run as Administrator from Right-clicking the xPortalNet Client Installation File
.
Step 4: The following screenshots will be shown. Click Next to continue.
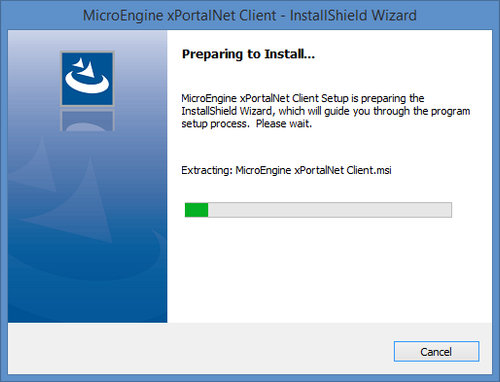
Figure 4: The Preparing to Install… Window
.
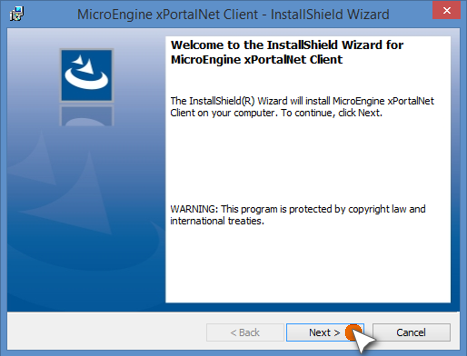
Figure 5: The InstallShield Wizard Window
.
Step 5: At the License Agreement window, please read the license agreement carefully. Check to accept the license agreement and click Next to continue.
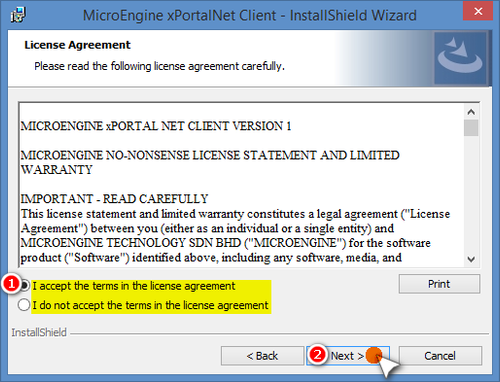
Figure 6: The License Agreement Window
.
Step 6: At the Customer Information window, please enter your information at User Name and Organization. Once completed, click Next to continue.
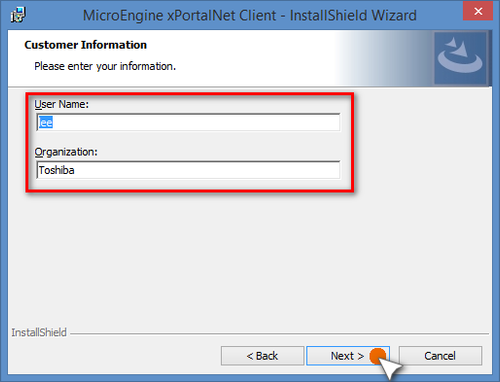
Figure 7: The Customer Information Window
.
Step 7: At the Destination Folder window, click Change… if users wished to change the installation destination folder. If not, click Next to continue.
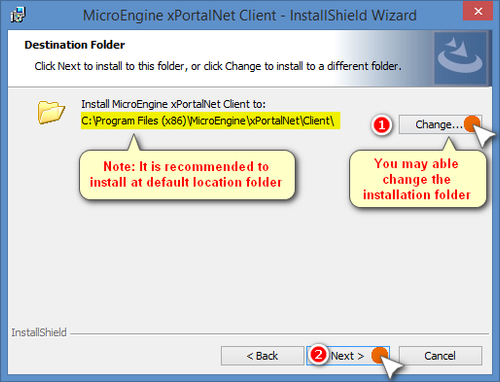
Figure 8: The Destination Folder Window
.
Step 8: The Ready to install the Program window will be shown. Please reconfirm all the installation settings and click Install to continue. To change any of the installation settings, click Back.
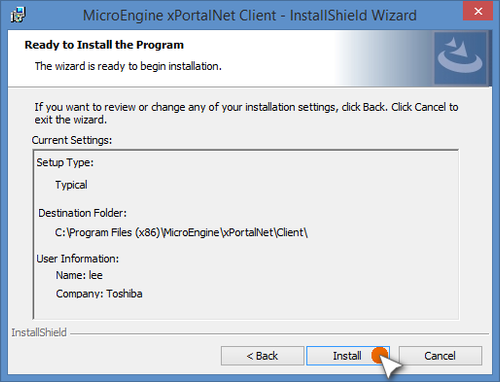
Figure 9: The Ready to Install the Program Window
.
Step 9: Once the installation is completed, the following window will be shown. Click Finish to complete the installation.
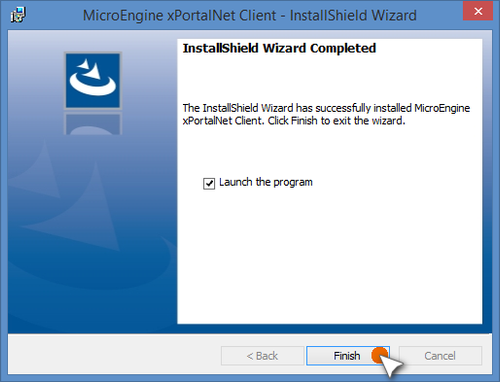
Figure 10: InstallShield Wizard Completed Window
.
.
To Install the xPortalNet Server Software:
Step 1: At the 3) xPortalNet v1.5 folder in the installation CD, right-click the xPortalNet Server installation files > Run as administrator.
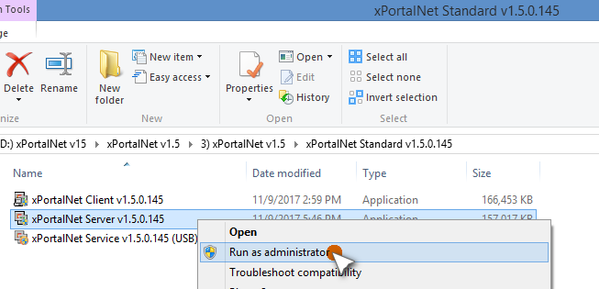
Figure 11: Selecting Run as Administrator from Right-clicking the xPortalNet Server Installation File
.
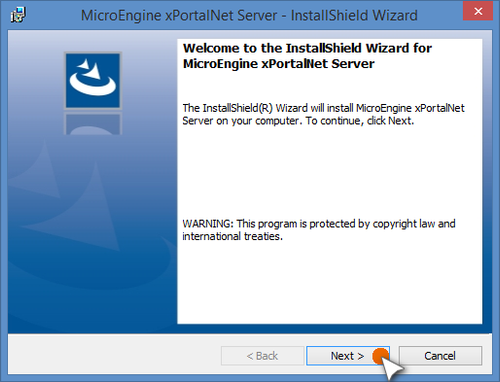
Step 2: The following screenshots will be shown. Click Next to continue.
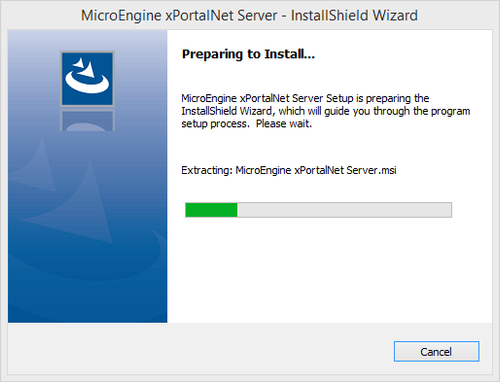
Figure 12: The Preparing to Install… Window
.
 .
.
Figure 13: The InstallShield Wizard Window
.
Step 3: At the License Agreement window, please read the license agreement carefully. Check to accept the license agreement and click Next to continue.
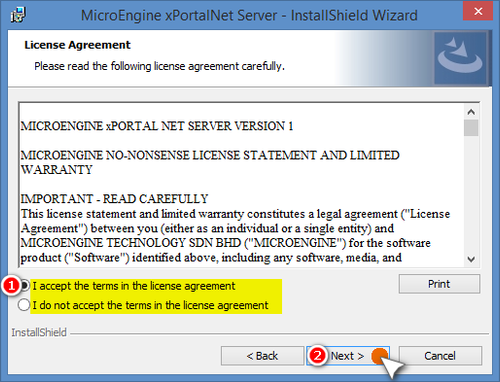
Figure 14: The License Agreement Window
.
Step 4: At the Customer Information window, please enter your information at User Name and Organization. Once completed, click Next to continue.
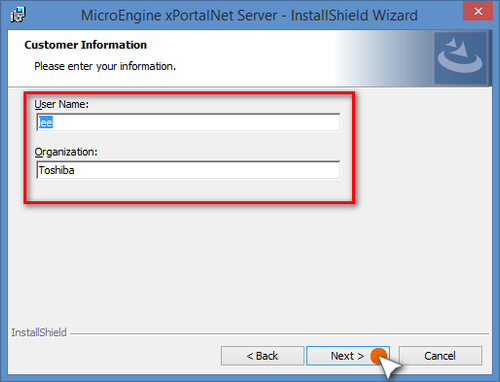
Figure 15: The Customer Information Window
.
Step 5: The Ready to Install the Program window will be shown. Please reconfirm all the installation settings and click Install to continue. To change any of the installation settings, click Back.
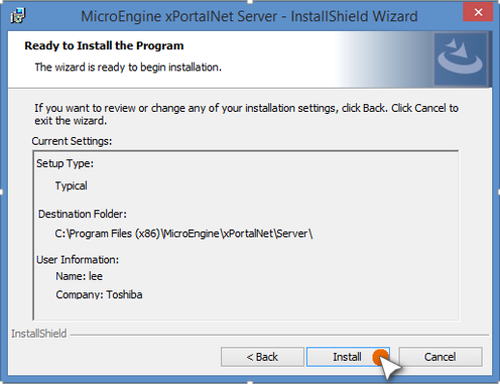
Figure 16: The Ready to Install the Program window
.
Step 6: Once the installation is completed, the following window will be shown. Click Finish to complete the installation.
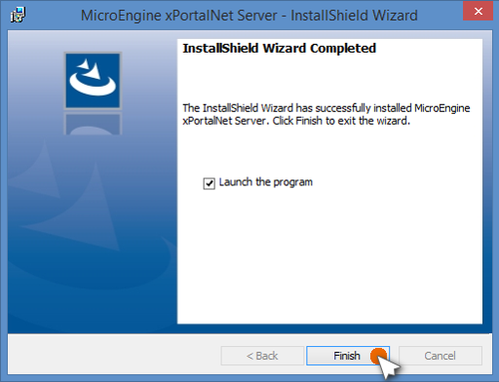
Figure 17: InstallShield Wizard Completed Window
.
.
To install the xPortalNet Service software:
Step 1: At the '3) xPortalNet v1.5' folder in the installation CD, right-click the xPortalNet Service installation files > Run as administrator.
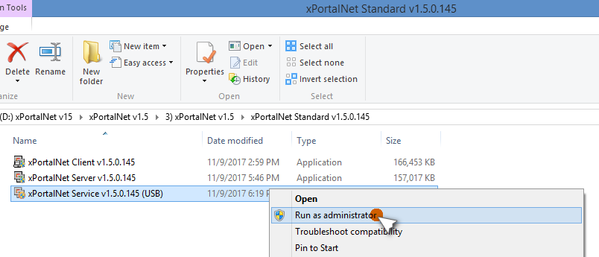
Figure 18: Selecting Run as Administrator from Right-clicking the xPortalNet Service Installation File
.
Step 2: The following screenshots will be shown. Click Next to continue.
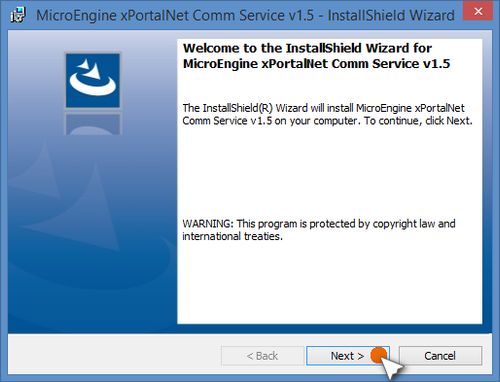
Figure 19: The InstallShield Wizard Window
.
Step 3: At the License Agreement window, please read the license agreement carefully. Check to accept the license agreement and click Next to continue.
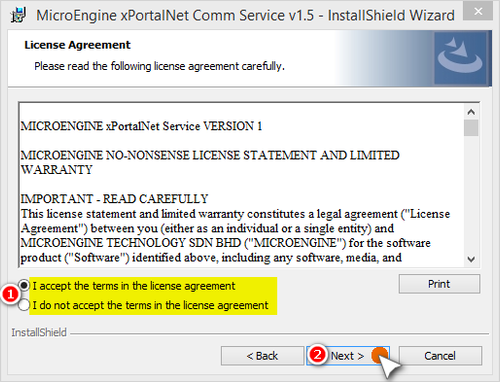
Figure 20: The License Agreement Window
.
Step 4: At the Customer Information window, please enter your information at User Name and Organization. Once completed, click Next to continue.
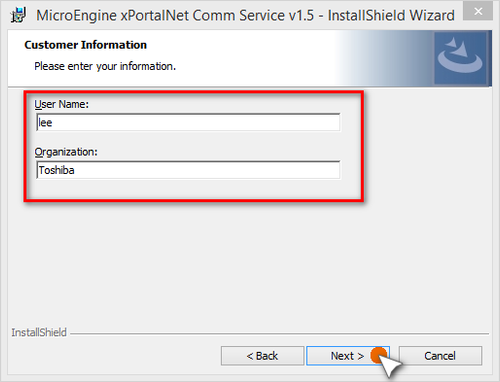
Figure 21: The Customer Information Window
.
Step 5: At the Destination Folder window, click Change… if users wished to change the installation destination folder. If not, click Next to continue.
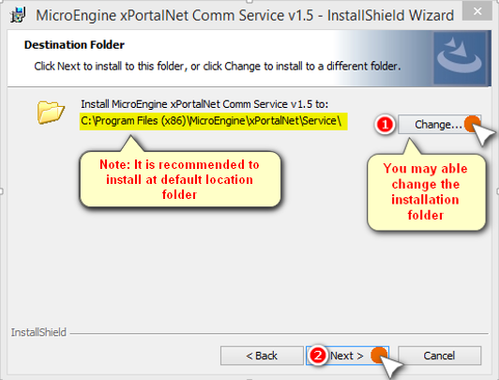
Figure 22: The Destination Folder Window
.
Step 6: The Ready to Install the Program window will be shown. Please reconfirm all the installation settings and click Install to continue. To change any of the installation settings, click Back.
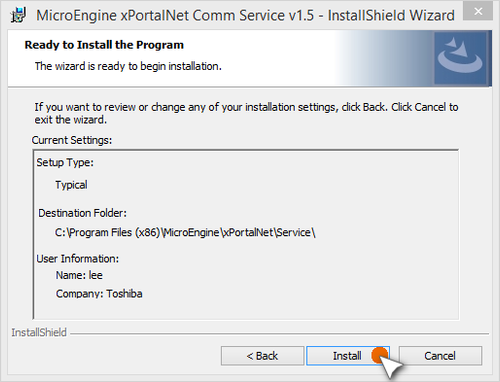
Figure 23: The Ready to Install the Program Window
.
Step 7: Wait until the installation to complete.
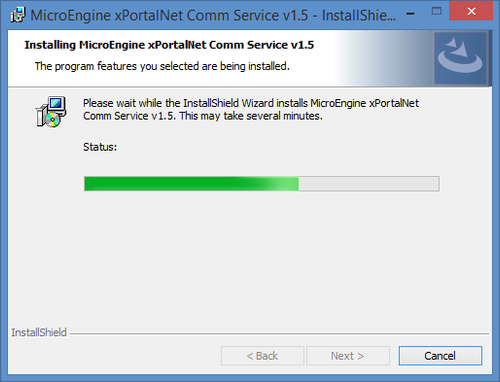
Figure 24: The Installation Status Window
.
Step 8: At the Select Database and Log Files Location window, leave the setting as default and click Save.
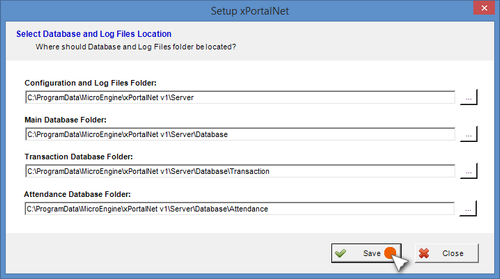
Figure 25: The Select Database and Log Files Location Window
.
Step 9: Once the installation is completed, the following window will be shown. Click Finish to complete the installation.
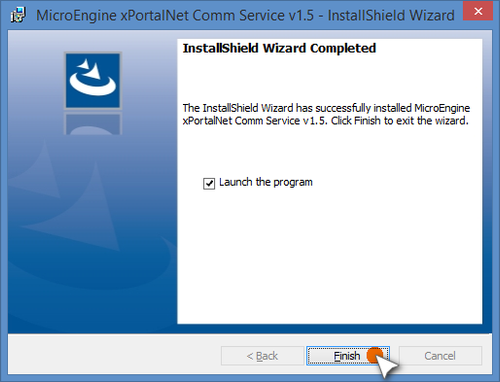
Figure 26: InstallShield Wizard Completed Window


