.
Summary
To download Microsoft SQL Server Express 2012 installation file.
To install Microsoft SQL Server Express 2012.
.
Step-by-step Guide:
To download Microsoft SQL Server Express 2012 Installation Files:
.
.
To install Microsoft SQL Server Express 2012:
Step 1: Locate the downloaded setup file for Microsoft SQL Server Express 2012:

Figure 1: The downloaded Setup File Location
.
Step 2: Run the SQLEXPRADV_x64_ENU.exe setup file, it will extract the required files for installation in the "SQLFULL_x86_ENU" folder as shown below:
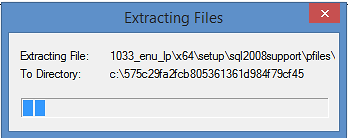
Figure 2: Extracting Files Window
.
Step 3: The SQL Server Installation Center window will be shown. Click Installation tab from the left panel and select New SQL Server stand-alone installation or add features to an existing installation.
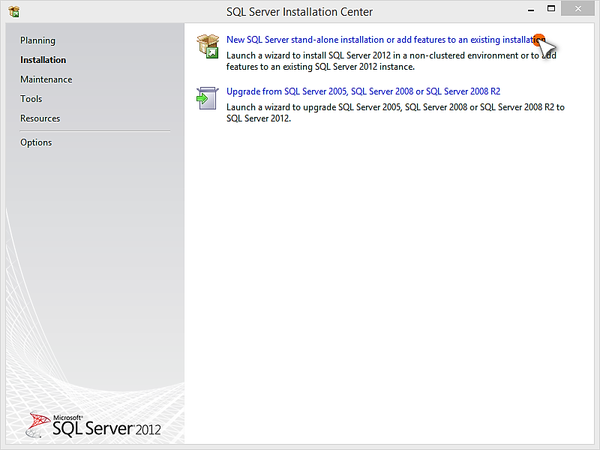
Figure 3: SQL Server Installation Center Window
.
Step 4: Wait for Microsoft SQL Server 2012 to process the installation.

Figure 4: Microsoft SQL Server 2012 Processing the Operation Window
.
Step 5: The Product Update window will then be shown. Click Next to continue.
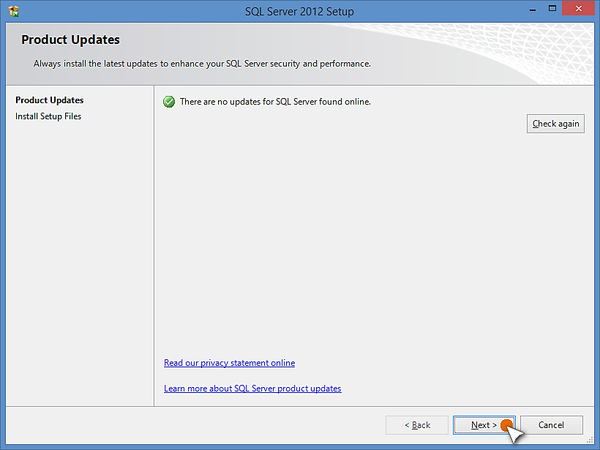
Figure 5: The Product Updates Window
.
Step 6: Next, the Install Setup Files window will be shown. Wait for the process to finish.
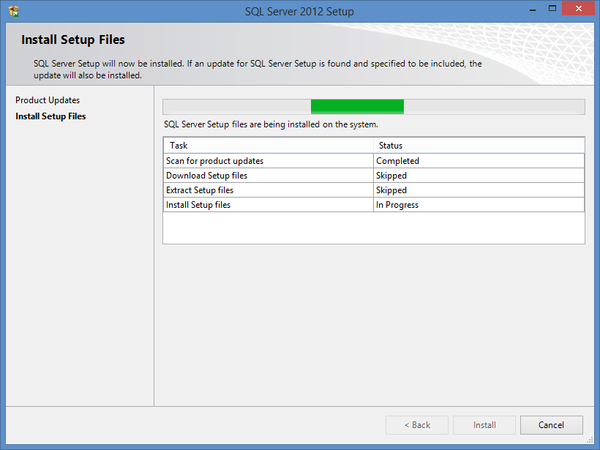
Figure 6: The Install Setup Files Window
.
Step 7: At the Installation Type window, click Next to continue.
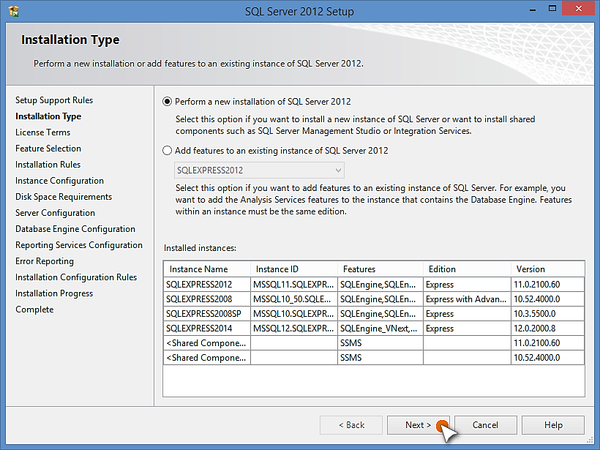
Figure 7: The Installation Type Window
.
Step 8: When the License Terms window is shown, please read the software license terms carefully. Check the I accept the license terms checkbox and click Next to continue.
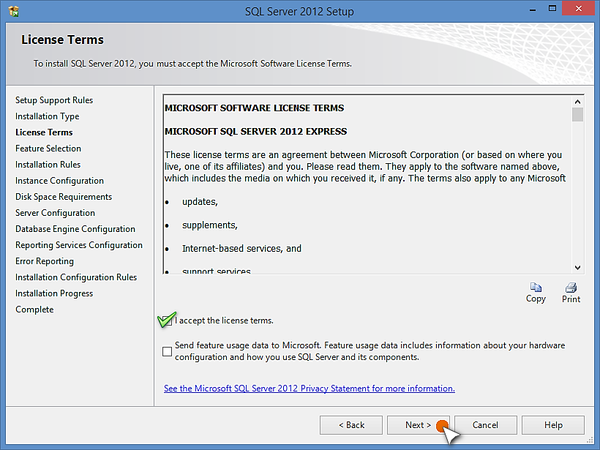
Figure 8: The License Terms Window
.
Step 9: At the Feature Selection window, click Next to continue.
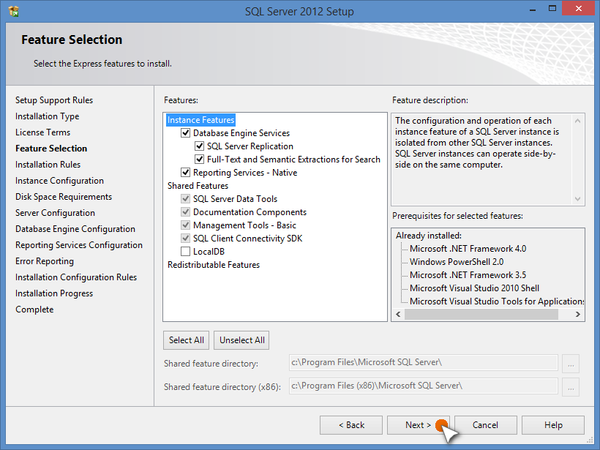
Figure 9: The Feature Selection Window
.
Step 10: The Instance Configuration window will be shown. If this is a fresh new instance of SQL Server on the Server PC, check the Default instance checkbox. If the Server PC already has an instance of SQL Server, check the Named instance checkbox and update the instance name. Click Next to continue.
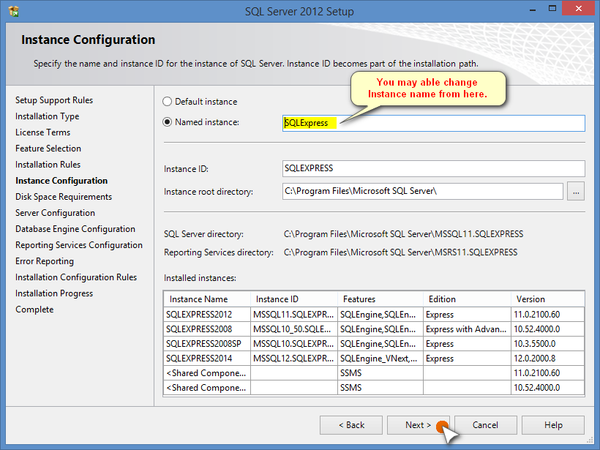
Figure 10: The Instance Configuration Window
.
Step 11: At the Disk Space Requirements window, ensure that the Server PC has sufficient space (indicated by green tick) for the installation and click Next to continue.
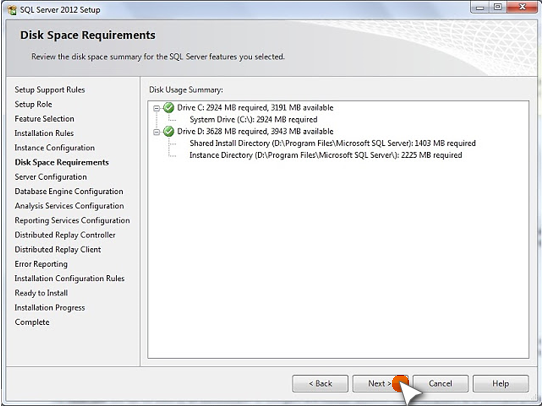
Figure 11: Ensure that Server PC has Sufficient Space in Disk Space Requirements Window
.
Step 12: The Server Configuration window will be shown. Keep the settings as default and click Next to continue.
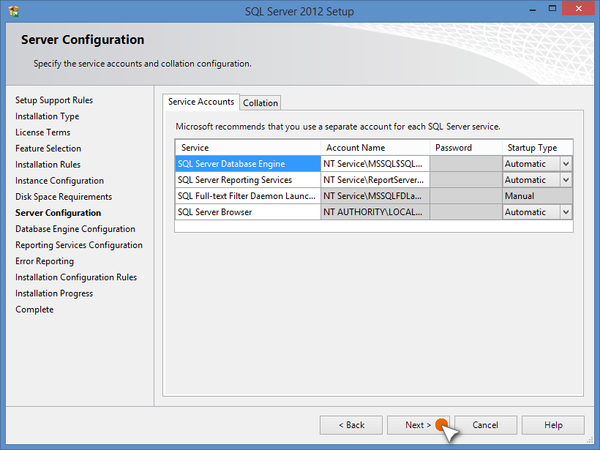
Figure 12: Do Not Modify the Settings at Server Configuration Window
.
Step 13: At the Database Engine Configuration window, click Server Configuration tab. Check the Mixed Mode (SQL Server authentication and Windows authentication) checkbox, enter the password for the authentication and add the current PC user as the SQL Server Administrator. Click Next to continue.
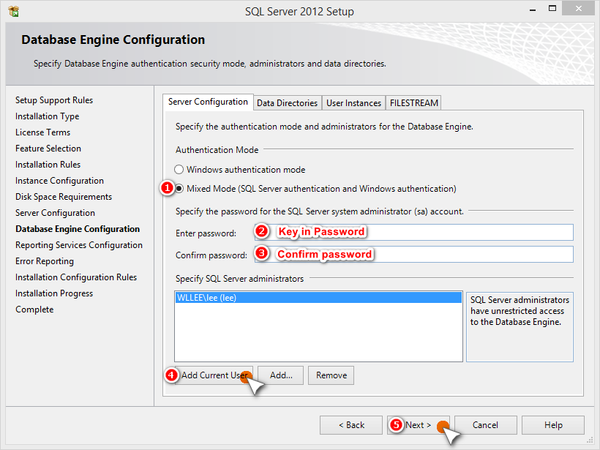
Figure 13: The Database Engine Configuration
.
.
.
Step 14: The Reporting Services Configuration window will be shown. Click Next to continue.
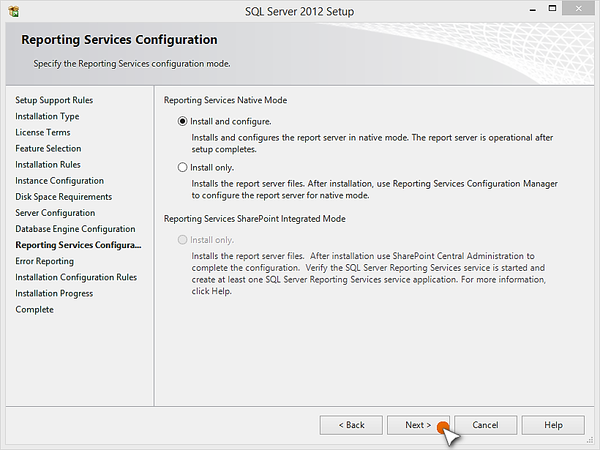
Figure 14: The Reporting Services Configuration Window
.
Step 15: The Error Reporting window will then be shown. Click Next to continue.
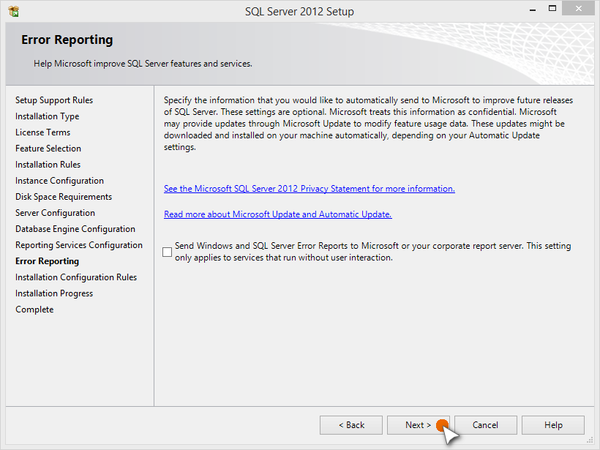
Figure 15: The Error Reporting Window
.
Step 16: After the Installation Configuration Rules window, the installation progress bar will be shown to indicate the progress of the SQL installation. Wait for the installation to finish.
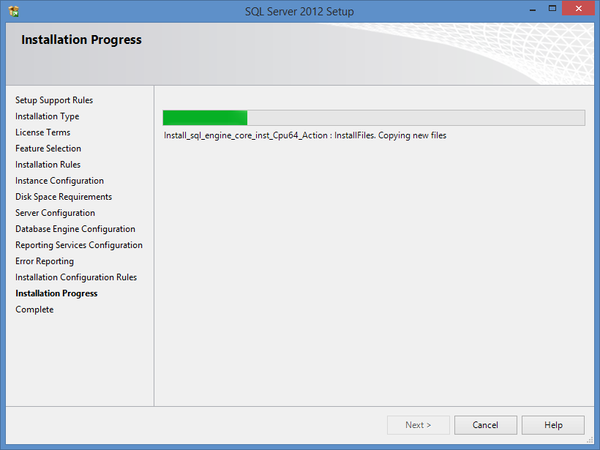
Figure 16: The Installation Progress Window
.
Step 17: Once the installation process completes, the Complete window will be shown. Click Close to exit the installation window.
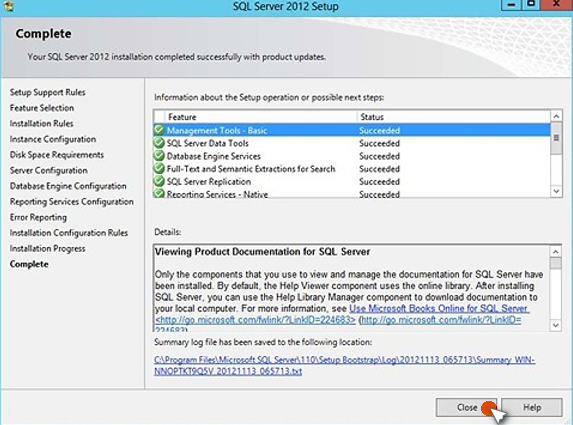
Figure 17: The Complete Window
.


