Error Message of "SQL Server Does Not Exist or Access Denied" is Shown When Users Attempt to Launch xPortalNet Server (Solution 1)
Problem (Issue) Statement: | Why use is unable to login to xPortalNet Server and SQL Server Does Not Exist Or Access Denied Error Message is Shown |
Description: | User is unable to login to xPortalNet Server application software due to “[DBNETLIB] [Connection Open(Connect0).] SQL Server does not exist or access denied.” error message. |
Related Software: |
|
Related Hardware: | NIL |
System Application: | NIL |
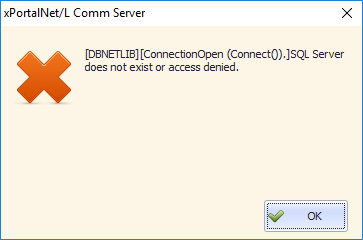
Symptom and Finding: | When user try to launch and login to xPortalNet Server application, the error message as shown below will pop out.
Figure 1: SQL Server Does Not Exist or Access Denied Error Message |
Cause: | This is caused by the MSSQL Server service not running. |
Solution: | Warning!
. . Summary:
Step-by-step Guide:
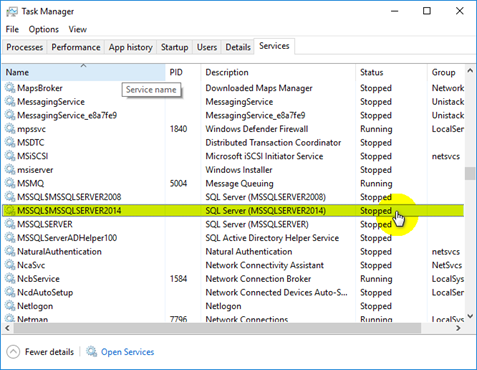
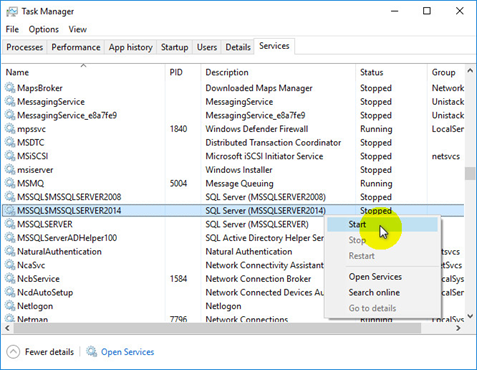
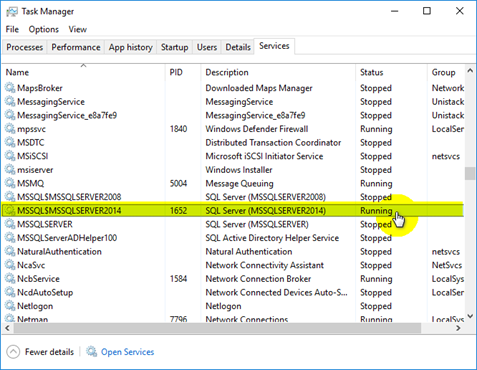
Step 1: Open Task Manager. . Step 2: Go to Services tab and look for MSSQL$MSSQLSERVER2014. . Step 3: Check on the Status column. . Step 4: If the Status is Stopped, right click and start the service. . Step 5: Make sure the SQL Server Status is Running. . Step 6: Launch xPortalNet Comm Service Controller and start the service. . Step 7: Right click on the xPortalNet Service icon at the system tray and click on Check Service Info. . Step 8: Check and ensure that the DB Connection is shown as Up. . Step 9: Launch and login to xPortalNet Server. . Step 10: Launch and login to xPortalNet Client. . Knowledge Base Link Users can also refer to Error Message of "SQL Server Does Not Exist or Access Denied" is Shown When Users Attempt to Launch xPortalNet Server (Solution 2)if the problem still persists. |
Date Documentation: | 12/7/2018 (Rev 1.0) |


PROOF-READ
.
.
.
© MicroEngine Technology Sdn Bhd (535550-U). All rights reserved.