Summary:
Step-by-Step Guide:
Ensure that xPortalNet HS Services is Running:
Step 1: Open xPortalNet HS Comm Service.
Step 2: Ensure that the xPortalNet HS Comm Service Status is Running.

Figure 1: xPortalNet Comm Service Running Pop-up Message
Step 1: Login to xPortalNet HS Server.
Step 2: Go to Server Admin > Connection Setup. The Connection Setup window will be shown as below.

Figure 2: Connection Setup window
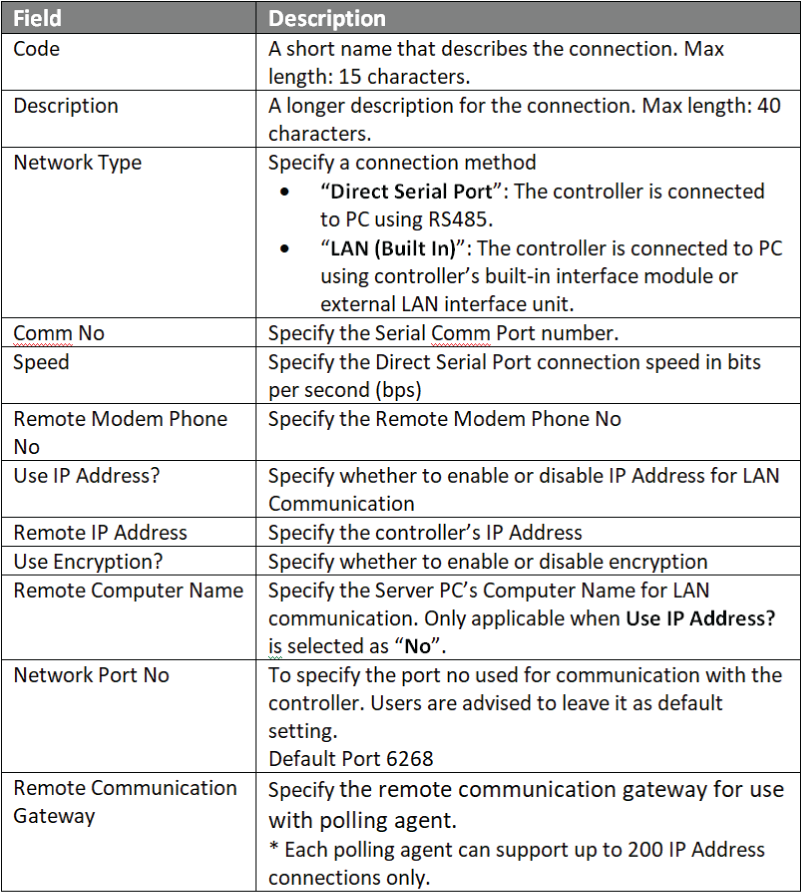
Step 3: Click Add to add a new connection. The Add Connection window will be shown as below. Fill in the respective fields and click OK to save changes

Figure 3: Add Connection window
.
.
Step 1: Go to xPortalNet HS Server > Server Admin > System Device Setup > Controller. The Connection Setup window will be shown as below:

Figure 4: Controller Setup window
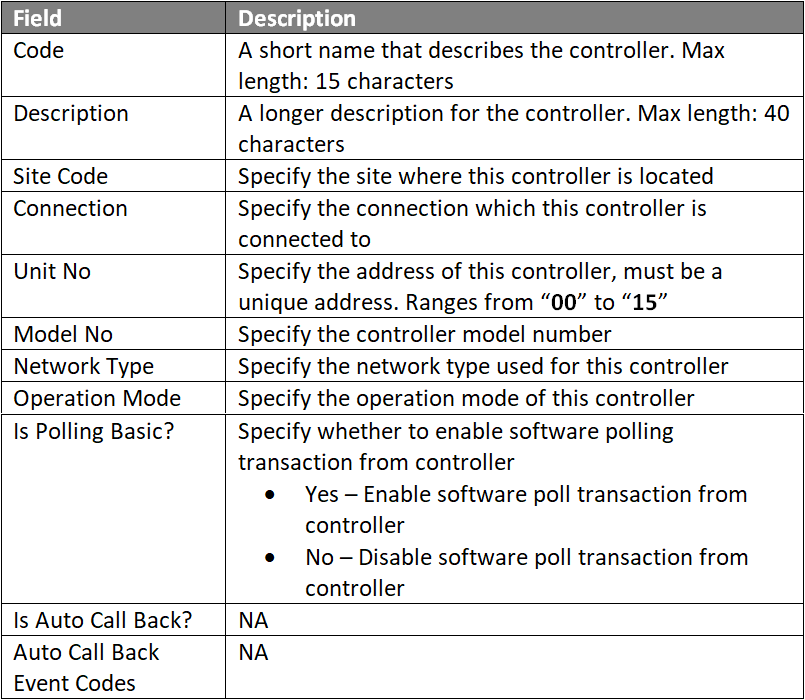
Step 2: Click Add to add a new controller device. The Add Connection Window will be shown as below. Fill up the respective field and click OK to save changes.

Figure 5: Add Controller window
Step 3: The following message window will be shown Record Added and click OKbutton.

Figure 6: Record Added window
.
.
Step 1: Go to xPortalNet HS Server > Server Admin > System Device Setup > Alarm Controller. The Alarm Controller Setup window will be shown as below:

Figure 7: Alarm Controller Setup Window
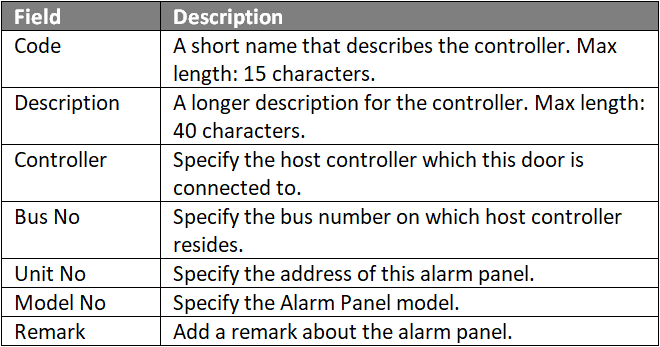
Step 2: Click Add to add a new alarm controller device. The Add Alarm Controller window will be shown as below. Fill in the respective fields and click OK to save changes. 
Figure 8: Add Alarm Controller Window
.
.
Step 3: The following message window will be shown Record Added and click OKbutton.
Figure 9: Record Added window
.
.
Step 1: Go to xPortalNet HS Server > Server Admin > System Device Setup > Output Point. The Output Setup window will be shown as below:

Figure 10: Output Setup Window
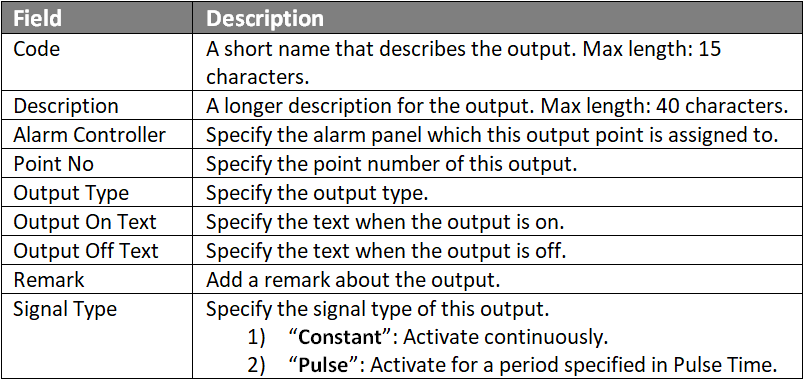
Step 2: Click Add to add a new output device. The Add Output Window will be shown as below. Fill up the respective field and click OK to save changes.

Figure 11: Add Output Window
.
.
Step 3: The following message window will be prompted to show that Record is Added. Click OK to continue.

.
.
Step 1:Go to xPortalNet HS Server > Server Admin > System Device Setup > Input Point. The Input Setup window will be shown as below:

Figure 13: Input Setup Window
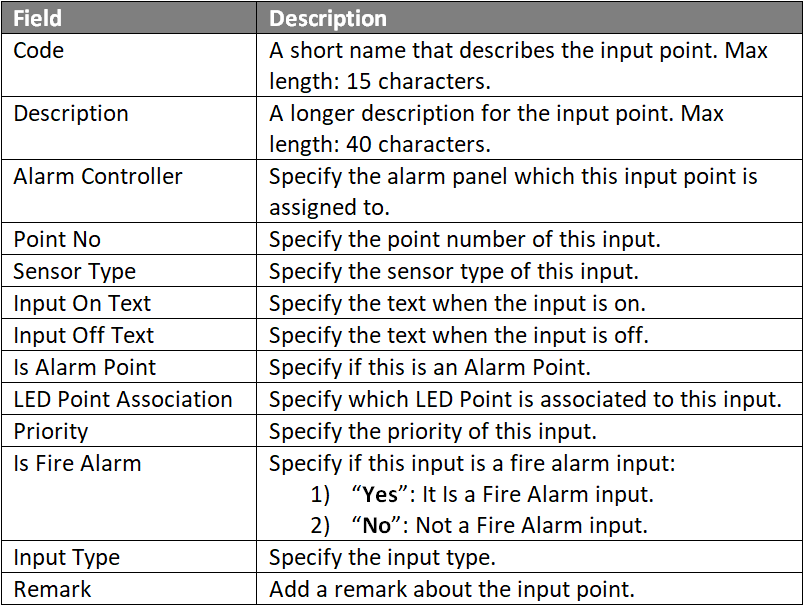
Step 2: Click Add to add a new input device. The Add Input window will be shown as below. Fill up the respective field and click OK to save changes.

Figure 14: Add Input Window
.
.
Step 3: The following message window will be shown Record Added. Click OKto continue.
Figure 15: Record Added Window
Step 4: Users can then proceed to create an Instruction Control to configure the relationship between the Inputs and Outputs.