Skip to end of metadata
Go to start of metadata

You are viewing an old version of this page. View the current version.

Compare with Current View Page History

« Previous Version 4 Next »

Problem (Issue) Statement:

How to connect fire alarm signal to XP-GT3200 controllers

Description:

A guide to connect fire alarm signal for XP-GT3200 controllers.

Related Software:

NA

Related Hardware:

  • XP-GT3200LE v3.21.0
  • XP-GT3200L v3.00.
  • XP-GT3200LABX v3.00.
  • MAS- RBT v2.10 above.

System Application:

Door Access System

Symptom and Finding:

NA

Cause:

For first time hardware wiring connection for fire alarm signal for XP-GT3200 controllers.

Solution:

Summary:

Step-by-step Guide:

  • To follow wiring diagram as below:

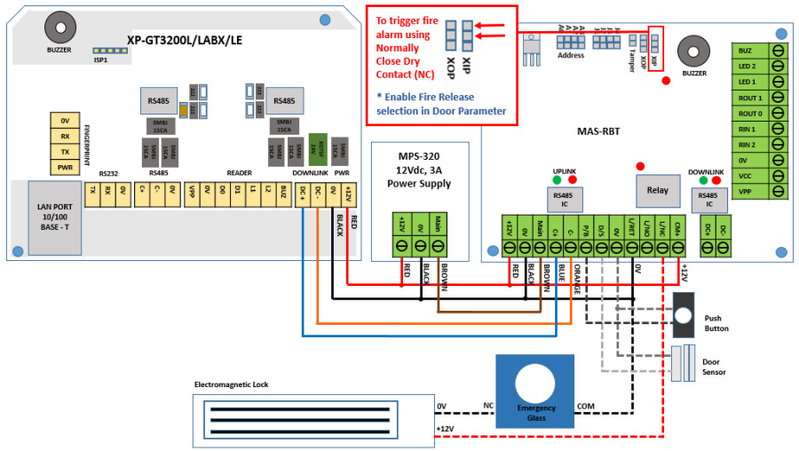
Step 1: Wiring diagram XP-GT3200 controller – Fire Alarm signal connection.
Wiring Diagram for Fire Alarm Signal Connection to XP-GT3200 Controller
Figure 1: Wiring Diagram for Fire Alarm Signal Connection to XP-GT3200 Controller


  • To enable fire alarm release:

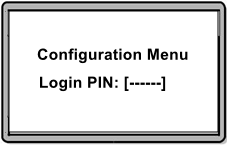
Step 1: After completing the fire alarm wiring termination, enter Configuration Menu to enable fire release setting at XP-GT3200 controller. Press *** and key in 6-digits MasterPIN.
Entering 6-digits MasterPIN
Figure 2: Entering 6-digits MasterPIN


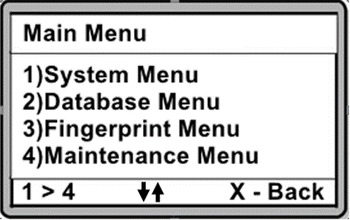
Step 2: Upon entering Configuration Menu, the Main Menu layout will be shown as below.
Main Menu Layout
Figure 3: Main Menu Layout


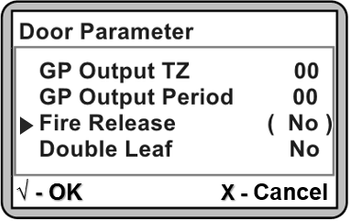
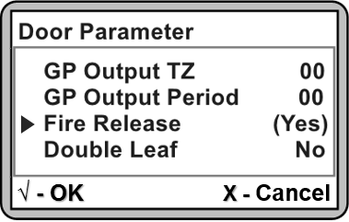
Step 3: Press 1 for System Menu > 2 for Door Parameter > Press DOWN arrow key until the parameter of Fire Release is shown. Press to change the setting as shown below.
Fire Release Parameter
Figure 4: Fire Release Parameter


Step 4: To enable the Fire Release feature, press UP or DOWN arrow key to change the parameter setting to "Yes" and press again.
Changing the Setting for Fire Release Parameter
Figure 5: Changing the Setting for Fire Release Parameter


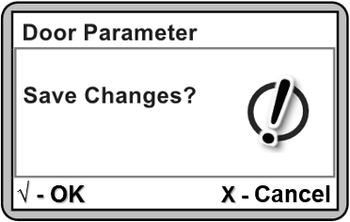
Step 5: Press X to exit from the Door Parameter menu. The following window will then be shown to confirm saving the changes. Press to confirm saving the changes.
Save Changes Window
Figure 6: Save Changes Window


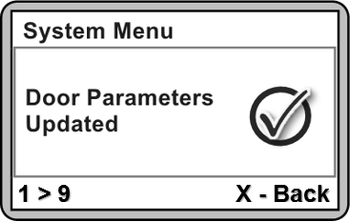
Step 6: The following window will be shown to confirm that the Door Parameters are Updated. Please wait for the controller to revert back to home window (Idle Mode).
Door Parameters Updated Window
Figure 7: Door Parameters Updated Window


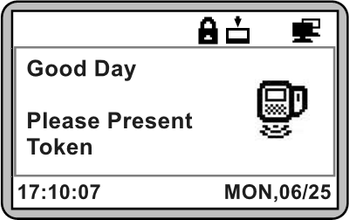
Step 7: The controller will automatically revert back to the home window (Idle Mode).
 Home Window (Idle Mode)
Figure 8: Home Window (Idle Mode)


  • To observe software response after triggering fire alarm signal:

Step 1: Users can test the programmed setup by triggering the fire alarm signal. The correct response observed from the hardware should be as follows:

  1. Electomagnetic lock will be released so that door can be accessed.
  2. Padlock icon on XP-GT controller's LCD screen will be shown as released to indicate that the Security status is OFF.
  3. MAS-RBT / MAS-RBU relay output LED will be turned ON to indicate that the electromagnetic lock is released.


Step 2: If the XP-GT controller is connected to the software, the Latest Event List tab will show Fire Alarm On and Door Security Off transactions.
Fire Alarm On and Door Security Off Transaction Logs
Figure 9: Fire Alarm On and Door Security Off Transaction Logs

Step 3: When the fire alarm signal is cut off / back to normal, the Latest Event List tab will show Fire Alarm OFF transaction.
Fire Alarm Off Transaction Log
Figure 10: Fire Alarm Off Transaction Log


Warning!

After fire alarm signal is cut off, XP-GT controller does not reset back to Security On condition. Users have to set / send Security On command to XP-GT controller. 


  • To configure Door status back to Normal Operation:

Step 1: To set Security On, enter Configuration Menu > System Menu > Door Parameter.


Step 2: Set Security OFF as "No" to enable the electromagnetic lock to secure the door.


Step 2: For software configuration to set Security On. Go to Device Comm > Send Door Command.
Download Security On Transaction Log

Figure 11: Downlaod Security On Transaction Log

Date Documentation:

25/6/2018 (Rev 1.0)

  • No labels