Skip to end of metadata
Go to start of metadata

You are viewing an old version of this page. View the current version.

Compare with Current View Page History

« Previous Version 4 Next »

Problem (Issue) Statement:

How to solve error message of "Email could not be sent" when sending test email for email notification in xPortalNet software?

Description:

When users wanted to send the test email after configuring the email notification setup, the software failed to send the test email. Users have to setup the Gmail settings to allow access for less secure apps in order to allow xPortalNet to send the email notifications.

Related Software:

  • Google Application

Related Hardware:

NA

System Application:

  • Email Notification

Symptom and Finding:

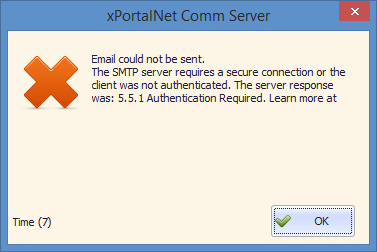
When the test email is sent during the configuration of Email Notification, the software prompts the error message of "Email could not be sent" as shown below due to access for less secure apps in Gmail not enabled.

Email Could Not be Sent Error Message
Figure 1: Email Could Not be Sent Error Message

Cause:

The Gmail account used is not configured to allow access for less secure apps. As such, xPortalNet is unable to send the email notification.

Solution:

Summary

  • To turn on access for less secure apps in Gmail.


Note

To perform steps below accordingly, please ensure that the network connection stable.


Step by step:

  • To turn on access for less secure apps in Gmail:

Step 1: Open your web browser, e.g. Internet Explorer, Google Chrome, Mozilla Firefox, etc.


Step 2: Go to www.gmail.com and log into your Gmail account.


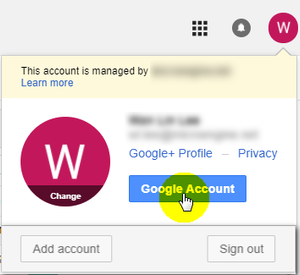
Step 3: At the top right corner of the browser, click on the account menu icon with a capital alphabet (Usually the alphabet is the first letter of your first name) as shown below.
Account Menu Icon
Figure 2: Account Menu Icon


Step 3: In the menu that appears, click Google Account.
Google Account Button 
Figure 3: Google Account Button


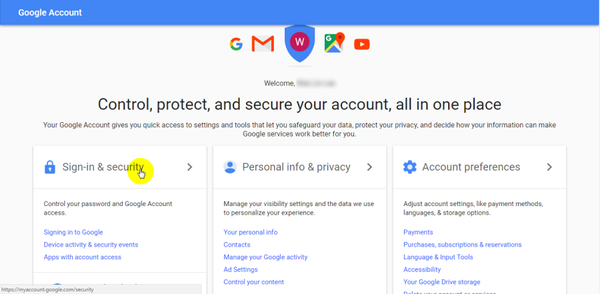
Step 4: A new browser tab or window will be opened as shown below. Click on Sign-In & Security to continue.

Figure 4: Sign-In & Security Icon


Step 5: Under Sign-In & Security page, go to the left panel and click Apps with account access.
Apps with Account Access Setting in Left Panel Menu
Figure 5: Apps with Account Access Setting in Left Panel Menu


Step 6: Scroll down and look for the setting of Allow less secure apps option on the right and turn it ON. This change will take effect immediately.

Figure 6: Allow Less Secure Apps Option in Sign-In & Security Window

Date Documentation:

28/6/2018 (Rev 1.0)

  • No labels