Skip to end of metadata
Go to start of metadata
You are viewing an old version of this page. View the current version.
Compare with Current
View Page History
Version 1
Next »
Problem (Issue) Statement: | How to connect XP-SNET controller to XP-SNET-E5D Extension Board |
Description: | A guide to connect XP-SNET controller to XP-SNET-E5D extension board. |
Related Software: | - xPortalNet v1.5 Standard
- xPortalNet v1.5 Lite
- xPortalNet v1.5 PS
|
Related Hardware: | - XP-SNET v3.45 and above
- XP-SNET-E5D
|
System Application: | |
Symptom and Finding: | NA |
Cause: | For first time guide to connect XP-SNET controller to XP-SNET-E5D extension board. |
Solution:
| Summary:To connect XP-SNET controller to XP-SNET-E5D extension board.To observe the XP-SNET-E5D after configuring the address of XP-SNET-E5D.
Step-by-step Guide:
To connect XP-SNET controller to XP-SNET-E5D extension board:
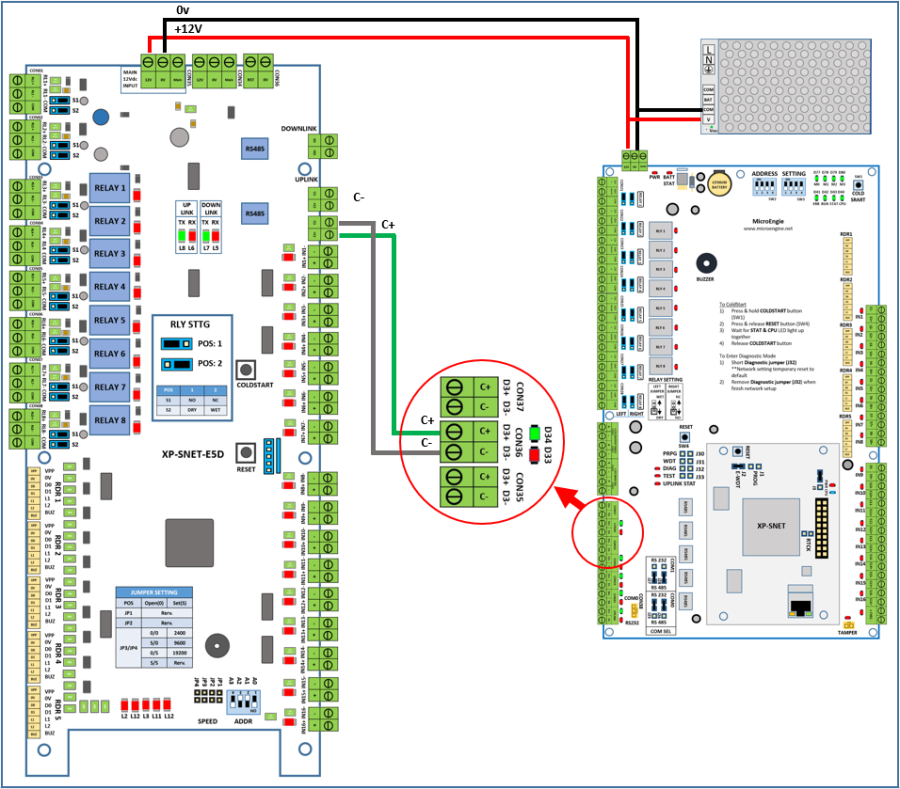
Step 1: Please follow the wiring diagram as shown below:

Figure 1: Wiring diagram Between XP-SNET Controller to XP-SNET-E5D Extension Board . . . To observe the XP-SNET-E5D after configuring the address of XP-SNET-E5D:
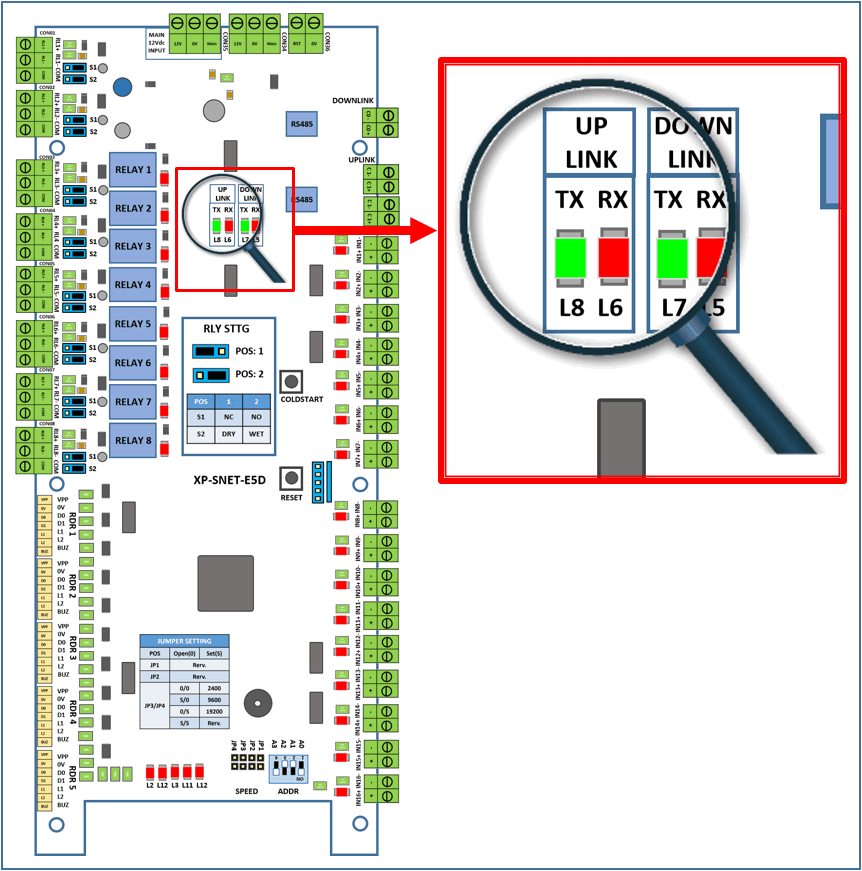
Step 1: Please ensure that all the relevant door settings are sent to XP-SNET controller. . Step 2: Next, on the XP-SNET-E5D controller, ensure that both L8 & L6 LEDs in the "Uplink" section is blinking to indicate that the XP-SNET-E5D extension has successfully established communication with the XP-SNET controller.

Figure 2: L8 and L6 LEDs on the XP-SNET-E5D Extension Board Must be Blinking |
Common Issue: | NA |
Date Documentation: | 16/1/2019 |
PROOF-READ
.
Related Articles.
Containing the label "snet"

